Cheddar and Thyme Flaky Biscuits

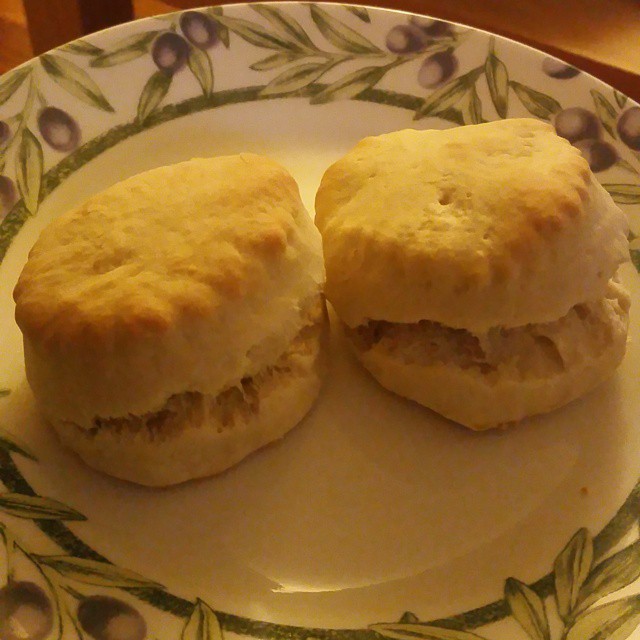
We really enjoyed these cheddar biscuits.  They were not too much work and you could even use the food processor to make it easier, like I did.  Definitely use butter instead of margarine.  Fresh thyme would be best but dried thyme works too.  Enjoy!

INGREDIENTS:

  • 2 cups flour
  • 4 teaspoons baking powder
  • 3 tablespoons white sugar
  • 1/2 teaspoon salt
  • 1/2 teaspoon cream of tartar
  • 1/2 cup butter, softened (not melted!)
  • 3/4 cup milk
  • 1/2 cup shredded cheddar cheese
  • 1 tablespoon fresh thyme, or 1 teaspoon dried thyme


DIRECTIONS:

  1. Preheat oven to 425* F.
  2. In a medium bowl, stir together the flour, baking powder, sugar, salt, and cream of tartar.
  3. Cut in butter using a pastry cutter or a fork until dough it is the size of peas.
  4. Make a well in the center of the mixture and measure the milk, shredded cheese, and thyme into the bowl. Gently mix until a soft dough forms.
  5. Roll or pat out on a floured surface to 3/4″ thick.  (Gradually add more flour if dough is too sticky to work with).
  6. Cut into circles with biscuit cutter and place on baking sheet.  (Use parchment paper if you want to go the extra mile).
  7. Bake for 10 minutes in the preheated oven, or until the bottoms of the biscuits are golden brown.


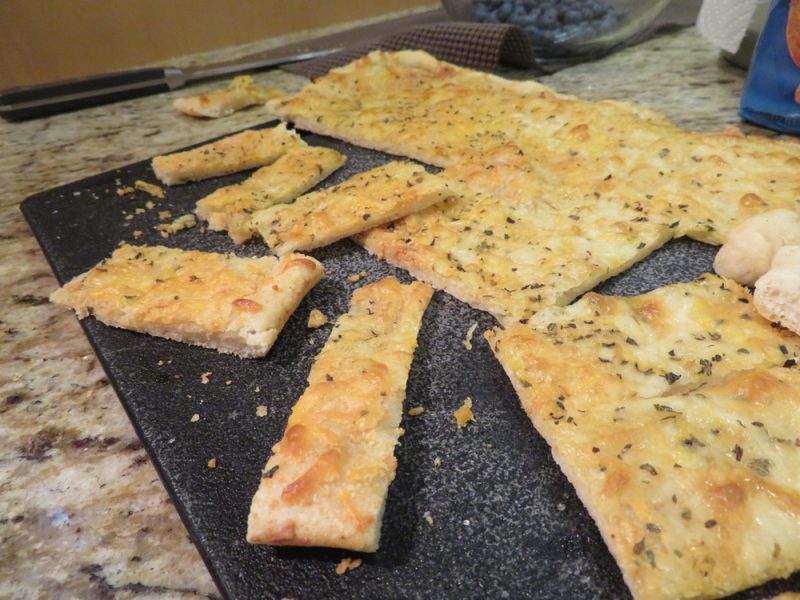
Easier Garlic Cheesy Flatbread

I have posted another garlic cheese flatbread before, which involved making your own dough.  While it’s tasty, that recipe does have a bit of waiting and work involved.  Tonight I tried the same theory but with refrigerated pizza crust.  It tasted just as good, if not better!  Hooray.  So here is the recipe that saves a lot of time!

OLD RECIPE:  If you want to see my previous recipe, with the homemade dough, click here.  It takes longer, but if you don’t have refrigerated pizza dough on hand, it’s a great recipe!

You will find the refrigerated pizza crust near where your grocer keeps refrigerated biscuits and crescent rolls.


INGREDIENTS:

  • 13.8 oz. refrigerated pizza crust
  • 2 tablespoons unsalted butter, melted/softened
  • 1 tablespoon garlic powder
  • 1/4 cup grated Parmesan cheese
  • 1 cup+ shredded mozzarella or Italian blend cheese (add as much as you want!)
  • OPTIONAL but great:  Any Italian spices you prefer: basil, oregano, Italian seasoning, etc.

DIRECTIONS:

  1. Preheat oven to 350* F.
  2. Prepare your 17″ x 11″ baking sheet pan by putting aluminum foil on the bottom of it.  Lightly spray with any cooking spray like PAM so your dough doesn’t stick.
  3. Remove refrigerated pizza dough from packaging.  Use a rolling pin to roll to a suitable size to fit into the  17″ x 11″ baking sheet pan, previously mentioned.
  4. Spread melted or softened butter on the top of the raw dough.
  5. Sprinkle with garlic powder, Parmesan cheese, and mozzarella/Italian blend cheese.  Add spices if desired.
  6. Bake for approximately 20 minutes, or until golden brown and cheesy looks bubbly (and happy).
  7. Cut into slices and serve! 🙂


Easy Bread Machine Rolls – Perfect for Thanksgiving! (And Eggless!)

img_1712

img_1713

img_1714

img_1706 img_1708 img_1710 img_1711


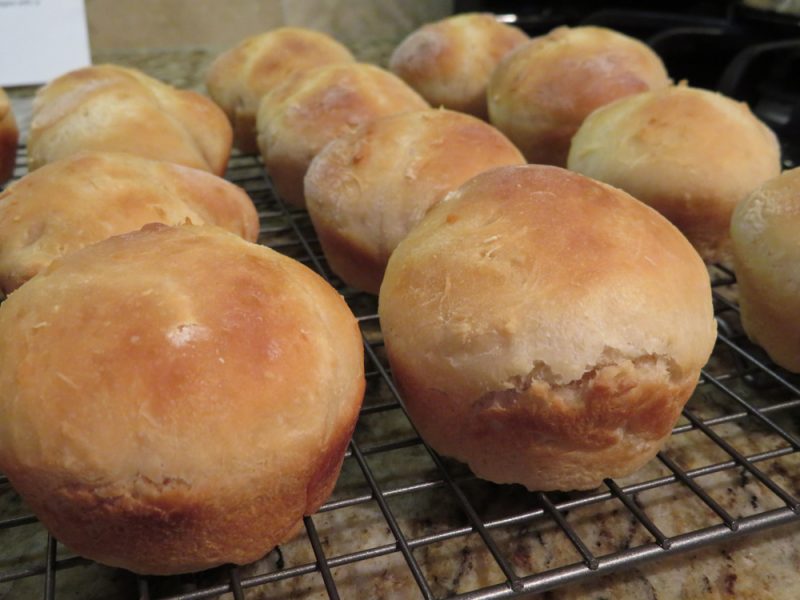
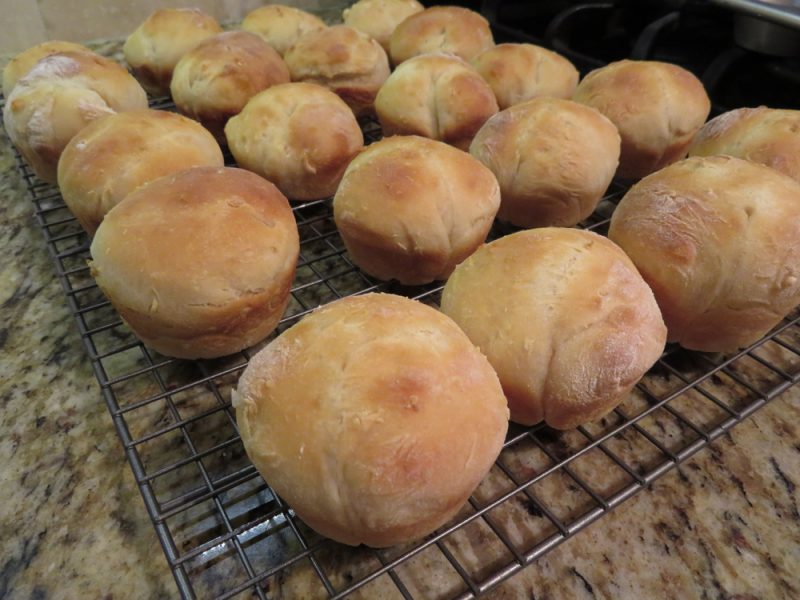
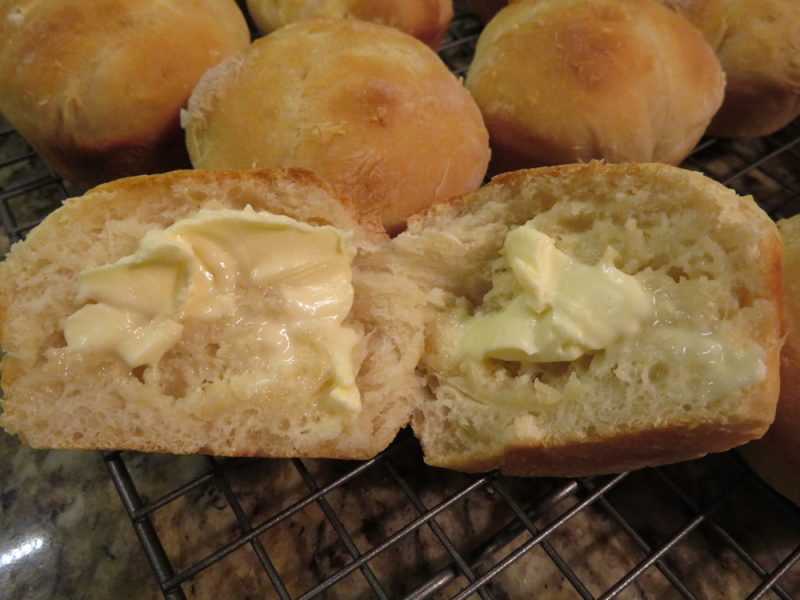
I finally found a bread machine recipe for fresh rolls that is eggless and easy!  Many bread roll recipes for the bread machine and regular baking involve eggs.  Thankfully, this one was very tasty and did not.  This is simple and uses inexpensive, common ingredients.  This makes about 20-24 rolls depending on size.


INGREDIENTS:

  • 1/4 cup canola oil
  • 1/3 cup sugar
  • 1 3/4 tsp. salt
  • 1 tablespoon active dry yeast
  • 3/4 cup warm water
  • 3/4 cup milk (I used 2%)
  • 4 cups flour (I weighed it – this equals about 500 g.)


Also needed:

  • Bread machine
  • Muffin pan (regular size) x 2 pans
  • Spatula
  • Pastry brush, etc
  • PAM spray


DIRECTIONS:

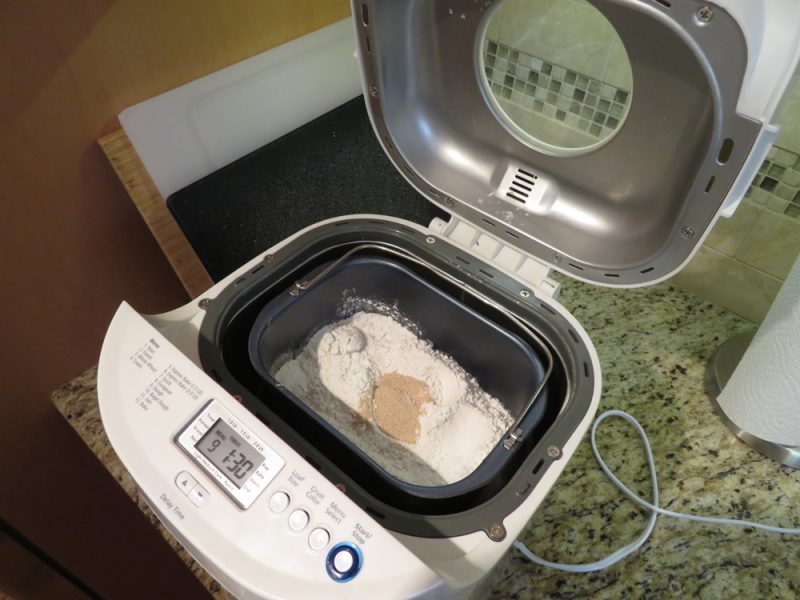
  1. Place liquid ingredients in bottom of loaf pan – including canola oil, warm water, and milk.
  2. Add other ingredients: sugar, salt, and flour on top of the liquid ingredients.
  3. Add yeast at the very top – not touching the liquid ingredients on bottom.
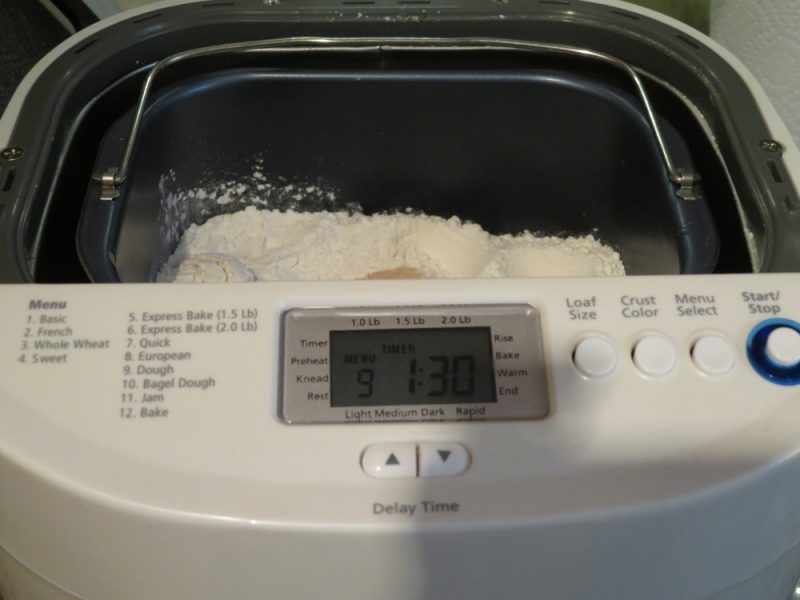
  4. Select the dough cycle.  (My dough cycle lasted 1.5 hours).
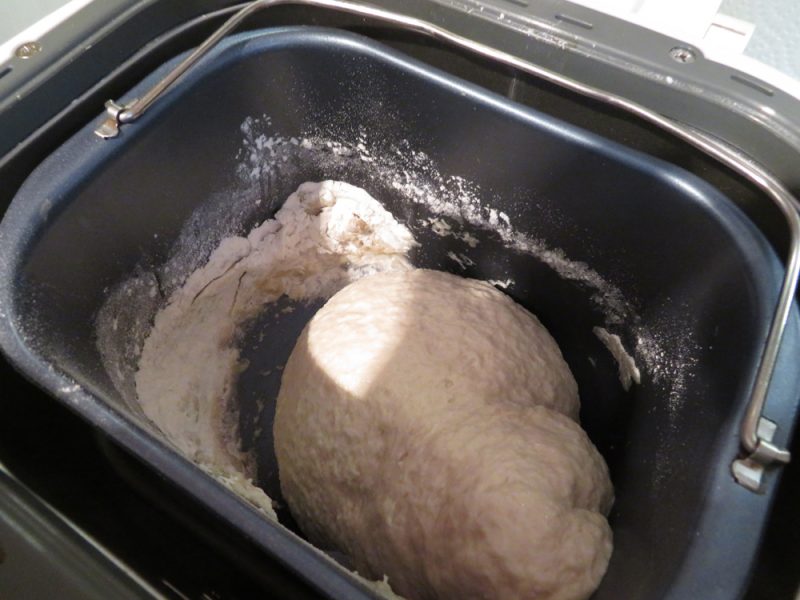
  5. Monitor dough cycle in about 5-10 minutes.  Scrape the sides of the pan with a soft spatula, if necessary, to scrape the flour back into the dough. (See photo #6 to see how dry flour sticks to the side of the pan).  Add a tiny bit of warm water, if needed, to get that flour incorporated into the dough.
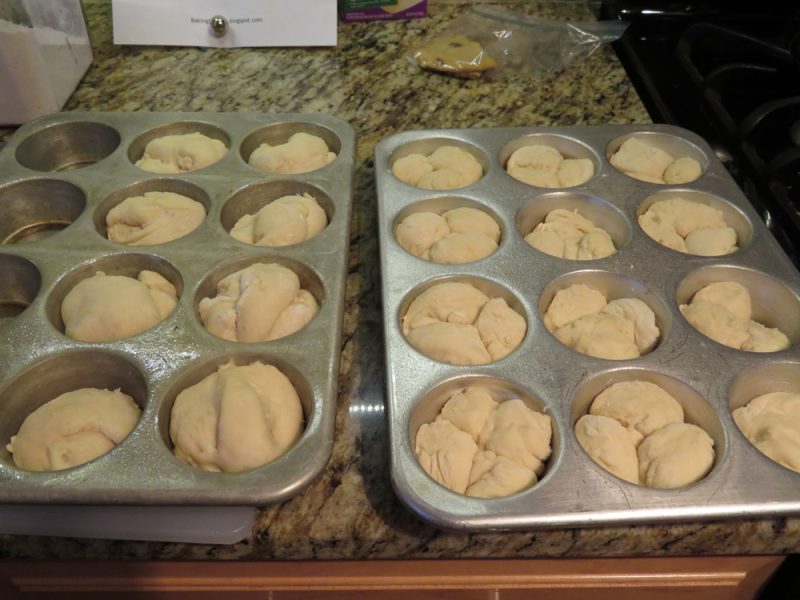
  6. Once the dough cycle has ended, take out and shape into rolls or balls.  Place balls into muffin cups sprayed with PAM first.
  7. Leave rolls in muffin pans on counter to relax the gluten – about 20 minutes.
  8. Bake rolls at 400 degrees for 12 minutes, or until golden.  (Mine took about 15ish minutes).
  9. Using a pasty brush, brush butter on top of finished rolls.


From Bakingforboys.blogspot.com

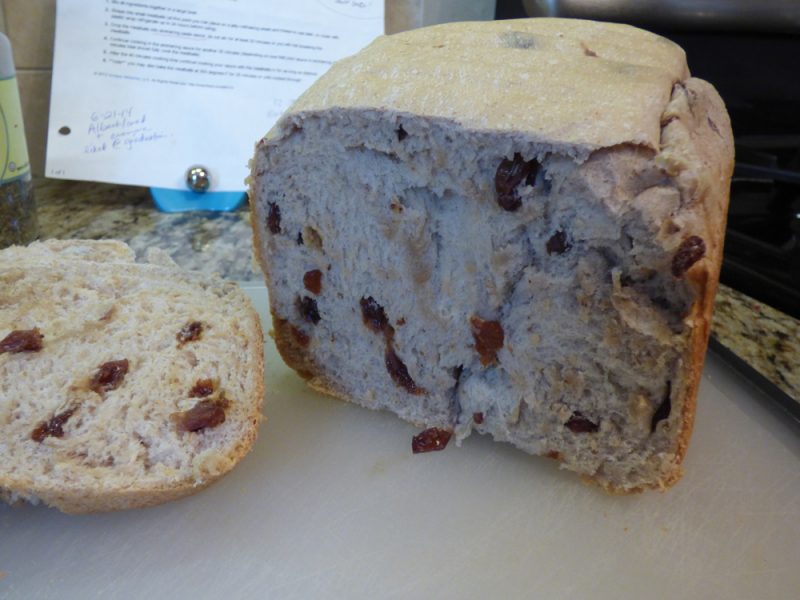
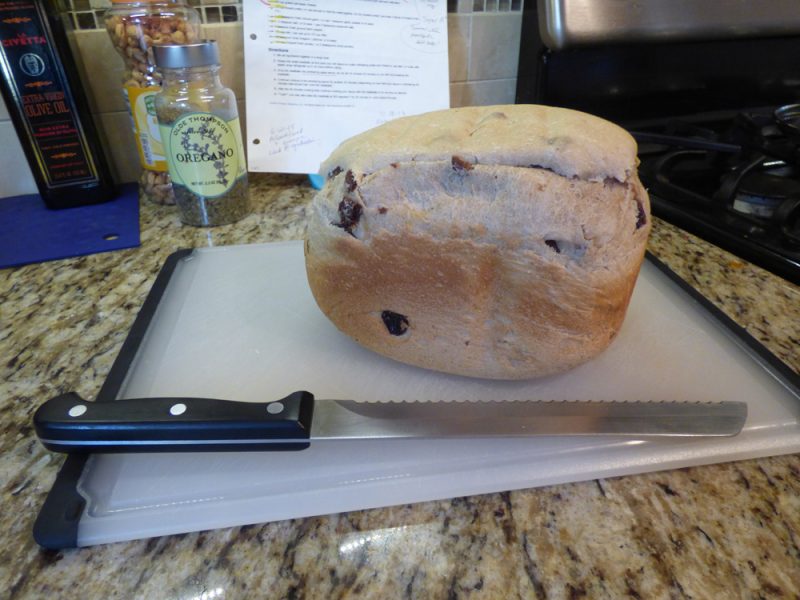
Betty Crocker Cinnamon-Raisin Bread Machine Bread * (Not IC Safe)

cinn-raisin-bread-machine2

cinn-raisin-bread-machine1

This is a keeper recipe – it makes great tasting cinnamon raisin bread that can go desserty, it can be your carb for breakfast, or just a treat.  It’s a great all-around special bread machine concoction.  Enjoy…

I bumped up the raisins to 1 cup – c’mon, it is raisin bread!  Haha….

**I used the 1.5 LB. size and “light crust” color setting on my machine.

INGREDIENTS:

  • 1 cup water
  • 2 tbsp. butter or margarine, softened
  • 3 cups BREAD flour
  • 3 tbsp. sugar
  • 1 1/2 tsp. salt
  • 1 tsp. ground cinnamon**
  • 2 1/2 tsp. bread machine yeast
  • 3/4 cup to 1 cup dark raisins**

**Known IC irritants, tread carefully!

DIRECTIONS:

  1. Measure carefully, placing all ingredients except raisins in bread machine pan in the order recommended by the manufacturer.  Weighing your bread flour, or any flour will always turn out best.  I go off the general assumption that 1 cup of flour equals 125 grams, but check your package or check online.    
  2. Add raisins at the “Raisin/Nut” audible signal, or 5-10 minutes before the last kneading cycle ends.
  3. Select Sweet or Basic/White cycle.
  4. Use medium or light crust color.
  5. Select 1.5 LB. loaf size.
  6. Once completed, remove baked bread from pan and cool on wire rack before slicing.

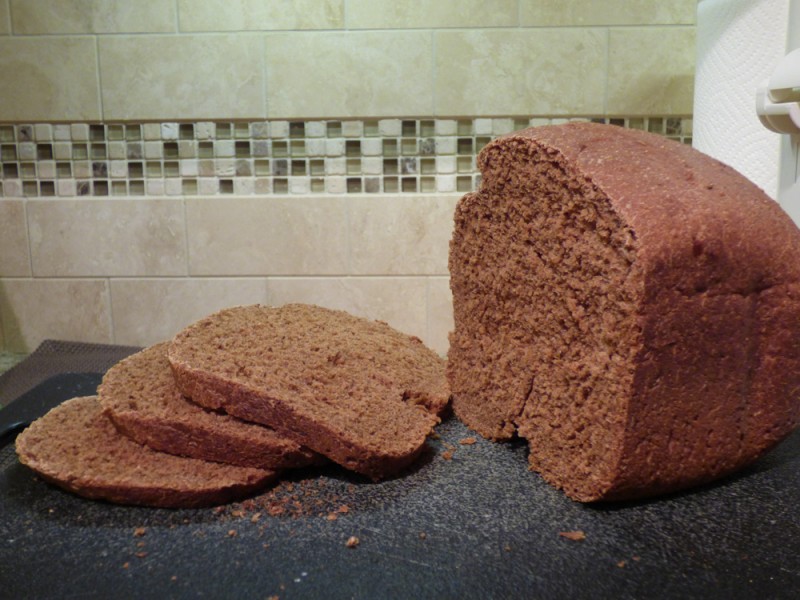
Black Forest Pumpernickel Bread Machine Loaf * (Not IC Safe)

pumpernickel-bread-2016-smaller

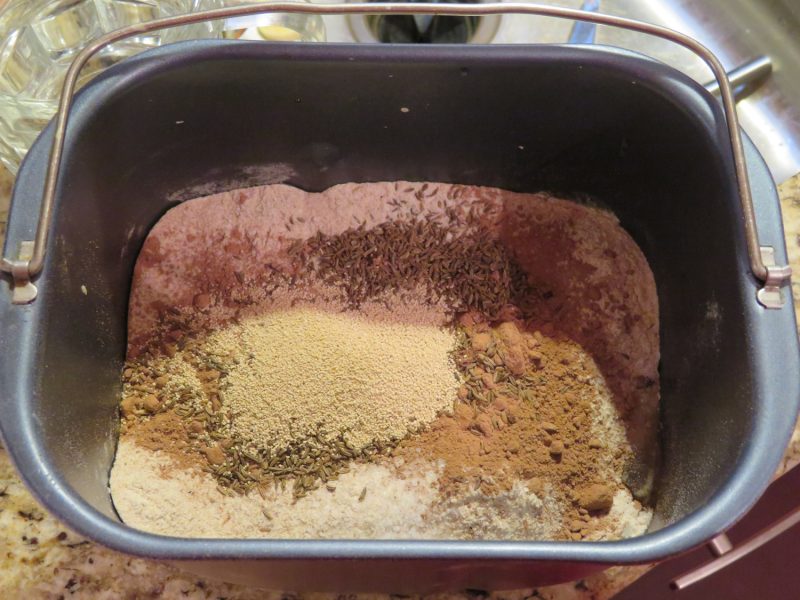
ABOVE: The ingredients in the bread machine pan.  Liquids on bottom, dry ingredients in the middle, and then the yeast on top.  

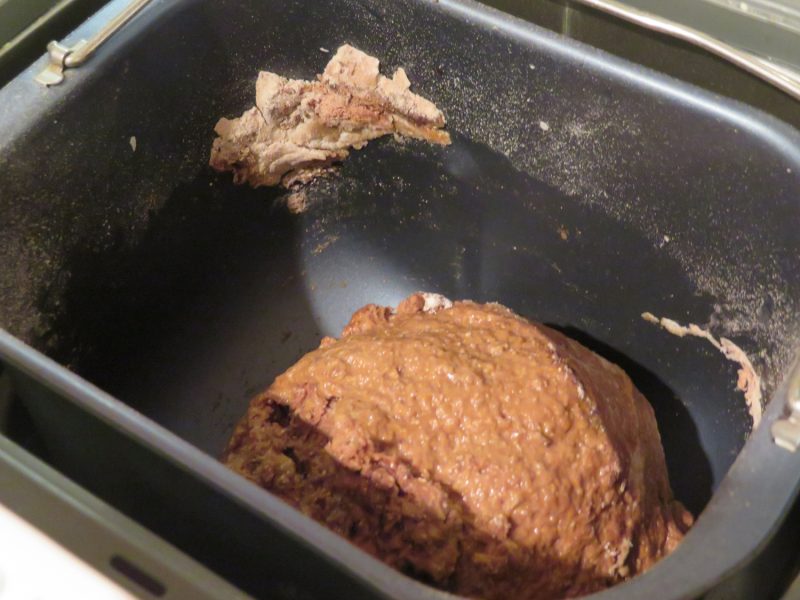
ABOVE: A few minutes into kneading, open the lid and use a spatula to push any flour pockets down into the dough.  (See top left flour pocket clinging to side of bread pan).


You’re going to love this dark pumpernickel bread with the ease of the bread machine!  It’s just perfect.  I’m not a fan of light rye bread, but I love dark rye!  It does use three types of flour, which may turn off some people, but it’s quite easy.  **Always store your whole wheat flour in the freezer; ask America’s Test Kitchen if you doubt me.  **Spray your measuring cup before pouring molasses into it for easy cleanup!  Enjoy!

INGREDIENTS:

  • 1 1/8 cups warm water
  • 1/3 cup molasses
  • 1 1/2 tablespoon canola oil
  • 1 1/2 cup bread flour
  • 1 cup rye flour
  • 1 cup whole wheat flour
  • 1 1/2 tsp. salt
  • 3 tablespoons cocoa powder**
  • 1 1/2 tablespoons caraway seeds**?
  • 2 tsp. active dry yeast

**Known IC irritants, tread carefully!

DIRECTIONS:

  1. Place all ingredients into your bread maker according to the manual directions.  (Order does matter a lot!)
  2. Select crust type to “light”.
  3. Select basic setting.
  4. Select 1.5 pound loaf size.
  5. Press start.
  6. Check while the machine is kneading.  If mixture is too dry, add a tablespoon of warm water at a time.  If mixture is too wet, add a small amount of flour at a time.  The mixture should go into a ball form and be just soft and slightly sticky to the touch.

Yummy Garlic Bread in Bread Machine

garlic-bread-in-machine-11-2015

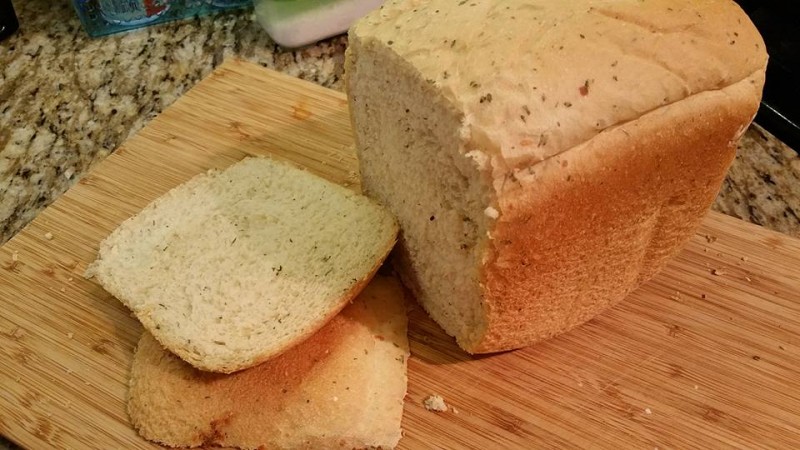
Garlic bread in the bread machine.  It sounds impossible, but it isn’t at all!  I made this at Thanksgiving and it came together so quickly.  It’s a fast recipe!  The only rule is to make sure you follow your bread machine’s directions of adding the ingredients in the correct order.  Most state liquid ingredients on the bottom of the bread pan, dry ingredients in the middle, and make a little well in the dry ingredients on the top, and put your yeast there.  Don’t let your yeast touch the wet ingredients on the bottom.

INGREDIENTS:

  • 1 cup warm water (110 degrees F)
  • 1 tablespoon butter (use unsalted to control the salt)
  • 1 tablespoon dry milk powder
  • 1 tablespoon white sugar
  • 1 1/2 tsp. salt
  • 1 1/2 tablespoons dried parsley (dried is fine)
  • 2 tsp. garlic powder (use your freshest garlic powder for best results)
  • 3 cups BREAD flour
  • 2 tsp. active dry yeast

DIRECTIONS:

  1. Place ingredients in the pan of the bread machine in the order recommended by the manufacturer.  (Most bread machines state this order, but check your manual first!!
    Liquid ingredients on the bottom of the bread pan
    Dry ingredients in the middle
    And make a little well in the dry ingredients on the top, and put your yeast there.  Don’t let your yeast touch the wet ingredients on the bottom.)
  2. Select basic bread cycle and 2 lb. loaf, press Start.

ATK Buttermilk-Ranch Pita Chips *

pita-chips-1

pita-chips-3

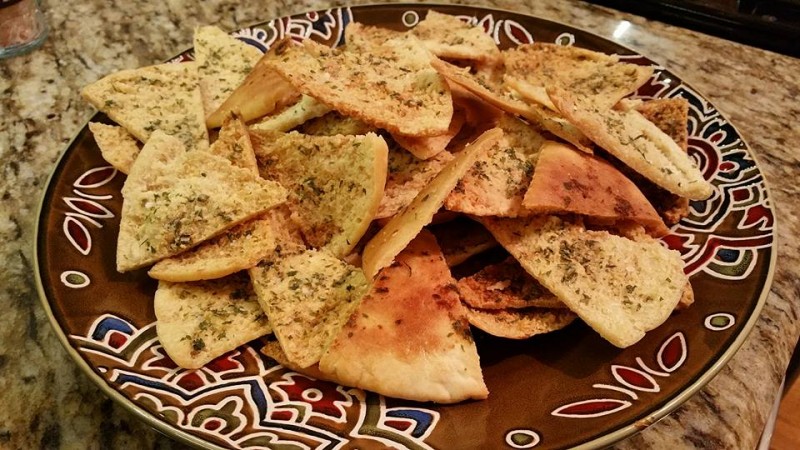
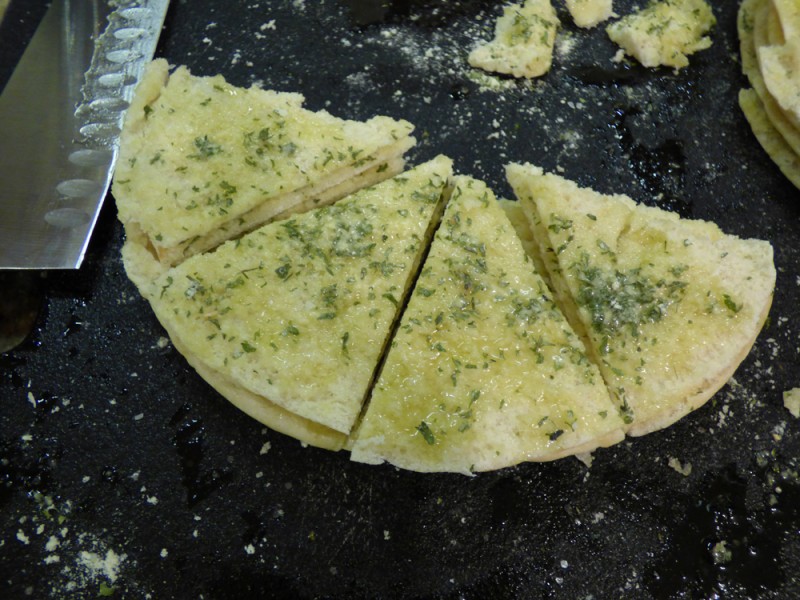
ABOVE: Use pita pockets for easiest cutting.  I have made this recipe twice and using the pita pockets was infinitely easier to cut and resulted in uniform thickness chips versus cutting a non-pita pocket myself.
pita-chips-4

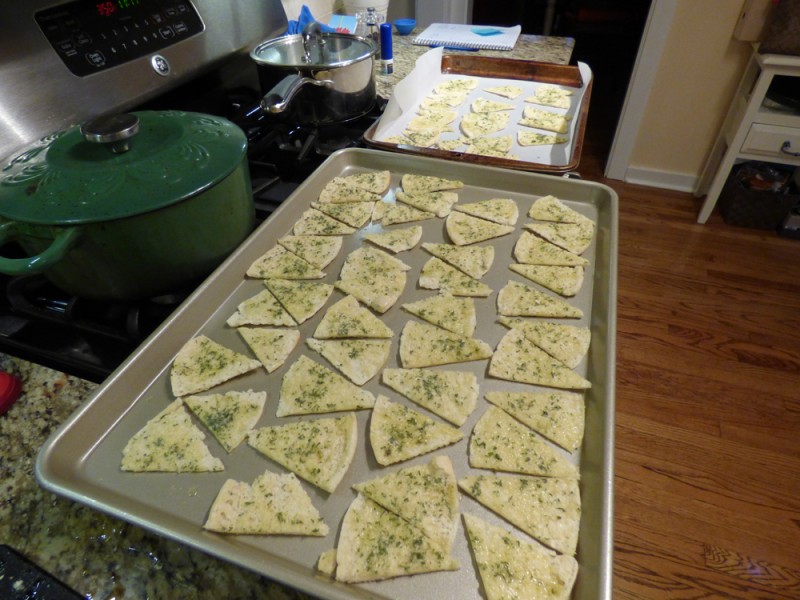
(ABOVE: Alternate wedges in order to fit maximum number of chips on the pan).
Buttermilk-powder-I-like

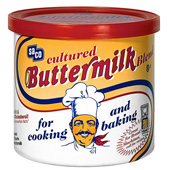
(ABOVE: The brand I buy for buttermilk powder).


I just subscribed to the three website deal on Americastestkitchen.com, that includes access to Cook’s Country website and Cook’s Illustrated.  So, you may be seeing a lot of these recipes from now on, since they are such a trusted source I will be making many of them.  I saw this recipe on the Cook’s Country website and had to try it immediately!  Everyone that has tasted it has ranted and raved about it.

Buttermilk powder is in the baking aisle at your larger, well-equipped stores.  It was maybe $5-6 and I had just bought it a month before this recipe came along for those instances where you need 1 cup of buttermilk and don’t want to buy a $4 container and have the rest go to waste.

****I had just run out of dried dill, it had lost all flavor and I threw it out.  So I went with dried parsley and it was fantastic!

Note: Use good quality extra-virgin olive oil here as this recipe uses a bit of it and it’s a major component!

Note #2: You can use regular or whole-wheat pita bread here.

Serves 8

INGREDIENTS:

  • Four 8″ pita breads (if you want to make life easy, but the pocket style!)
  • 1 T. buttermilk powder (see photo above)
  • 2 tsp. dried dill****
  • 1 tsp. kosher salt
  • 1/4 tsp. garlic powder (not salt)
  • 1/4 tsp. onion powder (not salt)**
  • 1/2 cup extra-virgin olive oil

**Onion can irritate some people, be careful.


DIRECTIONS:

  1. Adjust oven racks to upper-middle and lower-middle positions and heat oven to 350 degrees F.
  2. Using kitchen shears, cut around perimeter of each pita and separate into 2 thin rounds.
  3. Combine buttermilk powder, dill (or parsley), salt, garlic powder, and onion powder in bowl.
  4. Working with 1 round at a time, brush cut side generously with olive oil and sprinkle with spice mixture.
  5. Stack round on top of one another, cut side up, as you go.
  6. Using chef’s knives, cut pita stack into 8 wedges.
  7. Spread wedges, cut side up and in single layer, on 2 rimmed baking sheets. (See my photo for alternating pita chips on baking sheet to get maximum number of chips on each sheet).
  8. Bake until wedges are golden brown and crisp, about 15 minutes, rotating and switching sheets halfway through baking.
  9. Let cool slightly before serving. (They are best served slightly warm, but are great at any temperature!)

 

Italian Herb Bread – 2 LB. Loaf (Bread Machine)

herb-bread-machine-9-18-15

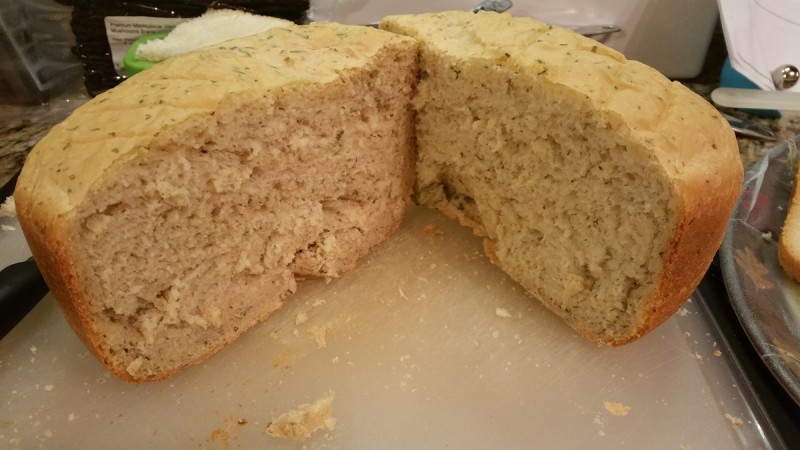
I just made this herb bread – it’s super fantastic and ultra easy.  I threw all the ingredients in in the morning; I’d estimate it took about five minutes to put it all in and clean up!  I’ve made many bread machine recipes: cheese bread, whole wheat bread, dark rye pumpernickel, and more I have forgotten.  This is a good one!  Here’s the recipe:

Remember to follow your bread machine’s instructions for order of ingredient placement.

INGREDIENTS:

  • 1 and 1/4 cup water (I used lukewarm)
  • 1 and 1/2 tablespoon vegetable or olive oil (I used olive oil)
  • 1 tsp. salt
  • 3 and 1/2 cups bread flour
  • 2 teaspoons sugar
  • 1 tablespoon dried parsley (I crushed all the herbs with my fingers to release more flavor before adding to pan).
  • 1/4 cup grated parmesan cheese
  • 2 tsp. dried onion flakes (I just used a dash of onion powder)
  • 1/2 tsp. dried basil
  • 1/2 tsp. garlic powder (I just used a few dashes)
  • 2 teaspoons active dry yeast


DIRECTIONS:

  1. Measure and add liquid ingredients to the bread pan, fitted with paddle.
  2. Measure and add dry ingredients (EXCEPT YEAST) to the bread pan.
  3. Use your finger to form a well (hole) in the flour where you will pour the yeast.  Yeast must NEVER come in contact with a liquid when you are adding ingredients.  Measure the yeast and carefully pour it into the well.
  4. Snap the baking pan into the breadmaker and close lid.
  5. Choose your mode on your bread machine, mine said “French” bread.
  6. Press the loaf size button and select 2 LB.
  7. Select your crust color, I select medium.
  8. Press “Start”.


Southern Buttermilk Biscuits *

buttermilk-biscuits-6-15-image1 buttermilk-biscuits-6-15-image2


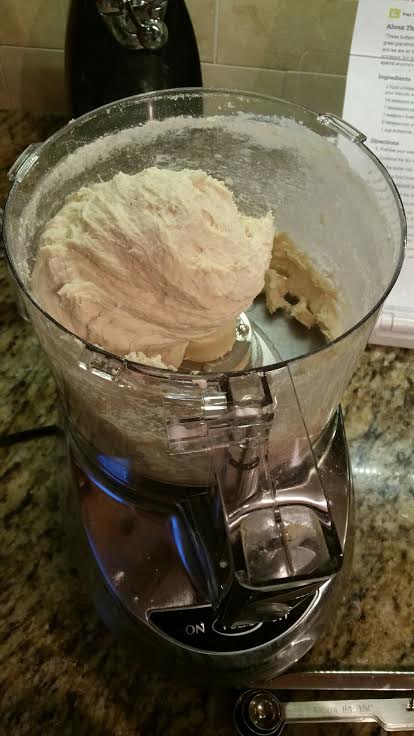
I found this recipe on Food.com and it sat in my “to-make” recipe folder for about a year and a half.  I thought making buttermilk biscuits would be too difficult, but it turns out it was anything but!  This really is a recipe where the food processor shines!  You could do it by hand but it will be better mixed and so much easier on you to just use a food processor!  Please make this!  It’s a very easy recipe, it just sounds complex in the directions!  It tastes so much better than canned biscuits!!

Use real buttermilk, this isn’t a circumstance where the milk soured with lemon would be good enough.

NOTE: Use unsalted butter.  If you only have salted butter on hand, omit the salt so you don’t have overly salted biscuits.  Cook and bake with unsalted butter for best results.  For serving guests, use salted butter.  

INGREDIENTS:


**Make sure your buttermilk ingredients are safe!


DIRECTIONS:

  1. Preheat your oven to 450°F.
  2. Combine the dry ingredients in a bowl, or in the bowl of a food processor.
  3. Cut the butter into chunks and cut into the flour until it resembles course meal.  If using a food processor, just pulse a few times until this consistency is achieved.
  4. Add the buttermilk and mix JUST until combined.  Do not over-mix.
  5. If it appears on the dry side, add a bit more buttermilk. It should be wet.  Honestly, I like my dough a little on the dry side so I can work with it and not have extremely messy hands.  So I covered my hands in flour while manipulating the dough and added more flour when necessary.  It’s a giant mess if your dough is too wet while cutting it into shapes.  
  6. Turn the dough out onto a floured board.  Gently PAT (do NOT roll with a rolling pin) the dough out until it’s about 1/2″ thick.
  7. Flour the top of your dough lightly to prevent the cutter from sticking.  Then, use a round cutter to cut into rounds.
  8. You can gently knead the scraps together and make a few more, but they will not be anywhere near as good as the first ones.
  9. I put parchment paper down on my pan and it turned out beautifully.  Place the biscuits on a cookie sheet- if you like soft sides, put them touching each other.  If you like”crusty” sides, put them about 1 inch apart- these will not rise as high as the biscuits put close together.
  10. Bake for about 10-12 minutes- the biscuits will be a beautiful light golden brown on top and bottom.  Do not overbake.


Note: The key to real biscuits is not in the ingredients, but in the handling of the dough.  The dough must be handled as little as possible or you will have tough biscuits.  I (the original author) have found that a food processor produces superior biscuits, because the ingredients stay colder and there’s less chance of overmixing.  You also must pat the dough out with your hands, lightly. Rolling with a rolling pin is a guaranteed way to overstimulate the gluten, resulting in a tougher biscuit. You can make these biscuits, cut them, put them on cookie sheets and freeze them for up to a month.  When you want fresh biscuits, simply place them frozen on the cookie sheet and bake at 450°F for about 20 minutes.

ATK’s Zucchini Bread *

americas-test-kitchen-zucchini-bread

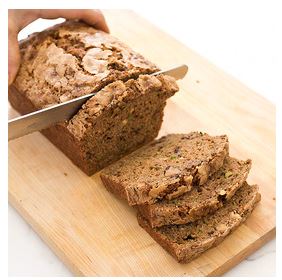
This photo is courtesy of America’s Test Kitchen -Cook’s Illustrated.  My bread turned out slightly under-cooked and wasn’t as presentable as I normally like so I’ll just use a stock photo until I can re-make it again.  It’s very delicious bread.  I never knew zucchini could work so well into a dessert type bread!  I cooked it for the full time and even followed the directions for the toothpick coming out with just a few crumbs attached, but it tricked me.  So later, I had to cut it into slices and re-bake on a baking sheet, which helped.  I think the problem was I could only twist and drain so much moisture out of the shredded zucchini.  Next time I will use an orange squeezer to get more moisture out.  My 8 year old loved it – but then again, it is more desserty vs. a hard sell.  Enjoy!

INGREDIENTS:

  • 1 1/2 lbs. zucchini shredded
  • 1 1/4 cups packed (8 3/4 oz.) brown sugar
  • 1/4 cup vegetable oil
  • 2 large eggs
  • 1 tsp. vanilla extract
  • 1 1/2 cups (7 1/2 oz.) all-purpose flour
  • 1/2 cup (2 3/4 oz.) whole-wheat flour
  • 1 T. ground cinnamon**
  • 1 1/2 tsp. salt
  • 1 tsp. baking powder
  • 1 tsp. baking soda
  • 1/2 tsp. ground nutmeg
  • 2/3 cup walnuts (toasted and chopped), optional
  • 1 T. granulated sugar
  • Chocolate chips are a great addition (optional)**

**Known IC irritants, tread carefully! You can make this IC safe by omitting the cinnamon and choc. chips. 

DIRECTIONS:

  1. Adjust oven rack to middle position and heat oven to 325* F.
  2. Grease 8 1/2 x 4 1/2″ loaf pan.
  3. Shred zucchini with either the large holes of a box grated (or use your food processor shredding disc like I did.)
  4. Place shredded zucchini in center of dish towel.  Gather ends together and twist tightly to drain as much liquid as possible, discarding liquid (you should have 1/2 to 2/3 cup liquid).  This method didn’t work well for me, next time I will use an orange squeezer (click here) to remove even more liquid from the zucchini.
  5. Whisk brown sugar, oil, eggs, and vanilla together in medium bowl.  Fold in zucchini.
  6. Whisk all-purpose flour, whole-wheat flour, cinnamon, salt, baking powder, baking soda, and nutmeg together in large bowl.
  7. Fold in zucchini mixture until just incorporated.  Fold in walnuts, if using.  Fold in chocolate chips, if using.
  8. Pour batter into prepared pan and sprinkle with granulated sugar; it makes a nice crust.
  9. Bake until top bounces back when gently pressed and toothpick inserted in center comes out with few moist crumbs attached – 65-75 minutes.
  10. Let bread cool in pan on wire rack for 30 minutes.
  11. Remove bread from pan and let cool completely on wire rack, serve.