Eggless Cheesecake *

 cheesecake

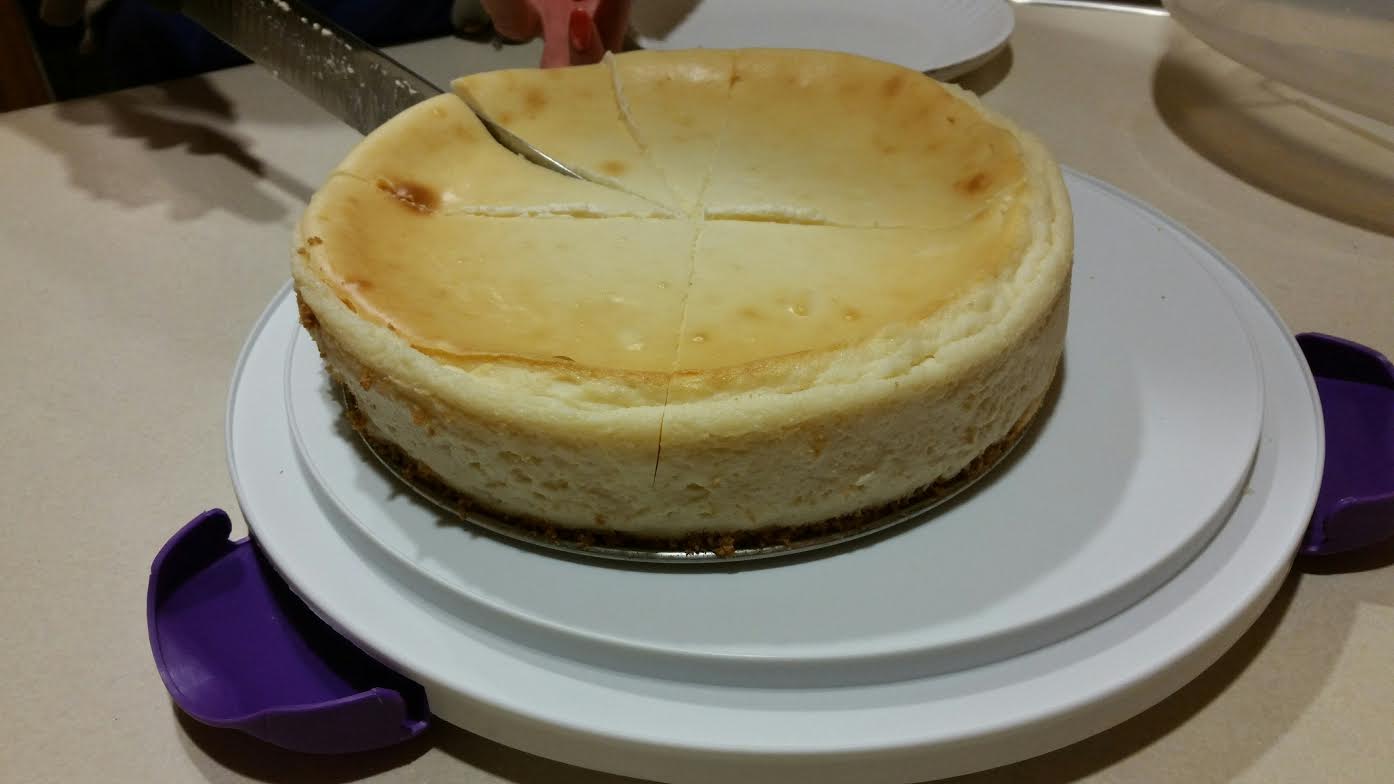
I’ve been making this eggless cheesecake for over a decade.  It’s creamy, delicious, and shockingly eggless.  This is a recipe you really need to make sure you make without distractions.  Put the child(ren) to bed, get the pets out of the room, quiet your phone, don’t check texts, turn off the TV, and focus on the measurements, because they aren’t the normal amounts used in other baking recipes, and this recipe is intermediate to advanced in skill.  One time with my son in the room, I added the entire can of sweetened condensed milk instead of 1/2 cup, it puffed up too high and was ruined.  So please pay attention.  This recipe is worth it.  If you have citrus or I.C. issues like me, definitely play it safe and omit the two lemon ingredients, but it’s sadly so much better with them!  Enjoy!

Baking Knowledge level: Intermediate to advanced.

INGREDIENTS:

  • Graham crackers to make the crust or buy a pre-made crust.
  • Four 8 oz. bars regular or Neufchâtel cream cheese, room temperature (I do a mixture of 2 regular bars and 2 reduced fat bars)
  • 1/2 cup sweetened condensed milk (Approximately half of a standard 14 oz. can, but measure it!)*
  • 1/2 cup sugar
  • 1/4 tsp. baking soda
  • 2 tsp. baking powder
  • 1/4 cup cornstarch
  • 1 T. pure 100% vanilla extract^^
  • 1 cup sour cream *

Notes:

** You can make the crust yourself, or buy pre-made, but please make sure your graham crackers or crust is safe, some have cinnamon, which is an irritant to some!  Cinnamon irritates me.

*Buy the most simple sweetened condensed milk  and sour cream you can – the less ingredients the better! I only buy Daisy brand sour cream. 

OMIT the 1 T. lemon juice and the 1/2 tsp. grated lemon rind, because they are common irritants.

^^Some people like me have problems with vanilla extract, so I omit it, and I have far less pain.


Necessary Tools:

  • A SPRINGFORM PAN like this, don’t use anything else
  • A jelly roll pan for underneath the springform pan
  • Aluminum foil


DIRECTIONS:

To make your own graham cracker crust:

  1. Make sure your springform pan’s latch is closed.  Read the directions for your pan before beginning.
  2. Using aluminum foil, cover the outside of your springform pan to prevent leaks.  Bring aluminum foil up 1″ around the sides of the pan and make an aluminum foil barricade just in case of a small leak.  Then place your springform pan (with foil around the bottom outside of it) onto a jelly roll pan to ensure if it leaks, even though it shouldn’t, you don’t have a large oven mess to clean up.  Set aside.
  3. Note: If your pan ends up leaking after baking, try to rescue your cheesecake and throw out the pan.  Life is too short for junky & frustrating bakeware.  Treat yourself to a new leakproof pan on Amazon or where ever you prefer to buy it.
  4. Crush or food process enough chocolate or honey graham crackers to make about 1/2″ medium size crumbs on the bottom of your Springform pan.  Melt approximately 2-3 tablespoons of unsalted butter, let cool slightly.  Using your clean fingers, combine the graham cracker crumbs with the cooled melted butter in the bottom of your un-greased 9″ springform pan.
  5.   Pat graham cracker and butter mixture and tamp down until the entire bottom of the springform pan is covered in crumbs and compacted as best you can.
  6. Now set aside and finish your cheesecake filling below.

To make the cheesecake:

  1. Preheat oven to 300 degrees F.
  2. In a large bowl with a handheld mixer, or in your stand mixer, beat everything except sour cream until smooth approximately 3 minutes.
  3. Add sour cream and blend well.
  4. Pour batter into prepared pan (foil on outside bottom, with graham/butter crust on the bottom of the pan).
  5. Bake for approximately 1 hour on center rack.  Thin knife inserted into outside of cake should come out clean when cake is done.  If it doesn’t, I usually add 10 minutes and re-test.  Middle of cake will still be creamy.
  6. Turn off oven and open oven door.  Let cake sit in oven for another 2-3 hours to cool slowly.  (DON’T SKIP THIS STEP!)
  7. Remove pan from oven after it has cooled.  Loosen sides of pan with knife.  Unlatch your Springform pan to open it up and remove sides.
  8. Place cake, still on thin metal pan base, on a cooling rack.  Allow to cool completely at room temperature before placing in fridge.  Lightly cover with plastic wrap if needed (monitor condensation).
  9. Refrigerate a few hours before serving.

Whole Wheat Apple Muffins *


I’ve been making this recipe since 2014!

This recipe is from “Smitten Kitchen” – and we found it really healthy YET wonderful.  Sometimes, as we all know, healthy baked goods can be very unappetizing, but these had flavor, sweetness, with a unique apple taste.   I got about a 18-19 muffins yield.  They freeze and defrost well.  I left them on the counter to defrost, or in a pinch, I defrosted them on the defrost setting of my microwave.  I’ve used buttermilk one time, and recently (2017) I used 2% Greek Yogurt, both work well but I prefer the Greek Yogurt (or use any regular yogurt).  🙂   ENJOY!

—You can make these eggless by obviously removing the egg – no substitution needed. The buttermilk or yogurt makes up for it.—

Smitten Kitchen Link!

INGREDIENTS:

1 cup (4 ounces) whole wheat flour
1 cup (4 1/4 ounces) all-purpose flour
1 teaspoon baking powder
1 teaspoon baking soda
1/4 teaspoon salt
1 tablespoon cinnamon** 
1/2 cup (1 stick, 4 ounces) unsalted butter, at room temperature
1/2 cup (3 1/2 ounces) granulated sugar
1/2 cup dark brown sugar, packed, divided
1 large egg, lightly beaten (*eggless tip, if you need it)
1 cup (8 ounces) buttermilk or yogurt**
2 large apples, peeled, cored, and coarsely chopped


**(cinnamon is not I.C. safe for me, so I omit it)

*IF YOU NEED TO MAKE THEM EGGLESS, I JUST TOOK OUT THE EGG BECAUSE THERE IS BUTTERMILK OR YOGURT IN THE RECIPE TO MAKE UP FOR IT). 

**We used 2% Fage Greek Yogurt and it turned out wonderful. – December 2017.

  1. Preheat the oven to 450°F. Grease and flour 18 muffin cups and set aside.
  2. Mix together the flours, baking powder, baking soda, salt, and cinnamon, and set aside.
  3. In a separate bowl, cream the butter and add the granulated sugar and 1/4 cup of the brown sugar. Beat until fluffy.
  4. If using eggs, add the egg and mix well; stop once to scrape the sides and bottom of the bowl.
  5. Mix in the buttermilk/yogurt gently. (If you over-mix, the buttermilk will cause the mixture to curdle.)
  6. Stir buttermilk/yogurt mixture into the dry ingredients and fold in the apple chunks.
  7. Divide the batter evenly among the prepared muffin cups, sprinkling the remaining 1/4 cup brown sugar on top.
  8. Bake for 10 minutes, turn the heat down to 400°F, and bake for an additional 5 to 10 minutes, or until a toothpick inserted into the center of a muffin comes out clean.
  9. Cool the muffins for 5 minutes in the tin, then turn them out onto a wire rack to cool completely.

I.C. Bladder Safe Blueberry Bread (Eggless, Too!) *


This is phenomenal blueberry bread all by itself: the texture is spot on with a bakery (even though it’s eggless!), the crust is perfectly browned, and it tastes wonderful but not sickly sweet!  What’s even more wonderful about it is it’s IC safe!  I had to edit a few ingredients and do some homework with apple juice to find one without ascorbic acid AND with added vitamin C – both IC irritants.

My husband’s allergic to eggs and I have IC (BOY are we a pair!)  So, with our combined restraints I’m pleasantly surprised and happy to find this recipe works for both of us AND is delicious.

I found this safe apple juice, without added vitamin C or ascorbic acid, at CVS.  Maybe it’s somewhere else too.

Yields: one loaf


INGREDIENTS:

  • 1/2 cup (1 stick or 8 TBSP.) unsalted butter, melted
  • 3 TBSP. water
  • 1/2 cup milk (I used 2%)
  • 2/3 cup organic apple juice (check ingredients!)
  • 3 cups unbleached all-purpose flour
  • 3/4 cup granulated sugar
  • 1 TBSP. baking powder
  • 3/4 tsp. salt
  • 1/4 tsp. baking soda
  • 1 cup blueberries, fresh or frozen (I used frozen and let them come to room temp, also increased to 1.25-1.5 cups)


NOTES: Try to find a high quality apple juice with the least amount of acids and no HFCS etc, or water it down. Acids are very irritating to the bladder.

DIRECTIONS: 

  1. Preheat oven to 350* F.
  2. Spray a 9x5x3″ loaf pan with “PAM for Baking” or a similar spray.
  3. In the bowl of a stand mixer fitted with a paddle attachment, combine the melted butter, water, milk, and apple juice until thoroughly combined.  At this stage the mixture will look a little unsightly and unmixed but it WILL come together later.  Trust me!
  4. In a separate medium bowl, combine the flour, sugar, baking powder, salt, and baking soda with a wire whisk.
  5. Add the dry mixture to the butter mixture, and stir with a spatula until just combined.
  6. Gently fold in the blueberries, trying not to crush them.
  7. Pour batter into prepared loaf pan, bake 55-60 minutes or until the top is golden brown.  (Since I added more blueberries than usual, it took me about 75-80 minutes for doneness. Don’t just rely on the golden brown crust, test it with a toothpick in center to make sure it doesn’t come out wet!)
  8. Cool completely before slicing.

Vegan Cornmeal Raspberry Muffins *


vegan-cornmeal-muffins1

vegan-cornmeal-muffins2

This is a tasty raspberry muffin recipe that adds the flavor of cornmeal to the mix!  It’s yummy and has that cornmeal crunch!  I used a mixture of fresh raspberries and frozen, but you could do all fresh or all frozen too!  It’s okay to mash the fresh raspberries a little if you want a more unified flavor.  I sprinkled the tops with Turbinado sugar.  A+!

——PLEASE MAKE SURE YOU TOLERATE RASPBERRIES BEFORE MAKING THIS. THEY ARE ON THE ‘TRY IT’ LIST.  MY ADVICE WOULD BE TO TRY JUST A FEW (MAYBE 3-5) WITHOUT OTHER IRRITATING FOODS AND SEE HOW YOU HANDLE IT. 

INGREDIENTS:

  • 1 And 1/2 Cups All Purpose Flour
  • 3/4 Cup Cornmeal
  • 3/4 Cup Sugar
  • 3 Teaspoons Baking Powder
  • 1 Teaspoon Baking Soda
  • 1/4 Teaspoon Salt
  • 1 Cup fresh raspberries (Can Use Frozen too, but no not thaw them!)
  • 1 And 1/4 Cups Almond Milk, or regular milk 
  • 1/4 Cup vegetable oil
  • 1 Teaspoon Vanilla Extract
  • Turbinado sugar, or brown sugar to coat the tops before baking

NOTES:

**This recipe originally had orange zest, apple cider vinegar, but they had to removed to be IC safe. See how you handle vanilla extract, for me it’s irritating. If irritating to you, omit it.

If tolerated, vanilla almond milk works well in this recipe!  


DIRECTIONS:
  1. Preheat oven to 400F for 15 minutes. Grease or line a 12-cup muffin tin with paper liners.
  2. In a large bowl combine together the dry ingredients. Take 2 tablespoons of this mixture and
  3. combine it with the berries, in a separate bowl. This will avoid the berries from sinking to the bottom of the muffins.
  4. In another bowl whisk together the milk, oil, and vanilla extract.
  5. Gently fold in the wet ingredients into the dry mixture. Stir in the berries. Do not over mix the batter.
  6. Spoon the batter into the prepared muffin tins, about 2/3rds full. I got only 11 muffins for the above measurement.
  7. Sprinkle some Turbinado or brown sugar on top of the muffins.
  8. Bake for about 15-20 minutes or until a toothpick inserted in the center of the muffin comes out clean.
  9. Transfer to a wire rack and let it cool for at least 5 minutes before removing from the pan.
TASTE:
  1. These muffins had a very nice texture from the cornmeal. The quantity of sugar mentioned in the original recipe is 1/2, which is what I used and felt that it could use some more sugar. That’s why I have increased the quantity to 3/4th cup in the recipe.
NOTES:
  1. If using frozen berries, do not thaw it.
  2. Instead of sprinkling granulated sugar on top of the muffins, using turbinado sugar would give it a much nicer look.


Delicious Popcorn Balls *

We made these popcorn balls coincidentally around Valentine’s Day and it was serendipitous.  They come together fast and are more forgiving than Rice Krispie treats that harden faster than you can stir!  The marshmallow mixture stays pliable for a while.

We made the popcorn in our air popper and had to make two batches.

We used unflavored peanuts – just plain works well here.  No one wants garlic/onion flavored popcorn balls.  If you do, I don’t know you anymore!

You can add toasted slivered almonds or chopped peanuts too. I love adding chopped peanuts – about 1/2 to 3/4 cup is perfect.


INGREDIENTS:

  • Cooking spray
  • 14 heaping cups plain popped popcorn
  • 6 TBSP. unsalted butter
  • One 10.5 oz. package mini marshmallows
  • 2 TBSP. light brown sugar
  • 1 tsp. vanilla extract, IF TOLERATED
  • 1 tsp. salt
  • 3/4 cup chopped salted peanuts or toasted slivered almonds, optional but great
  • Sprinkles!  Red, blue and white for 4th of July?  Red and green for Christmas?  FUN!, optional
  • 1/2 cup to 3/4 cup plain chopped peanuts, optional


DIRECTIONS:

  1. Remove any un-popped kernels from the popped popcorn.  Lightly grease a large mixing bowl with cooking spray and add popcorn, set aside.
  2. Melt butter in a large saucepan over medium heat.
  3. Add marshmallows, brown sugar, vanilla, salt, and cook stirring, until marshmallows have melted and mixture is smooth, 4-5 minutes.
  4. Pour marshmallow mixture over popcorn, along with peanuts (or almonds), if desired.
  5. Mix with 2 lightly greased rubber spatulas until popcorn is evenly coated.
  6. Using clean, greased hands, form mixture into 2 1/2 inch balls.
  7. Eat immediately or wrap each ball tightly in plastic and keep up to 5-7 days.

Old School Simple Rice Pudding *

The photos can’t possibly do this rice pudding justice, but it’s the best I’ve ever made!  I highly recommend making this at least 6-12 hours before you are serving it, preferably a day ahead of time.  When it’s fully chilled, the flavor really deepens and becomes perfectly sweet and creamy.  Just believe me!  I use homemade vanilla and I doubled the amount of vanilla I added.

As of 3/2018, I can no longer tolerate vanilla or cinnamon.  So, I omit these and it still turns out good, but not as flavorful, of course.

INGREDIENTS:

  • 3cup medium grain rice or 34 cup long grain rice
  • 1 1cups water
  • 1teaspoon salt (heaping)
  • 4 cups whole milk (I use 2%)
  • 1cup sugar
  • 1teaspoon vanilla*
  • cinnamon (optional)**
  • whip cream (optional)

NOTES: *Vanilla can be an irritant to some, I had to stop using it.  

**Cinnamon is a known irritant, remove if it bothers you. 

DIRECTIONS:

  1. Bring rice, water and salt to a boil over med-high heat.
  2. Simmer covered until water has been absorbed (approximately 15 minutes).
  3. Stir in milk and sugar and cook uncovered over medium heat for 30-40 minutes, stirring frequently–especially towards the end of cooking.
  4. The pudding is done when the rice and milk have amalgamated into a thick porridge-like consistency.
  5. DO NOT OVERCOOK or the pudding will be solid instead of creamy once cooled.
  6. Remove from heat and stir in vanilla.
  7. Pour into a bowl or cups. (I use ramekins for a nice portion).
  8. You can sprinkle cinnamon on the top if you like.
  9. COVER with plastic wrap directly on surface “IF” you don’t want a skin.
  10. CHILL approx. 6 hours or more, preferably overnight for best flavor.  Serve with whip cream if desired.

Eggless Banana (Orange Or Apple) Nut Muffins

SAMSUNG CAMERA PICTURES

These are tried and true banana orange nut muffins.  I’ve been making them OVER 15 YEARS so that says something!   This is a recipe from Rosemarie Emro’s cookbook “Bakin’ Without Eggs”.  This cookbook is sometimes hit or miss for me but it has produced some amazing eggless desserts (cookies and cheesecake, and waffles)!  


TIPS:

–Be sure to use quality plain peanuts, without added spices like onion, garlic, and flavoring.  Also, you can try a different nut like chopped cashews, etc.

–Use 100% quality orange juice, preferably not from concentrate.

–Use ripe bananas that are at the perfect mashable stage.  

–Use metal baking pans, avoid nonstick.  Yes they may cost more and are harder to find, but they will last forever and have better heat distribution.  Check Amazon.com or Williams-Sonoma.  

–Use muffin liners for the easiest cleanup ever!


INGREDIENTS:  (makes 12-15 muffins)

  • 2 1/4 cups all-purpose unbleached flour
  • 1 cup sugar
  • 2 tsp. baking powder
  • 1 tsp. baking soda
  • 1//4 cup vegetable oil
  • 1 cup orange juice or apple juice
  • 2 ripe bananas, mashed
  • 1/2 cup nuts , finely chopped (optional) <—We use plain peanuts here

DIRECTIONS:

  1. Preheat oven to 400°F.
  2. Lightly butter a 12 compartment muffin tin – Or use muffin liners like I do, for the easiest cleanup ever.
  3. In a large bowl, combine flour, sugar, baking powder and baking soda.  Stir until dry ingredients are mixed.
  4. Stir in oil, orange juice (or apple juice), mashed bananas, and nuts (if using) until smooth. (You don’t need an electric mixer for this recipe).
  5. Spoon prepared muffin batter into muffin liners, filling half full.
  6. Bake for 15-20 minutes or until browned on top.  Check at 15 minutes with the toothpick test, if not done, add another 5 minutes, and re-check.
  7. Remove and let cool in pan on wire rack.

Easy Banana Muffins *


INGREDIENTS:

  • 3 large bananas (ripe, preferably with brown spots)
  • 1/2 cup white sugar
  • 1 egg (or use egg-replace like “Neat Egg” like we did), slightly beaten
  • 1 teaspoon baking soda
  • 1 teaspoon baking powder
  • 1 1/2 cups all-purpose flour
  • 1/3 cup melted butter
  • 1/2 teaspoon salt
  • chopped nuts (optional, but great) —Think walnut, cashew, peanut, etc. I used cashew, it was fantastic. **
  • Chocolate chips (optional)**

**Chocolate chips are not IC safe so please substitute or omit.

**Use unflavored nuts!  If you don’t check, you may purchase peanuts that have onion and garlic flavors in them.  Check your ingredient label.


Pro Tip:  if you want to save money, buy your nuts at ALDI or pay the price, literally.  I love all their nuts that I can have, but I especially love their giant, plump cashews.
DIRECTIONS:

  • Mash bananas with a fork.
  • Add sugar and the slightly beaten egg.
  • Stir in melted butter.
  • Stir in dry ingredients: baking soda, baking powder, flour, salt, nuts, and chocolate chips.
  • Put liners in your medium size muffin pans.  Spoon batter into your liners.
  • Bake approximately 20 minutes at 350* F.
  • Use a toothpick to check for doneness – also, they should be slightly golden brown.

Eggless & Milk-Free Chocolate Cupcakes * (Not IC Safe)

moms-chocolate-cupcakes

Here’s a fantastic milk-free and eggless chocolate cupcake.  If I made this for you, you would not know it’s missing those two ingredients.  I prefer this to the ends of the Earth over a grocery store, chemical-laden, high-sugar, no-flavor cupcake!

Get this – all these ingredients are shelf stable!  They will last a long time so this means you can always whip up cupcakes or a cake within minutes without running to the store!

For me, it made 14 cupcakes.

INGREDIENTS:

  • 1 1/2 cups flour
  • 1 cup sugar
  • 1 teaspoon baking soda
  • 1 teaspoon salt
  • 1/3 cup cocoa powder**
  • 1/2 cup oil
  • 1 cup water
  • 1 teaspoon vanilla extract**
  • 1 tablespoon vinegar**

**Known IC irritants, tread carefully!


DIRECTIONS:

  1. Preheat oven to 350* F.
  2. Mix all ingredients together until moist and well blended.
  3. Pour batter in cupcake liners, in pan, and bake for 20-25 minutes at 350* F. (For me, it took at least 25 minutes!  Make sure you bake them long enough or they won’t release from liners).
  4. Let cool and frost with your favorite icing.

If instead you want to make a layer cake, double the recipe above and evenly pour into 2 round cake pans.  Increase baking time to about 35 minutes or until a toothpick inserted in the center comes out clean.


Hershey’s Hot Cocoa * (Not IC Safe)

20160113_113412P109084220160113_113331   P1090844
We make this recipe when we want a cup of hot cocoa that a) doesn’t have preservatives, b) fake sweeteners, and c) doesn’t taste weird.  It takes a few minutes but the flavor is really worth it.

One note about this recipe, though, it states it makes three 6 oz. servings, but in reality, one recipe yields about two servings at best.  We always double this recipe for three people.  The recipe below serves approximately 2 people.  No one wants to have a small cup of hot cocoa…especially after smelling this recipe!


INGREDIENTS:  (for approximately 2 people)

  • 2 tablespoons Hershey’s cocoa powder**
  • 3 tablespoons granulated sugar
  • dash of salt
  • 1/4 cup hot water (doesn’t need to be boiling)
  • 1 1/2 cup milk (any percentage is fine, I used 2%)
  • marshmallows, if desired.

**Known IC irritants, tread carefully!


DIRECTIONS:

  1. Blend the cocoa powder, sugar, and salt in a medium saucepan.
  2. Gradually add the hot water.
  3. Boil over medium heat for 2 minutes, stirring constantly.
  4. Add the milk and heat thoroughly, stirring occasionally.  (Do not boil).
  5. Remove from heat and whisk until foamy.
  6. Serve hot – top with marshmallows, if desired.