Broccoli-Cheddar Soup

broccoli-perfect-soup-12-25-13

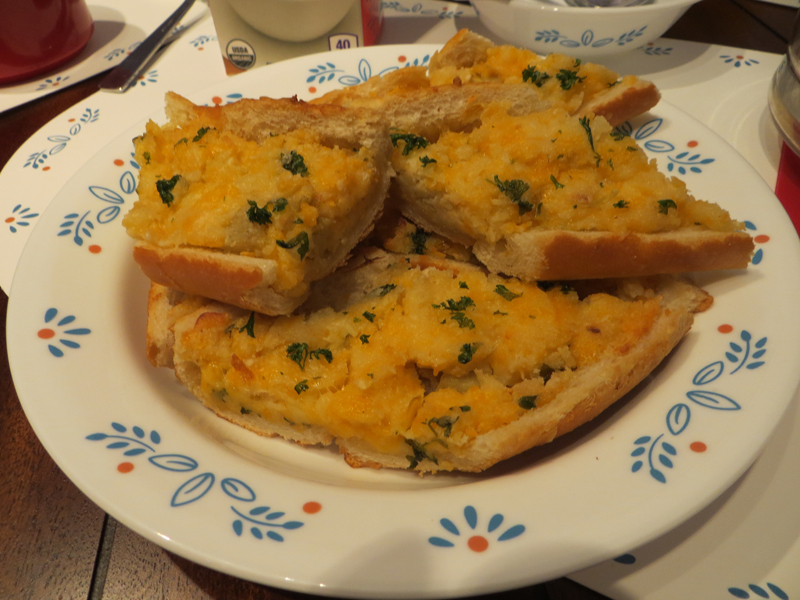
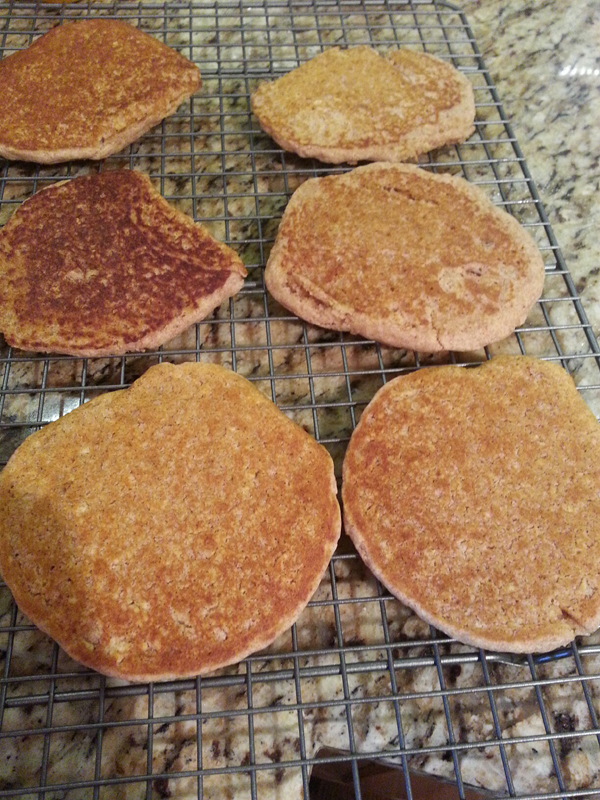
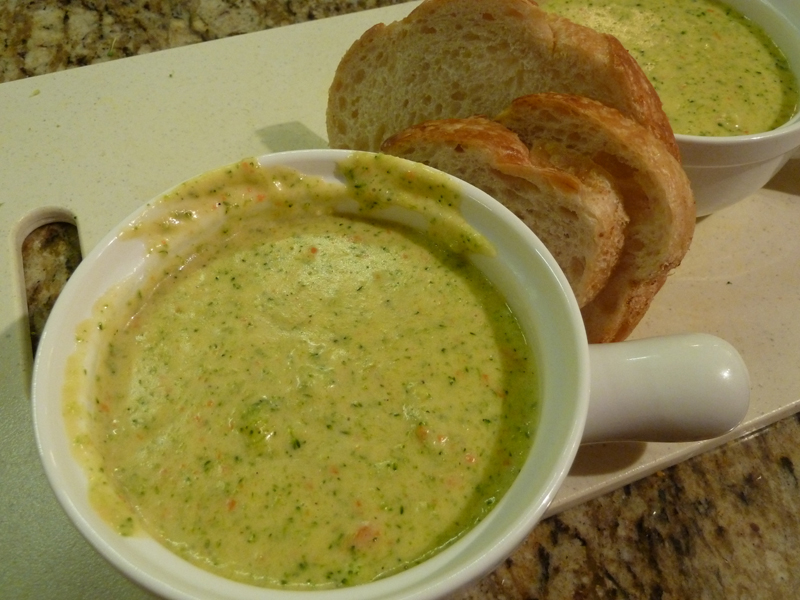
This was a great test for my new Christmas gift, an immersion blender.  I didn’t have to transfer the hot soup to a blender and I did it right in the pan.  For this recipe, I’m glad I got two heads of broccoli to be safe.  I did not have to add additional water in the second-to-last step, but you should monitor it.  This is a true keeper!  I threw out my old recipe for cheesy broccoli soup!  I wouldn’t substitute milk for the half-and-half, this recipe needs its fat and creaminess.  I served with sourdough on the side.  ENJOY!
INGREDIENTS:
  • 6 tablespoons unsalted butter
  • 1 small onion, chopped
  • 1/4 cup all-purpose flour
  • 2 cups half-and-half
  • 3 cups low-sodium chicken broth
  • 2 bay leaves
  • 1/4 teaspoon freshly grated nutmeg
  • Kosher salt and freshly ground pepper
  • 4 7-inch sourdough bread boules (round loaves)
  • 4 cups broccoli florets (about 1 head)
  • 1 large carrot, diced
  • 2 1/2 cups (about 8 ounces) grated sharp white and yellow cheddar cheese, plus more for garnish

DIRECTIONS:

  1. Melt the butter in a large Dutch oven or pot over medium heat. Add the onion and cook until tender, about 5 minutes.
  2. Whisk in the flour and cook until golden, 3 to 4 minutes, then gradually whisk in the half-and-half until smooth.
  3. Add the chicken broth, bay leaves and nutmeg, then season with salt and pepper and bring to a simmer. Reduce the heat to medium-low and cook, uncovered, until thickened, about 20 minutes.
  4. (OPTIONAL): Meanwhile, prepare the bread bowls: Using a sharp knife, cut a circle into the top of each loaf, leaving a 1-inch border all around. Remove the bread top, then hollow out the middle with a fork or your fingers, leaving a thick bread shell.
  5. Add the broccoli and carrot to the broth mixture and simmer until tender, about 20 minutes.
  6. Discard the bay leaves. Puree the soup in batches in a blender until smooth; you’ll still have flecks of carrot and broccoli. Return to the pot. (Or puree the soup in the pot with an immersion blender.)
  7. Add the cheese to the soup and whisk over medium heat until melted. Add up to 3/4 cup water if the soup is too thick.
  8. Ladle into the bread bowls and garnish with cheese.

Cheesy Artichoke Bread

cheesy-artichoke-bread-chefkate-12-2013

This is another Chef Kate recipe.  It is really wonderful and a perfect, enticing cheesy appetizer that has a flavor you can’t pin down – artichoke!  I suggest using wider loaves of bread like a wide French bread or an extra wide Italian loaf.  ENJOY!

INGREDIENTS:

  • 1 large loaf of French bread
  • 12 oz. sour cream
  • 1/2 cup unsalted butter, melted (You could use less here to be more calorie & fat conscious).
  • 1 T. sesame seeds
  • 8 oz. shredded Monterrey Jack cheese (I used Colby Jack and it was fine)
  • 4 oz. shredded cheddar cheese
  • 1/4 cup grated Parmesan cheese
  • 6.5 oz. jar marinated artichoke hearts, drained and chopped
  • 4 cloves garlic (I used garlic powder and it was fine)
  • 2 T. minced fresh parsley (You can add more parsley to the top like I did for presentation)


DIRECTIONS:

  1. Cut the bread in half, lengthwise.  Hollow out the middle, leaving about 1/4″ on each side.  Set the shells aside.
  2. Place the removed bread in a food processor, cover and process until you get crumbs.
  3. In a mixing bowl, combine the bread crumbs, sour cream, butter, and sesame seeds.
  4. Spread the mixture on a cooking sheet (or baking dish) and place under the broiler for about 4 minutes until lightly toasted.  (About 4″ from broiler).
  5. In a large bowl, combine the toasted bread crumb mixture, cheeses, artichokes, garlic, and parsley.  Mix well.
  6. Spoon this mixture into the bread shells from step one. 
  7. Bake in a preheated oven at 350° for 25 minutes.  Let sit for a few minutes before cutting into pieces. 


Eggless Sugar Cookies

P1100399

P1100394

P1100396

P1100397


Okay, I swear I don’t usually bake this many cookies, but it’s that time of year!  We hadn’t tried an eggless sugar cookie in many, many years and gave one a try.  It worked beautifully!  Honestly, I couldn’t tell the difference and why not skip eggs once in a while anyway?  My egg-allergic husband was quite happy!  The only cookie cutter it failed on was the snowflake, but that’s okay.  My favorite one is the last photo of the snowman because my husband decorated it!  I got this recipe from  http://socialsavvymom.com and it was excellent!  Enjoy!

INGREDIENTS:

  • 1 1/4 cups butter, softened (2 1/2 sticks)
  • 1 cup sugar
  • 4 teaspoons milk
  • 2 teaspoons pure vanilla
  • 3 cups all-purpose flour

DIRECTIONS:

  1. In a large mixing bowl, preferably with an electric mixer, beat butter and sugar together until fluffy. Add milk and vanilla, beat again and scrape bowl. With mixer on low speed, add flour one cup at a time and beat after each addition. Shape into logs approximately 2″ in diameter. Roll the logs in parchment paper or plastic wrap and chill for at least 2 hours or overnight.  (I chilled it overnight and it turned out just fine).
  2. When ready to bake, preheat oven to 375 degrees F. Line baking sheets with parchment paper or a Silpat liner and give them a light spray with vegetable shortening. Unwrap logs and slice into 1/4″ thick slices or roll out to cut out shapes. Place cookies on prepared cookie sheet and bake for 8-10 minutes or until very light brown and the sides are slightly firm.
  3. Remove from oven and let cool 5 minutes before transferring cookies to a wire rack. Cool completely before storing in air tight containers.

Easy Dill “Hands-Free” Fridge Pickles * (Not IC Safe)

easy-dill-fridge-pickles easy-dill-fridge-pickles2

We love this REAL SIMPLE recipe.  It’s super easy and produces “Claussen”-like pickles at a fraction of the cost, and what’s better than making it yourself?  I actually have taken out the onion and garlic and it was still good.  The next time I added onion and garlic powder and it was still good!  It’s an adaptable recipe.  For best results, refrigerate at least 2 days before eating one, or more.  I need to buy a waterproof jar, this stand in was okay but it easily leaks.  I put a note down to double the liquid in this recipe to cover the pickles, but try whatever you want.  Enjoy!

INGREDIENTS:

  • 4 Kirby cucumbers (about 1 lb), quartered lengthwise*      (*We use the 5″ small cucumbers as we couldn’t find Kirby)
  • 3/4 cup white wine vinegar**
  • 1/4 small sweet onion, such as Vidalia or Walla Walla, thinly sliced**
  • 2 cloves garlic, smashed
  • 2 tablespoons sugar
  • 1 teaspoon dill seed (I’ve even used 1 tsp. dill weed and it was fine, fresh dill is great too)
  • 1 teaspoon black peppercorns**
  • 1 bay leaf
  • kosher salt

**Known IC irritants, tread carefully!


DIRECTIONS:

  1. Place the cucumbers in a 1-qt. jar or some other container with a tight-fitting lid.
  2. In a bowl, combine the vinegar, onion, garlic, sugar, dill seed, peppercorns, bay leaf, 2 tsp. salt, and 3/4 cup hot tap water.
  3. Stir until the sugar dissolves.
  4. Pour the vinegar mixture into the jar with the cucumbers, cover, and refrigerate for at least 1 day before serving.  The pickles will last 1 week. 


Candy Cane Cookies *

20131220_134019_resized

candy-cane-peppermint-cookies-albert-12-20-2013

20131220_144341_resized


What a fun recipe this is!  I must have had these cookies as a child because I remember them!  Please reserve a few hours to make them.  When you’re twisting 1-2 teaspoon measurements of dough, it will take a while.  I made some small and for the next tray, I made them much bigger 6.5-7″. I found the twisted pattern was prettier with larger cookies. I ended up using 4 trays to make all the cookies.  I recycled my parchment paper for the 2nd batches.  I also recycled the peppermint topping for subsequent batches.  I suggest using a food processor to finely crush the peppermint candies.  You don’t want big chunks that could break someone’s teeth so I ground them very fine!  You could even do one dough in red and one in green!  That would be awesome too!  ENJOY!!


INGREDIENTS:

  • 1 cup sugar
  • 1 cup butter or margarine, softened
  • 1/2 cup milk
  • 1 teaspoon vanilla**
  • 1 teaspoon peppermint extract
  • 1 egg
  • 3 1/2 cups all-purpose flour
  • 1 teaspoon baking powder
  • 1/4 teaspoon salt
  • 1/2 teaspoon red food color
  • 2 tablespoons finely crushed peppermint candies
  • 2 tablespoons sugar

NOTES: Vanilla can irritate some IC sufferers. Please make sure you can have vanilla and peppermint.

DIRECTIONS:
  • Stir together 1 cup sugar, the butter, milk, vanilla, peppermint extract and egg in large bowl. Stir in flour, baking powder and salt. Divide dough in half. Stir food color into 1 half. Cover and refrigerate at least 4 hours.  (I did it overnight and it was fine.)
  • Heat oven to 375ºF.
  • Stir together peppermint candy and 2 tablespoon sugar; set aside.  (I used a food processor, prepare for a peppermint cloud when you open the lid).  🙂
  • For each candy cane, shape 1 rounded teaspoon dough from each half into 4-inch rope by rolling back and forth on floured surface. Place 1 red and white rope side by side; press together lightly and twist. Place on ungreased cookie sheet; curve top of cookie down to form handle of cane.
  • Bake 9 to 12 minutes or until set and very light brown. Immediately sprinkle candy mixture over cookies. Remove from cookie sheet to wire rack. Cool completely, about 30 minutes.

Mouthwatering Beer-Marinated Beef Roast

beer-beef-roast-12-2013


I love this recipe.  First I thought it was wonderful in the oven, but the second time I made it, I had the idea of putting it in the slow cooker and the result was even better!  The slow cooker method is highly suggested!  Marinate as long as possible for best flavor, preferably 24 hours in fridge!  I used a Boston roast but choose whatever you like!


INGREDIENTS:

DIRECTIONS:

  1. Use a metal skewer to poke some holes throughout the beef roast so marinade can penetrate.  (Poke every single side!)
  2. Whisk together beer, honey, soy sauce, Montreal steak seasoning, and garlic in bowl. 
  3. Pour into a large resealable plastic bag. (You may want to put the bag inside of a bowl, like I did, just in case the bag leaks).
  4. Add the roast, squeeze out excess air, and seal the bag.  Marinate in fridge at least 24 hours.
  5. Put into slow cooker on low.  Use a thermometer to measure doneness.  My “SLOW” cooker took 3 hours on low. 
  6. Alternatively, heat oven to 350° F and cook until desired doneness.  (When I did the oven method, I lowered it to 300° or it cooked too quickly)
  7. Remove from oven and cover with foil, and let rest for approximately 20 minutes before slicing. 


Potstickers with Bok Choy (Can be Vegetarian)

20131218_171432_resized


20131218_165644_resized

ABOVE: This takes practice and coordination.  One area is wrapping the potstickers, the next area is cooking them, and the far off area is them cooling! 


20131218_170357_resized

This was not only a tasty Rachael Ray recipe, but a great learning experience!  It was shockingly easy to make the ingredients, but the preparation was the difficult part.  Now I know that I prefer using egg roll wrappers instead of the wonton wrappers.  Wonton wrappers are shockingly small and once you put the recommended amount of filling in, they are nearly impossible to close without bursting open.  My son loved these – I made him a vegetarian version (all the ingredients, less pork) and he wanted more and more!  He thought they were just like the vegetarian egg rolls that he loves.  As I no longer eat Chinese food at restaurants after a recent hellish food poisoning incident, I better learn how to make all my favorites at home fast!  Bok choy was very easy to work with and I will include it in more of my recipes from here on out!  Wilting the bok choy was a fun process to see it go from this giant quantity to a small amount.  I had to overlap three wonton wrappers to get the size of potsticker that I wanted! 

If you want this vegetarian, just omit the pork and add more finely chopped and cooked veggies!  My son loved it that way!


INGREDIENTS:

  • 2 T. vegetable oil, plus more for brushing
  • 3/4 lb. ground pork
  • 1/2 lb. bok choy, finely chopped
  • 1 large clove garlic, finely chopped (I used garlic powder)
  • 1/4 tsp. crushed red pepper
  • 1 T. soy sauce, plus more for serving
  • 20 square wonton wrappers (Definitely use egg roll wrappers if you want they bigger)


DIRECTIONS:

  1. In a large skillet, heat 1 T. oil over medium heat.  Crumble in the pork and cook until done, transfer to bowl.
  2. Cook the bok choy, garlic, and red pepper in the skillet, stirring until wilted, add the soy sauce and cook 1 minute.
  3. Transfer to the bowl and stir to combine (with pork). 
  4. Place 2 T. of the filling down the center of one wonton wrapper (JUST TRY THIS, LOL, 2 T. filling will NOT fit in a wonton wrapper!)
  5. Moisten edges and fold so no filling fall outs.  Repeat with remaining wrappers.
  6. Heat the skillet over medium heat.  Brush the rolls with oil and, working in batches, cook seam side down, turning once, until golden, about 5 minutes. 

(Add a dash of toasted sesame oil and sliced scallions to soy sauce to make an amped-up dipping sauce). 


Baked Sweet Potato Fries

BHG-sweet-potato-fries-12-13


I finally found a good recipe for baked sweet potato fries and I will not lose it!  We halved this recipe and it was a perfect amount for two people.  Go by weight versus number of potatoes as they vary greatly in their sizes!

INGREDIENTS:

  • Nonstick cooking spray
  • 4 medium sweet potatoes (about 2 pounds), peeled if desired.
  • 1/4 cup olive oil
  • 1 tsp. salt
  • 1/2 tsp. black pepper
  • Snipped fresh parsley (optional, I did not use)
  • Coarse salt (optional)
  • OPTIONAL: You can add 2 cloves garlic, minced or 1/4 tsp. garlic powder with the oil.  I added a few dashes of garlic powder


DIRECTIONS:

  1. Preheat oven to 400° F.  If desired, line two baking sheets with foil.  Lightly coat foil with nonstick spray, set aside.
  2. Cut sweet potatoes lengthwise into 1/2″ thick strips.
  3. Place potatoes in large bowl. 
  4. In a small bowl combine oil, salt, and pepper.
  5. Drizzle oil mixture over potatoes, tossing to coat. 
  6. Arrange sweet potatoes in a single layer on prepared baking sheets.
  7. Bake for 15 mins, turn potatoes over, bake for 10-15 more minutes or until golden brown. 
  8. If desired, sprinkle with parsley or coarse salt. 


Chef Kate’s Meat Ragu Sauce

chef-kate-meat-ragu-12-15-13


chef-kate-meat-ragu


This is another one of Chef Kate’s recipes – a local chef who teaches at the library.  It is a great hearty meat ragu that will not leave you feeling hungry!  We used the plum crushed tomatoes, but I could not find the coveted San Marzano tomatoes she mentioned.  I usually use extra lean sirloin but since the meat is the only real fat of this recipe, I decided to go with 85%.  This is so yummy.  She advised not to use ground turkey as it doesn’t turn out right. The only change I made was subbing green peppers for the mushrooms, but we both agree it was missing something without the mushrooms (and this comes from hardcore anti-mushroom people!) LOL  No one will ever change my mind about olives, though.  Anyway….

**This is the first time in 2 years since my allium intolerance/sickness, that I cooked with real onion and garlic in small doses!  I will only cook with raw onion/garlic maybe once a month now.  Small steps…

INGREDIENTS:

  • 1 T. olive oil
  • 4 oz. white mushrooms, cleaned and diced (or green pepper)
  • 1 large onion, finely diced (I used about 1/4 cup)
  • 6 garlic cloves (I used 1 clove)
  • 1 pound ground beef (or a combination of beef and pork).
  • 1/4 tsp red pepper flakes
  • 2 T. tomato paste
  • 14.5 oz. can diced tomatoes
  • 1 T. fresh oregano or 1 tsp. dried
  • 28 oz. can crushed tomatoes (Plum, San Marzano is the best)
  • Salt and pepper, to taste


DIRECTIONS: 

  1. In a large saucepan, heat the oil over medium-high heat. Saute the mushrooms, onions, and garlic until the edges start to brown.
  2. Stir in the red pepper flakes, tomato paste, diced tomatoes, and oregano.
  3. Use the juice from the diced tomatoes to deglaze the pan and release anything sticking to the bottom of the pan.
  4. Break apart any large pieces of meat and sprinkle it over the vegetables to cook.
  5. Once the meat is in the pan, pour the crushed tomatoes over everything. 
  6. Reduce heat and let the sauce simmer for at least 30 minutes.
  7. Season with salt and pepper.

Heart-Healthy Oatmeal Pancakes

oatmeal-pancakes-12-13


oatmeal-whole-wheat-pancakes-12-13-13


I think this is a very cool recipe.  It’s from an eggless book I have, as my hubby’s allergic to eggs.  It’s called The Food Allergy Mama’s Baking Book by Kelly Rudnicki.  This recipe uses NO REFINED WHITE FLOUR.  Usually I see healthier recipes that use partial white and wheat flour but this one doesn’t dabble with refined!  The only hint is make the pancakes small, about 1/4 cup or less, they spread and will get crumbly.  This is so healthy (for a pancake) and diabetic-friendly, and carb-friendly!  If you’re eating this way for low carb or diabetic/prevention reasons, just remember don’t ruin it with loads of butter or full-sugar syrup.  ENJOY!  I just did the skillet and did not used the warmed oven. Yield about 20 pancakes.  I yielded 18.


INGREDIENTS:

  • 1 cup quick-cooking oatmeal
  • 1 cup whole-wheat flour
  • 2 tablespoons sugar
  • 6 teaspoons baking powder
  • 1/2 teaspoon salt
  • 4 tablespoons water (1/4 cup)
  • 1 1/2 cups milk (or soy or rice milk)
  • 4 tablespoons vegetable oil
  1. Preheat a cast-iron griddle or similar pan on medium heat until hot, and preheat oven to 200° F.
  2. Meanwhile, in a large bowl, combine the oatmeal, flour, sugar, baking powder, and salt with a wire whisk. 
  3. In a large measuring cup, combine the water, soy milk, and oil.
  4. Pour the water mixture into the dry ingredients, and mix with a wire whisk until just combined.  Do not overmix, a few lumps are fine!
  5. Spray the griddle with cooking spray.  Pour about 1/2 cup of batter onto the heated griddle.  Cook until small bubbles start to form on top. 
  6. Flip and cook other side until light brown.
  7. Transfer the pancakes to warmed oven and repeat (optional).