Easy Pressure Cooker Instant Pot Brown Rice *

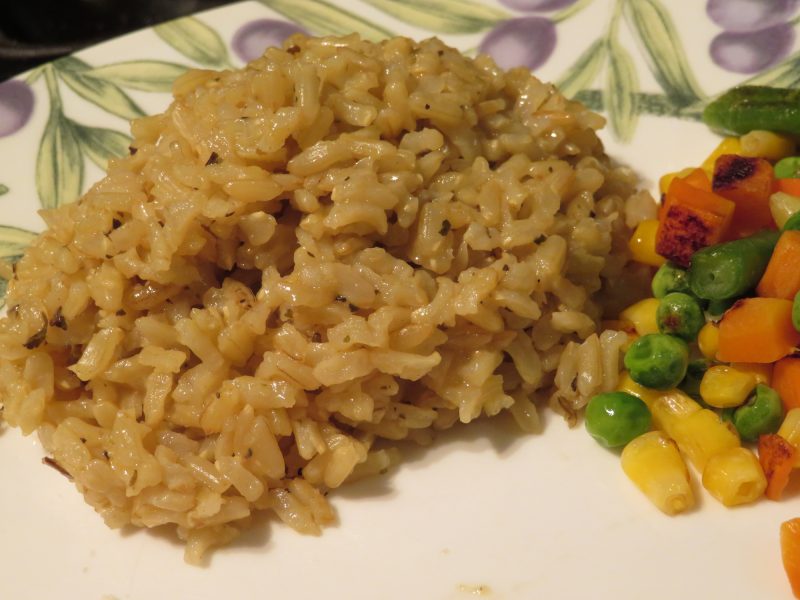
This is a perfectly simple and fast way to cook your brown rice.  The pressure cooker (my Instapot) infuses so much flavor in a short time, it shocks me!

For the first time making it, I halved it with no issues.
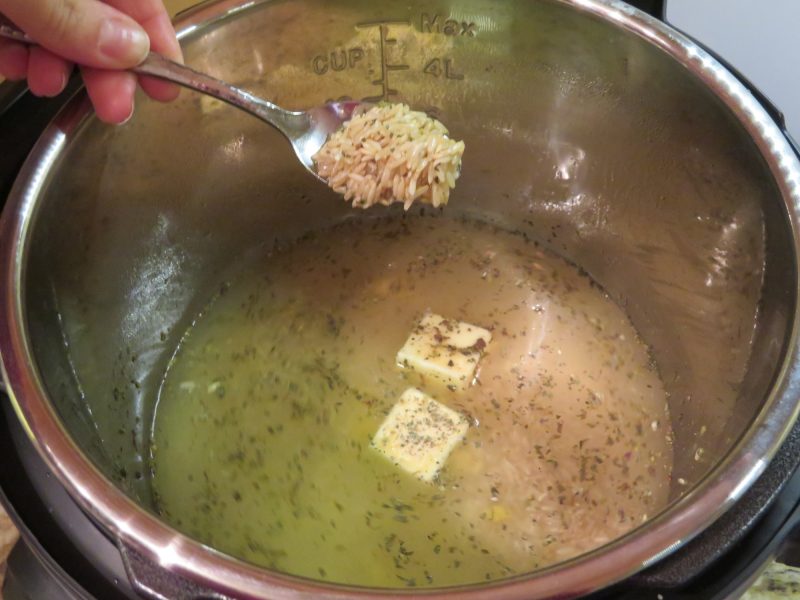
 

INGREDIENTS:

  • 4 cups water
  • 2 cups long brown rice
  • 4 chicken bouillon cubes (or, if using bouillon from jar, use 4 tsp.)*
  • 3 dashes Mrs. Dash seasoning mix, original**
  • 3 tablespoons butter

**Instead of Mrs. Dash, which has ingredients I can not have, I used a mixture of dried oregano, basil, garlic, and onion (all dried) and it turned out fabulously!

*Please make sure your chicken bouillon is safe. I was using one with soy and it was irritating me.  I found a pre-made one from ALDI that does not have soy and it’s safe!  If using pre-made broth, omit bouillon cubes, and replace 4 cups water with 4 cups chicken broth.


DIRECTIONS:

  1. Spray pressure cooker with cooking oil / spray.
  2. Add all ingredients to cooker.
  3. Set pressure cooker to “sealing”, not venting.
  4. I set it on manual for 15 minutes.  Once the correct pressure is achieved, it will countdown from 15 minutes.
  5. I slowly and carefully released the steam vent with a long spoon with a hook at the end.
  6. It wasn’t done, so I put it on “keep warm” and about 5 minutes later, it was perfect!

Jacques Pépin Criques – Potato Pancakes via the Food Processor! *


This was a superb Jacques Pepin recipe!  I saw him demonstrate this recipe on More Fast Food My Way on TV.  It’s really simple thanks to the food processor and was fun to make.  I highly suggest using a fish turner like he uses.  Make sure you place the finished pancakes on a raised rack so they do not sit directly on a plate or paper towels and get soggy!  Enjoy!

This makes about 12 potato pancakes!


INGREDIENTS:

  • 2 cups potatoes
  • 2 eggs
  • 1/2 cup diced white or yellow onion, or a few dashes onion powder*
  • 2 cloves crushes garlic
  • 2 T. potato starch
  • 1/2 tsp. baking powder
  • few pinches of salt
  • scallion/chives/or green onion*
  • Vegetable oil

NOTES: Onion can be an irritant for some patients, please tread carefully.

DIRECTIONS:

  1. Begin by peeling your potatoes, rinse any dirt off with water.  Place them in a bowl with water to cover.
  2. Once all your potatoes are peeled and in water, take one out to chop it and put the chopped potatoes directly in your food processor.  Do NOT rinse the chopped potatoes at this point; you will rinse all the starch away.
  3. Once all the potatoes are chopped and into your food processor, add the 2 eggs, chopped onion, 2 cloves of crushed garlic, potato starch, baking powder, and salt.
  4. Puree until you get an applesauce texture.
  5. Pour batter into a fresh bowl, add chopped green onions.
  6. Heat your oil in your skillet.
  7. Pour about 1/4 cup of the batter into the hot oil, you should be able to get 4 potato pancakes into a 12″ skillet.  It will take about 3 batches.  Flip pancake to cook the other side when you sneak a peek and the bottom is browned. Add more oil as needed and adjust temperature as needed for proper browning, not burning.  
  8. When you remove the cooked pancake, place it on a raised cooling rack.  You do not want to put it directly on paper towels or a plate, it will get soggy!
  9. Serve with sour cream or eat plain.  YUM!


Vegan Cornmeal Raspberry Muffins *


vegan-cornmeal-muffins1

vegan-cornmeal-muffins2

This is a tasty raspberry muffin recipe that adds the flavor of cornmeal to the mix!  It’s yummy and has that cornmeal crunch!  I used a mixture of fresh raspberries and frozen, but you could do all fresh or all frozen too!  It’s okay to mash the fresh raspberries a little if you want a more unified flavor.  I sprinkled the tops with Turbinado sugar.  A+!

——PLEASE MAKE SURE YOU TOLERATE RASPBERRIES BEFORE MAKING THIS. THEY ARE ON THE ‘TRY IT’ LIST.  MY ADVICE WOULD BE TO TRY JUST A FEW (MAYBE 3-5) WITHOUT OTHER IRRITATING FOODS AND SEE HOW YOU HANDLE IT. 

INGREDIENTS:

  • 1 And 1/2 Cups All Purpose Flour
  • 3/4 Cup Cornmeal
  • 3/4 Cup Sugar
  • 3 Teaspoons Baking Powder
  • 1 Teaspoon Baking Soda
  • 1/4 Teaspoon Salt
  • 1 Cup fresh raspberries (Can Use Frozen too, but no not thaw them!)
  • 1 And 1/4 Cups Almond Milk, or regular milk 
  • 1/4 Cup vegetable oil
  • 1 Teaspoon Vanilla Extract
  • Turbinado sugar, or brown sugar to coat the tops before baking

NOTES:

**This recipe originally had orange zest, apple cider vinegar, but they had to removed to be IC safe. See how you handle vanilla extract, for me it’s irritating. If irritating to you, omit it.

If tolerated, vanilla almond milk works well in this recipe!  


DIRECTIONS:
  1. Preheat oven to 400F for 15 minutes. Grease or line a 12-cup muffin tin with paper liners.
  2. In a large bowl combine together the dry ingredients. Take 2 tablespoons of this mixture and
  3. combine it with the berries, in a separate bowl. This will avoid the berries from sinking to the bottom of the muffins.
  4. In another bowl whisk together the milk, oil, and vanilla extract.
  5. Gently fold in the wet ingredients into the dry mixture. Stir in the berries. Do not over mix the batter.
  6. Spoon the batter into the prepared muffin tins, about 2/3rds full. I got only 11 muffins for the above measurement.
  7. Sprinkle some Turbinado or brown sugar on top of the muffins.
  8. Bake for about 15-20 minutes or until a toothpick inserted in the center of the muffin comes out clean.
  9. Transfer to a wire rack and let it cool for at least 5 minutes before removing from the pan.
TASTE:
  1. These muffins had a very nice texture from the cornmeal. The quantity of sugar mentioned in the original recipe is 1/2, which is what I used and felt that it could use some more sugar. That’s why I have increased the quantity to 3/4th cup in the recipe.
NOTES:
  1. If using frozen berries, do not thaw it.
  2. Instead of sprinkling granulated sugar on top of the muffins, using turbinado sugar would give it a much nicer look.


Cookbook Organization -Post-it Notes & Tabs Trick!

So, if you have many awesome cookbooks like me (i.e. too many, but you use them all, so there!), you need to keep things organized.  There’s nothing worse than having the perfect soup recipe for an occasion and not knowing which cookbook it’s in!  And then having to waste your time Googling for 30 minutes…

And yes, to make this work you need to invest in tabs.  For the best prices check Amazon. I know, I buy a plethora of  tabs because I love them and they don’t re-stick that well.
So, I started doing this organizational hack for cookbooks and realized it may help others.

1) “MUST KEEP THIS AND MAKE AGAIN” TABS:  The large top tabs are made of 3×3″ post-it notes cut in half.  I make sure to put them on the right side page of the cookbook so you can see the labeled tabs from the front.

2) “RECIPE TO TRY IMMEDIATELY” TABS:  The tab sticking out at the top right of the cookbook, diagonally, is only for recipes I plan to make very soon.  For instance, I will go to the grocery store, come back, and lose my recipe unless I do this!  It saves time!  You could even Sharpie label this tab with the recipe name, if you had multiple “recipes to try immediately” tabs.

3) “NEED TO TRY LATER” TABS:  The tabs sticking out on the right side are tabs labeling recipes I want to make in the future.

So, if a side tab becomes a “must make again” recipe (because I made the recipe and it is a knockout!), then I take the time to make a labeled TOP tab with the name of the recipe for easy access.

Hopefully this helps someone in internet land who loves to cook…

“Huck Finn Clone” Chicken Caesar Pita *

I’m obsessed with a Huck Finn Donut’s dish called “Chicken Caesar Pita”.  I’ve spent too much money buying it in the restaurant over and over again.  One of my friends loves it too.  I don’t need the fries or the fruit cup, so it’s not the best deal in the restaurant to order this dish AND it’s kind of simple, so why not make it at home?  It came out shockingly close to the restaurant meal!

The following ingredients are for 2 servings.  
INGREDIENTS:

  • About 1 large boneless skinless chicken breast,  (Make sure it’s filleted so it cooks evenly and quickly)
  • Coarse salt, onion powder, garlic powder*
  • Vegetable oil
  • 2 Kronos pitas (not pita pockets)
  • Shredded lettuce
  • Chopped tomato, IF tolerated*
  • Caesar salad dressing, or Italian dressing**
  • 2-3 thick slices of Swiss cheese

NOTES:

–Onion powder can be irritating to IC patients, please tread carefully.

–Tomato is a known irritant but some can tolerate it.  I can longer tolerate it.

–I used to make this recipe with bottled dressing but can no longer tolerate it.  Now I use honey and olive oil.  If you can tolerate it, try Ken’s Italian and Romano / or Ken’s Caesar dressing. It is fabulous.

DIRECTIONS:


  1. Begin by heating pan with vegetable oil, on medium heat.
  2. Fillet your boneless skinless chicken breast if necessary.  Pat dry.
  3. Season the chicken on both sides with coarse salt, onion powder, and garlic powder.
  4. Once the oil in pan is heated, add chicken breasts, flip after chicken is browned on one side, and cook thoroughly until at least 165* F.
  5. Remove to a clean plate and let chicken rest 5-10 minutes.
  6. While the chicken is resting, add your 2 pitas to the pan that has residual oil and heat.  Remove pitas to clean plates ready to serve.
  7. Chop chicken into bite-sized pieces.  Add back to pan and cover with desired amount of Swiss cheese slices.  Let cheese melt 2-3 minutes onto chicken.
  8. Add cheese-covered chicken to top of warmed pitas.
  9. Place chopped tomato and shredded lettuce on top of chicken pita.
  10. Drizzle Caesar or Italian dressing to top of veggie-covered chicken pita. If you can’t tolerate bottled dressing like I cannot, try a drizzle of honey and olive oil.
  11. Serve warm.