Delicious Won Ton Soup

wontonsoup1

wontonsoup2

We are huge fans of won ton soup and have purchased too many containers of it from take out, so I wanted to learn how to make it myself.  I have been making this a few years now.  It fills your home with a wonderful aroma of simmering broth, sesame oil (a must!), and authentic Chinese flavors.  This recipe is from About.com’s Chinese cooking section, by Rhonda Parkinson.

**I usually double this recipe because it goes so quickly.** 

INGREDIENTS

    • 18 – 24 won ton wrappers

Filling:

    • 1/2 pound boneless lean pork, chopped finely (I used ground pork for ease)
    • 1 tablespoon soy sauce
    • 1 tablespoon oyster sauce
    • a few drops sesame oil
    • 1 teaspoon sherry
    • 1/2 teaspoon sugar
    • 1 green onion, finely minced
    • 1 teaspoon cornstarch
    • 2 dashes of white pepper

Other:

    • Water for boiling won tons
    • 4 1/2 – 5 cups chicken stock
    • green onion, thinly sliced, as desired
    • a few drops sesame oil
  • Prep Time: 15 minutes
  • Cook Time: 15 minutes
  • Total Time: 30 minutes
PREPARATION

Combine all the filling ingredients in a bowl, mixing well. Lay one won ton skin in front of you. Cover the remaining won ton skins with a damp towel to keep them from drying out.
Filling the won tons: Moisten all the edges of the won ton wrapper with water. Place a heaping teaspoon of won ton filling in the center. (My tip:  Don’t overfill wonton or it’ll burst).  If these directions are too confusing, look at the graphic on the won ton package on how to fill and seal.
Fold the won ton wrapper in half lengthwise, making sure the ends meet. Press down firmly on the ends to seal.

Use thumbs to push down on the edges of the filling to center it. Keeping thumbs in place, fold over the won ton wrapper one more time. Push the corners up and hold in place between your thumb and index finger. Wet the corners with your fingers. Bring the two ends together so that they overlap. Press to seal. The finished product should resemble a nurse’s cap. Repeat with remaining won tons.

Alternate method: Place the teaspoon of filling in the middle of the wrapper and twist to seal. The final result should resemble a money bag or drawstring purse.

Boiling the won tons: Bring a large pot of water to a boil. Add the won tons, making sure there is enough room for them to move about freely. Let the won tons boil for 5 – 8 minutes, until they rise to the top and the filling is cooked through. Remove from the pot with a slotted spoon.

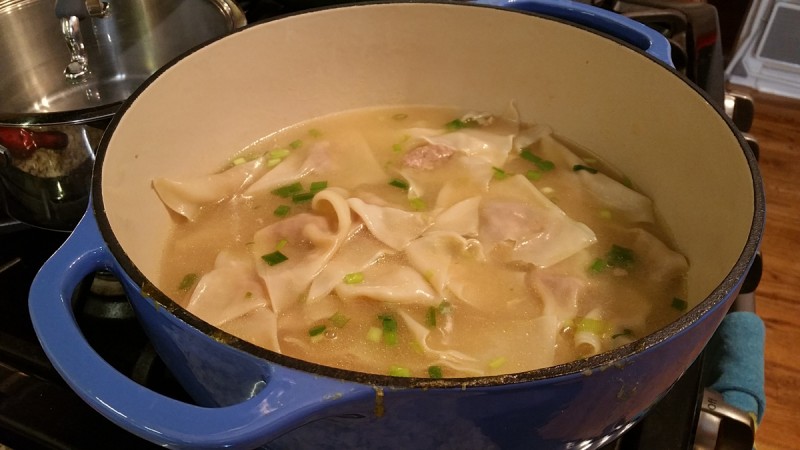
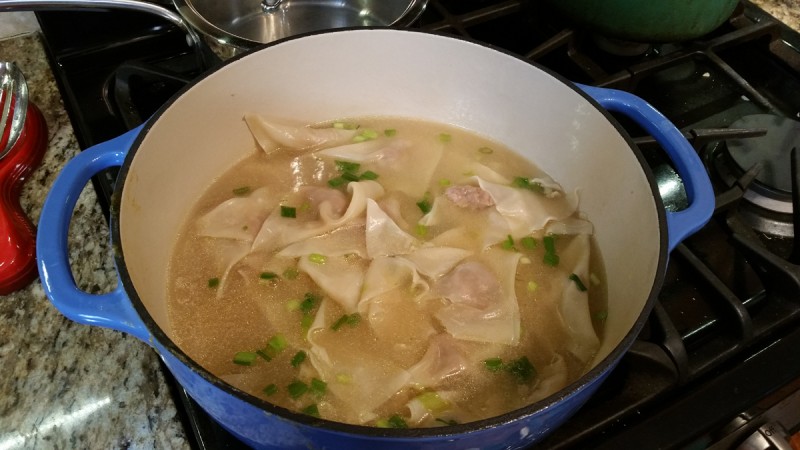
To make the soup: bring the chicken stock to a boil. Add the won tons and bring the soup back to a boil. Add the green onion, remove the pot from the heat and add the sesame oil, stirring.

My tip:  To save effort I’ve boiled the won tons in the actual chicken stock, but to each his/her own.

Ladle into soup bowls, allowing 6 won tons per person.

Yummy Garlic Bread in Bread Machine

garlic-bread-in-machine-11-2015

Garlic bread in the bread machine.  It sounds impossible, but it isn’t at all!  I made this at Thanksgiving and it came together so quickly.  It’s a fast recipe!  The only rule is to make sure you follow your bread machine’s directions of adding the ingredients in the correct order.  Most state liquid ingredients on the bottom of the bread pan, dry ingredients in the middle, and make a little well in the dry ingredients on the top, and put your yeast there.  Don’t let your yeast touch the wet ingredients on the bottom.

INGREDIENTS:

  • 1 cup warm water (110 degrees F)
  • 1 tablespoon butter (use unsalted to control the salt)
  • 1 tablespoon dry milk powder
  • 1 tablespoon white sugar
  • 1 1/2 tsp. salt
  • 1 1/2 tablespoons dried parsley (dried is fine)
  • 2 tsp. garlic powder (use your freshest garlic powder for best results)
  • 3 cups BREAD flour
  • 2 tsp. active dry yeast

DIRECTIONS:

  1. Place ingredients in the pan of the bread machine in the order recommended by the manufacturer.  (Most bread machines state this order, but check your manual first!!
    Liquid ingredients on the bottom of the bread pan
    Dry ingredients in the middle
    And make a little well in the dry ingredients on the top, and put your yeast there.  Don’t let your yeast touch the wet ingredients on the bottom.)
  2. Select basic bread cycle and 2 lb. loaf, press Start.

Crock Pot Cannellini Minestrone Soup

Crockpot Minestrone Soup

This recipe came out of a Crock Pot branded book.  It was fantastic and very healthy.  Don’t be scared of using the escarole.  It looks like lettuce; just rinse and dry it well (or use a salad spinner), and cut into ribbon strips as directed.  It really adds a lot to the appearance and provides healthy vitamins and nutrients.  Make sure you cook on low for at least 6 hours+ as you’re using hard beans.  If you don’t want to do that, get a can of the beans, drain, rinse, put in fridge.  Then add in the 30 mins to one hour of cooking.

Makes 6-8 servings, depending on serving size.

INGREDIENTS:

  • 4 cups chicken broth*
  • *(If not homemade broth, make sure the first ingredient is chicken, not salt!  If not making it myself, I buy “Better Than Bouillon”) 
  • 1 can (14.5 oz.) diced tomatoes, undrained
  • 1 can (12 oz) tomato-vegetable juice *****
  • 2 cups escarole, cut into ribbons
  • 1 cup chopped green onions
  • 1 cup chopped carrots
  • 1 cup chopped celery
  • 1 cup chopped potatoes
  • 1/4 cup dried cannellini beans, sorted and rinsed
  • 2 tablespoons chopped fresh chives (I used dried)
  • 1 tablespoon chopped, fresh flat-leaf parsley (I used fresh)
  • 1/4 tsp. salt
  • 1/4 tsp. black pepper
  • 2 ounces uncooked ditalini pasta

*****I didn’t buy the tomato-veg. juice; I used a 1/2 can of 14 oz. tomato sauce and added 1 cup vegetable broth.

DIRECTIONS:

  1. Place all ingredients except pasta into slow cooker.
  2. Stir well to combine.
  3. Cover, cook on low 6-8 hours or on high 4-6 hours.
  4. Stir in pasta.  Cover, cook 20 minutes or until pasta is tender.