Ghirardelli White Chocolate Muffins with Fresh Raspberries * (May or May Not Be IC Safe For You)

muffin1 muffin2 muffin3

I had the pleasure of spending time with my sister-in-law and her daughter and baking this recipe with them.  It was pretty straight-forward and easy, as far as baking goes!  Her new mixer came in handy.  I have owned the same Kitchenaid Artisan mixer for years and it is very easy to use.  Two controls: one side is the lock, the other is the speed.  Easy and makes light work of something like kneading bread dough or whipping cheesecake batter that must be fully mixed or else.  Also, it’s a star at creaming butter and sugar.

This recipe yielded approximately 12 servings, but for us, it yielded about 15 muffins.

INGREDIENTS:

  • 1cup butter, softened (a half normal sized stick of butter)
  • 1cup sugar
  • 1 tablespoon sugar
  • 1 large egg
  • 1 cup milk
  • 1 teaspoon vanilla extract
  • 1 tablespoon baking powder
  • 2 cups flour
  • 1 tablespoon flour
  • 8 ounces Ghirardelli white chocolate, chopped (a total of two 4 oz. bars)**
  • 1cup fresh raspberries**

**White chocolate and raspberries can irritate some IC patients, so please be careful. 


DIRECTIONS:

  1. Preheat oven to 400*F.
  2. Grease 12 standard-size muffin cups, or line with paper muffin liners.
  3. In a medium bowl, using an electric mixer on medium speed, cream together the butter and sugar until smooth.
  4. Add the egg, milk, and vanilla; blend well.
  5. In a separate large bowl, combine the baking powder, 2 cups of the flour, and the chopped white chocolate; whisk to combine.
  6. Gradually add to the butter mixture; stirring just until combined.
  7. Gently fold in the raspberries–the batter will be slightly lumpy.
  8. (The original directions on the Ghirardelli wrapper did not say to gently fold in, so we mixed them in which crushed them.  Either way, it will turn out just fine, it depends on your preference).  
  9. Fill the muffin cups 3/4 full of batter.
  10. In a small bowl, combine the 1 Tbsp. of flour and 1 Tbsp. sugar; mix thoroughly.
  11. Dust muffin tops with the sugar mixture.
  12. Bake for 20-25 minutes, or until the center of a muffin springs back when lightly pressed.
  13. Cool for 5 minutes in the tins; carefully transfer muffins to wire racks and cool further.
  14. Serve warm or cool; store in an airtight container at room temperature.


Easy Rotisserie Chicken (Well, Easy-ish) *

20150727_182500_resized20150727_172416_resized 20150727_182044_resized 20150727_182328_resized


So I’ll preface this with we are not grill masters, but we find our way and make some yummy BBQ.  Nothing special or crazy exotic, just yummy BBQ.  So here’s our recent rotisserie chicken.  I bought a antibiotic-free chicken and went for it.

About grills and rotisseries:  We own the Weber Genesis E-310 propane grill.  It was expensive but it’s worth every single penny.  We had too many cheapie grills that fell apart too early. I’m looking at you, Charbroil $300 special!  The Charbroil was junked in about two years with good care.

When you do certain grill tasks and especially use a rotisserie, you want quality silicone gloves to be able to grab the hot rotisserie and the hot meat.  We purchased the AYL Silicone heat resistant BBQ gloves on Amazon, about $19.99.  Links below.

INGREDIENTS:

  • A large whole chicken, you decide the size.
  • Smoked paprika**
  • Coarse salt
  • Freshly ground pepper**
  • Oregano

**Known IC irritants, tread carefully!

To make this IC safe, omit the paprika and pepper.  The oregano should give enough flavor.  

TOOLS:

DIRECTIONS:

  1. Remove the packaging from your whole chicken.  Remove giblets or any bonus parts you won’t need.  Don’t rinse your chicken; it just spreads bacteria all over your sink and counter.
  2. Pat your chicken dry with paper towels.
  3. Cut off chicken wings.  (If you leave the thin wings on, they will get burnt to a crisp, so do not).  You can grill them separately or save them for another use.  They crisp up very nicely on the top rack of your grill!
  4. Using kitchen twine, tie the drumsticks to the chicken or the rotisserie tightly, otherwise they will flop around while grilling.
  5. I sprayed my chicken with Original PAM spray because I was especially lazy, but you massage some softened, unsalted butter over the skin.
  6. Sprinkle and rub your spices on the whole chicken (and the wings, if using): smoked paprika gave it an awesome smokey taste, oregano, freshly ground pepper, coarse salt – or whatever spices you like.
  7. Unscrew your rotisserie and thread your whole chicken on it, making sure to insert it into the metal stabilizers.
  8. Prepare your grill per rotisserie directions.  We remove our grill grates and do indirect grilling.  We leave the left and right burners on our 3-burner grill, and turn off the middle burner.  This allows the meat to slowly cook.
  9. After about an hour, temperature your meat, away from the bone.  Cook until 165 degrees F, the safety temp.
  10. Once it has reached the safe temp., turn off your grill and leave lid open so the meat can cool and rest – a very important step.
  11. Wearing your silicone gloves, remove rotisserie with meat to a clean tray.


Southern Buttermilk Biscuits *

buttermilk-biscuits-6-15-image1 buttermilk-biscuits-6-15-image2


I found this recipe on Food.com and it sat in my “to-make” recipe folder for about a year and a half.  I thought making buttermilk biscuits would be too difficult, but it turns out it was anything but!  This really is a recipe where the food processor shines!  You could do it by hand but it will be better mixed and so much easier on you to just use a food processor!  Please make this!  It’s a very easy recipe, it just sounds complex in the directions!  It tastes so much better than canned biscuits!!

Use real buttermilk, this isn’t a circumstance where the milk soured with lemon would be good enough.

NOTE: Use unsalted butter.  If you only have salted butter on hand, omit the salt so you don’t have overly salted biscuits.  Cook and bake with unsalted butter for best results.  For serving guests, use salted butter.  

INGREDIENTS:


**Make sure your buttermilk ingredients are safe!


DIRECTIONS:

  1. Preheat your oven to 450°F.
  2. Combine the dry ingredients in a bowl, or in the bowl of a food processor.
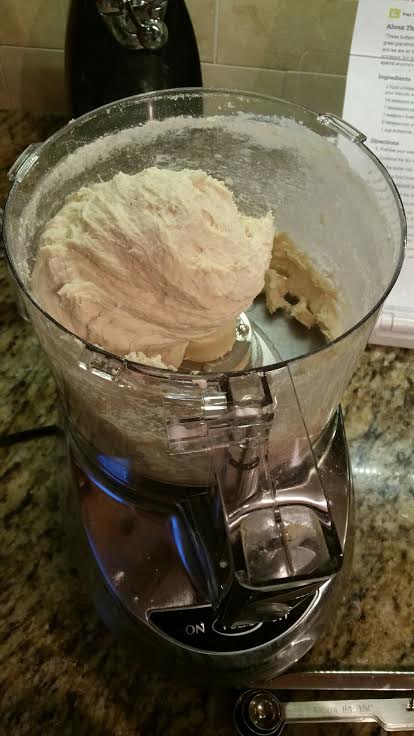
  3. Cut the butter into chunks and cut into the flour until it resembles course meal.  If using a food processor, just pulse a few times until this consistency is achieved.
  4. Add the buttermilk and mix JUST until combined.  Do not over-mix.
  5. If it appears on the dry side, add a bit more buttermilk. It should be wet.  Honestly, I like my dough a little on the dry side so I can work with it and not have extremely messy hands.  So I covered my hands in flour while manipulating the dough and added more flour when necessary.  It’s a giant mess if your dough is too wet while cutting it into shapes.  
  6. Turn the dough out onto a floured board.  Gently PAT (do NOT roll with a rolling pin) the dough out until it’s about 1/2″ thick.
  7. Flour the top of your dough lightly to prevent the cutter from sticking.  Then, use a round cutter to cut into rounds.
  8. You can gently knead the scraps together and make a few more, but they will not be anywhere near as good as the first ones.
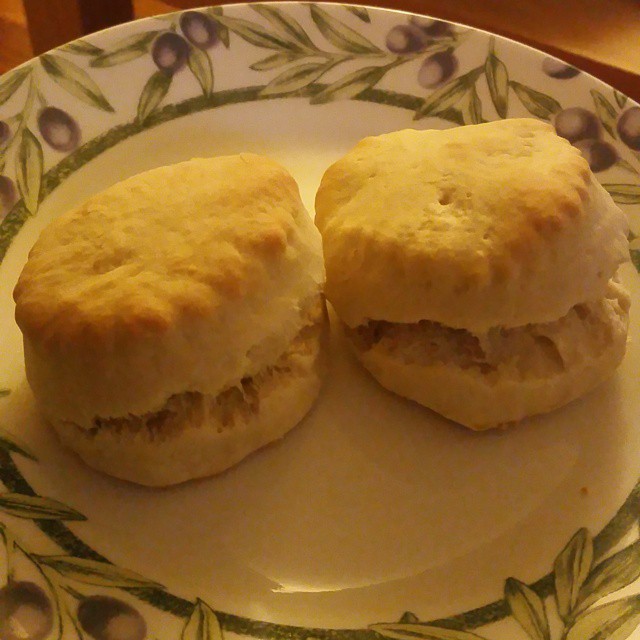
  9. I put parchment paper down on my pan and it turned out beautifully.  Place the biscuits on a cookie sheet- if you like soft sides, put them touching each other.  If you like”crusty” sides, put them about 1 inch apart- these will not rise as high as the biscuits put close together.
  10. Bake for about 10-12 minutes- the biscuits will be a beautiful light golden brown on top and bottom.  Do not overbake.


Note: The key to real biscuits is not in the ingredients, but in the handling of the dough.  The dough must be handled as little as possible or you will have tough biscuits.  I (the original author) have found that a food processor produces superior biscuits, because the ingredients stay colder and there’s less chance of overmixing.  You also must pat the dough out with your hands, lightly. Rolling with a rolling pin is a guaranteed way to overstimulate the gluten, resulting in a tougher biscuit. You can make these biscuits, cut them, put them on cookie sheets and freeze them for up to a month.  When you want fresh biscuits, simply place them frozen on the cookie sheet and bake at 450°F for about 20 minutes.

ATK’s Zucchini Bread *

americas-test-kitchen-zucchini-bread

This photo is courtesy of America’s Test Kitchen -Cook’s Illustrated.  My bread turned out slightly under-cooked and wasn’t as presentable as I normally like so I’ll just use a stock photo until I can re-make it again.  It’s very delicious bread.  I never knew zucchini could work so well into a dessert type bread!  I cooked it for the full time and even followed the directions for the toothpick coming out with just a few crumbs attached, but it tricked me.  So later, I had to cut it into slices and re-bake on a baking sheet, which helped.  I think the problem was I could only twist and drain so much moisture out of the shredded zucchini.  Next time I will use an orange squeezer to get more moisture out.  My 8 year old loved it – but then again, it is more desserty vs. a hard sell.  Enjoy!

INGREDIENTS:

  • 1 1/2 lbs. zucchini shredded
  • 1 1/4 cups packed (8 3/4 oz.) brown sugar
  • 1/4 cup vegetable oil
  • 2 large eggs
  • 1 tsp. vanilla extract
  • 1 1/2 cups (7 1/2 oz.) all-purpose flour
  • 1/2 cup (2 3/4 oz.) whole-wheat flour
  • 1 T. ground cinnamon**
  • 1 1/2 tsp. salt
  • 1 tsp. baking powder
  • 1 tsp. baking soda
  • 1/2 tsp. ground nutmeg
  • 2/3 cup walnuts (toasted and chopped), optional
  • 1 T. granulated sugar
  • Chocolate chips are a great addition (optional)**

**Known IC irritants, tread carefully! You can make this IC safe by omitting the cinnamon and choc. chips. 

DIRECTIONS:

  1. Adjust oven rack to middle position and heat oven to 325* F.
  2. Grease 8 1/2 x 4 1/2″ loaf pan.
  3. Shred zucchini with either the large holes of a box grated (or use your food processor shredding disc like I did.)
  4. Place shredded zucchini in center of dish towel.  Gather ends together and twist tightly to drain as much liquid as possible, discarding liquid (you should have 1/2 to 2/3 cup liquid).  This method didn’t work well for me, next time I will use an orange squeezer (click here) to remove even more liquid from the zucchini.
  5. Whisk brown sugar, oil, eggs, and vanilla together in medium bowl.  Fold in zucchini.
  6. Whisk all-purpose flour, whole-wheat flour, cinnamon, salt, baking powder, baking soda, and nutmeg together in large bowl.
  7. Fold in zucchini mixture until just incorporated.  Fold in walnuts, if using.  Fold in chocolate chips, if using.
  8. Pour batter into prepared pan and sprinkle with granulated sugar; it makes a nice crust.
  9. Bake until top bounces back when gently pressed and toothpick inserted in center comes out with few moist crumbs attached – 65-75 minutes.
  10. Let bread cool in pan on wire rack for 30 minutes.
  11. Remove bread from pan and let cool completely on wire rack, serve.


Eggless Waffle Recipe *

eggless-waffles

This is one of those recipes you must know about if you a) like good waffles and/or b) have an egg allergy.  Even though my husband is allergic to eggs, yet I can have eggs, I still enjoy these waffles on a monthly basis.  We’ve made them nearly every month (or every other) for over a decade – so you know they are good!  They’re from Rosemarie Emro’s “Bakin’ Without Eggs” book.

INGREDIENTS:

  • 4 cups all-purpose flour (If you want to make it healthier like we do, use up to 3 cups white whole wheat flour or whole wheat flour with 1 cup all-purpose flour.  Or, if you want to play it safer, do 50% all purpose and 50% wheat flour).
  • 2 T. + 2 tsp. baking powder
  • 1/2 tsp. salt
  • 6 T. sugar 
  • 4 cups (1 quart) buttermilk (It’s really best if you use the real buttermilk here and not that trick to make buttermilk out of milk and lemon).
  • 1/2 cup canola oil or applesauce (hint: canola oil works best!)
  • 1 tsp. real vanilla extract
  • Optional: blueberries, chocolate chips*, or your choice of small fruit to mix into batter.

**Omit chocolate chips to make it IC safe.  

DIRECTIONS:

  1. In stand mixer or in a large bowl, combine all ingredients with a whisk attachment or a whisk.  Whisk until smooth.
  2. Preheat your waffle maker according to the maker’s directions.  Decide if you need to spray your waffle maker with nonstick spray.  We have found it helps to release.
  3. Depending on the size of the wells of your waffle maker, pour just enough batter in it to fill up the wells just enough.  Read your manual for recommendations.
  4. Makes approximately 15-20 waffles, depending on size.

Delectable Green Pepper, Ham, & Tomato Quiche *

pepper-ham-quiche2 pepper-ham-quiche1


I made this recipe for my favorite quiche.  So, if you’re going to steal any recipes on my site without referencing my site name, please don’t steal this one. 🙂  To me this quiche is near perfection and I don’t think I’ll make any new quiche after this!  Slice into servings and freeze remainder in aluminum foil, if desired!

INGREDIENTS:

  • Pre-made pie crust, thawed at room temp for 15 minutes, or your own homemade pie crust
  • 1-2 tsp. extra virgin olive oil
  • 1 green (or any colored) bell pepper, top removed, seeded/membranes removed, diced**
  • 1 stalk green onion, root end removed, finely chopped**
  • 1/2 cup half and half, regular fat (or if you desire, low fat, but it’ll affect the flavor)
  • 5 large eggs, lightly beaten
  • coarse salt
  • 1 c. mixed shredded cheese (your favorite cheese is great here: swiss, mozzarella, cheddar, Parmesan, etc)
  • 6 slices deli honey ham, chopped into bite sized pieces (or your favorite ham steak, chopped)
  • 10-12 cherry tomatoes, halved**

**Known IC irritant, please tread carefully!  Please omit it, if you know it bothers you. Choose the correct colored pepper, some are irritating, some are not.  

DIRECTIONS:

  1. Preheat your oven to 350* F and place your oven rack on the middle position of the oven.
  2. Begin by placing de-thawed pie crust in your pie pan, forming around edges and sides snugly.
  3. Heat your olive oil in a skillet over medium heat until it gets shimmery and warm.  Carefully put your chopped green peppers and green onion in oil and saute until pepper pieces are lightly browned, about 5 minutes.  Remove from heat and set aside.
  4. Crack 5 eggs into a large Pyrex or bowl, making sure not to get any eggshell in bowl.  Add 1/2 cup half-and-half, and coarse salt to taste; whisk until thoroughly mixed.
  5. It’s time to assemble your quiche: sprinkle 1/2 your green pepper/onion mixture onto dough in pie plate.  Sprinkle 1/3 of the cheese. Sprinkle 1/2 your ham.
  6.  Rewhisk your egg/half and half mixture if it has separated and pour on top of quiche.
  7. Layer additional cheese, ham, and green pepper/onion mixture until it’s all used up. You can’t go wrong here.
  8. Top with halved cherry tomatoes, cut side down, so they are sticking out of quiche.
  9. Cover edges of pie plate with foil or a silicone pie guard, like I have.
  10. Bake approximately 35-38 minutes depending on your oven, until the top is lightly golden brown and a toothpick inserted into center comes out mostly clean.

Eggless Pumpkin Pie With Graham Cracker Crust *


pie1

pie2

pie3

pie4

This is an awesome pumpkin pie recipe that I make every year around this time.  It’s an eggless version of pumpkin pie with a sweet graham cracker crust.  To save time (and money), I buy the crust pre-made. I need to take a new look at the ingredients of the premade crust.  Some have cinnamon and I have to avoid that as it’s an irritant. To be really safe you can use a plain dough piecrust.

I let the pie cool at room temp. for about two hours.

Then I put it in the fridge UNCOVERED until serving.  If you cover it, even loosely with anything (Saran Wrap, aluminum foil, etc) it will create a very wet condensation on top of the pie that is unsightly but harmless.  The longer it chills before being served, the better it tastes!  I suggest at least 6 hours, but longer is great too, up to 1-2 days.  I highly suggest making this one day before you need it, it will taste much better!  After that, you can divide it into pieces and freeze or put in a storage container – but it will have some condensation.


Ingredients:

  • Graham cracker crust (make it yourself or buy it premade)^, or use a plain premade dough crust
  • 1/4 cup brown sugar
  • 2 tablespoons cornstarch
  • 1 teaspoon pumpkin pie spice mix* (For some this is not safe – see note)
  • 1 16-oz can pure, plain pumpkin (about 2 cups)
  • 1 14-oz can sweetened condensed milk**

NOTES:

  • ^Graham cracker crusts can sometimes have cinnamon and other spices.
  • **I tried low fat S.C.milk for the first time in a decade, don’t do it.  It needs that extra fat and it also helps the “mouth feel” consistency.
  • *For pumpkin pie spice, you can use McCormick or a big label, but I’ve had great success with Aldi’s brand.  They only sell it seasonally though.  ALDI’s canned pure pumpkin cost me $0.79 this year – 2016.  Whereas the big store wanted $1.99 for it.  (Same ounces and quality!)
    *I can no longer use pumpkin pie spice, it’s too irritating for me. So I omit it. Unfortunately, it definitely will have less flavor but is safe. 🙁 

Directions:

  1. Remove packaging (plastic, paper etc) from graham pie crust or plain dough crust, until you have just the foil pan and the crust inside remaining.  Set aside.
  2. In a large bowl, combine all ingredients: brown sugar, cornstarch, pumpkin pie spice (if safe for you!), pure pumpkin, and condensed milk. You can use a mixer here but I found that a good whisk will do the job just fine and there’s less to clean.
  3. With a spoon or whisk, stir until completely mixed.
  4. Pour mixture into unbaked pie shell; smooth top of pie with spatula.
  5. Put your filled pie on top of a baking sheet just in case anything spills, but it shouldn’t.  Cover edge with pie guard, if desired.
  6. Bake on middle or top rack for 55-60 minutes until knife/toothpick inserted in center comes out clean.
  7. Cool on wire rack until mostly cool.  Then refrigerate for many hours before serving, as the flavor amps up the longer it’s refrigerated!  I make it the day before it’s needed and it’s especially good.


Savory Stuffing In The Slow Cooker *

Crockpot stuffing


This is an awesome recipe for a very savory, flavored stuffing all made in your slow cooker!  No bland Stove Top stuffing here, this is very flavored and awesome.  If you like super plain stuffing, look elsewhere.  Easy and wonderful – give it a try when that boxed mix bores you!  From Food.com #49609.


INGREDIENTS:


  • 1/2 teaspoon savory
  • 1/2 teaspoon thyme
  • 12 cups lightly toasted bread, cubes (For me this ended up being 16 slices, or a loaf, of wheat bread)
  • 1/4 cup fresh parsley, chopped
  • 1 1/2 cups chicken stock or 1 1/2 cups vegetable stock

**Onions can irritate some IC patients. Please make sure all these herbs are safe before using them. Personally, I’d just reduce down to fresh parsley, salt, and dried thyme. 


DIRECTIONS:

  1. In a large fry pan saute onions, celery and apple in butter until onion is just translucent.
  2. Stir in sage, marjoram, salt, savory and thyme.
  3. Combine vegetable mixture with the bread cubes and parsley.
  4. Toss well.
  5. Pour stock over mixture, tossing well.
  6. Spoon into your crock-pot.
  7. Cover and cook on high for one hour.
  8. Reduce to low and continue cooking for 2-3 hours, stirring every hour.
  9. As stated, for Vegetarians you can use vegetable stock.

A Simple Frittata Recipe *

simple frittata


I just made this simple frittata.  When you feel like taking it easy or avoiding the carbs of a quiche crust, this is perfect.  There are so many combinations for meats, cheeses, and veggies here, it’s all up to your preferences.  This is from my Better Homes & Gardens cookbook.  I used chopped cooked ham, swiss and shredded cheddar cheese, and 2 cups mixture of broccoli, and four colors of sweet bell peppers)!  ENJOY!

INGREDIENTS:

  • 8 eggs, lightly beaten
  • 1 T. snipped fresh basil or 1 tsp. dried basil, crushed
  • 1/4 tsp. salt
  • 2 T. olive oil (Use the full amount here)
  • 1 1/2 cups fresh veggies, such as summer squash, broccoli, and/or sweet peppers.
  • 1/3 cup thinly sliced green onions (about 3)**
  • 1/2 cup chopped COOKED ham, kielbasa, chicken or turkey
  • 1/2 cup shredded cheddar, Monterey Jack, or Swiss cheese (about 2 oz)

NOTE: Onions can bother some people, so tread carefully. Use onion powder or omit.  


DIRECTIONS:

  1. In a large Pyrex or bowl, combine eggs, basil and salt – set aside.
  2. Heat oil in a large boilerproof skillet – I used a 10″ steel skillet.  Add veggies and green onions.  Cook, uncovered, over medium heat about 5 minutes or until veggies are crisp-tender, stirring occasionally.
  3. Stir in meat.
  4. Pour egg mixture that was set aside, over veggie mixture in skillet.  Cook over medium heat.
  5. As mixture sets, run a spatula around edge of skillet, lifting egg mixture so uncooked portion flows underneath.
  6. Continue cooking and lifting edges until egg mixture is almost set (surface will be moist).
  7. Sprinkle with cheese.
  8. Preheat broiler.  Place skillet under broiler, 4-5″ from heat.  Broil 1-2 mins or until top is just set and cheese melts.  (Or preheat oven to 400, bake for 5 mins until top is set).

Downeast Maine Pumpkin Bread *

maine-pumpkin-bread1 maine-pumpkin-bread2


I was in search of a new pumpkin bread recipe.  I have a recipe that is eggless but wanted to try one with eggs.  This one fits the bill and was excellent with a little whip cream on top.  I reduced the sugar from 3 cups to 2.5 cups (1 cup white, 1.5 cup brown sugar) and it was just sweet enough, but not too sweet.  I wanted it more on the savory side.  Also, to make it healthier, I did 1 cup wheat flour and 2.5 cups regular white flour.  Great recipe!


INGREDIENTS:

  • 1 (15 ounce) can pumpkin puree

  • 4 eggs

  • 1 cup vegetable oil

  • 2/3 cup water

  • 3 cups white sugar (or a mixture of brown sugar and white)

  • 3 1/2 cups all-purpose flour (a mixture of wheat and all purpose worked for me)

**Known IC irritants, tread carefully!  Check all the spices and make sure they’re safe for you! To make this safe, omit the cinnamon and only use safe spices.


DIRECTIONS:

  1. Preheat oven to 350 degrees F (175 degrees C). Grease and flour three 7×3 inch loaf pans.   I just used two standard loaf pans, even though this recipe says three 7×3″ pans. 
  2. In a large bowl, mix together pumpkin puree, eggs, oil, water and sugar until well blended.
  3. In a separate bowl, whisk together the flour, baking soda, salt, cinnamon, nutmeg, cloves and ginger.
  4. Stir the dry ingredients into the pumpkin mixture until just blended. Pour into the prepared pans.
  5. Bake for about 50 minutes in the preheated oven. Loaves are done when toothpick inserted in center comes out clean.