Homemade Natural Spray Cleaner

P1090256

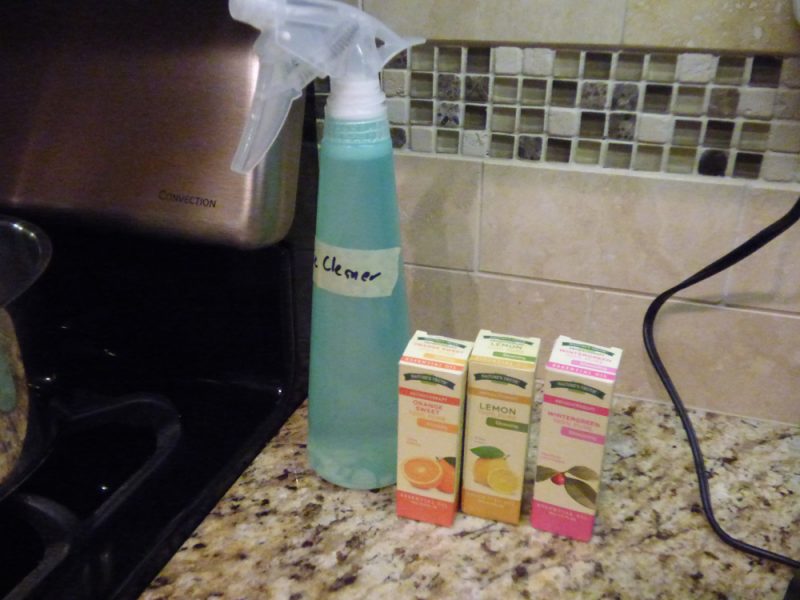
First off, excuse the horribly unclear photo, my camera decided to be annoying and I didn’t want to retake the photo, (laziness).

If you are looking for a natural homemade all purpose spray cleaner, look no further.  This is a great one. I use it on granite countertops, toilet lids, glass, windows, and more.

I haven’t been able to tolerate scents for many years now.  In addition, heavy cleaners like Fabuloso, Fantastic, or anything heavy or with scent murder my lungs and give me big fragrance reactions.  Instead of not cleaning, I used to use 7th generation unscented dish soap in toilets, on coutners, etc.  I still do, but I supplement with this wonderful spray cleaner.

borax

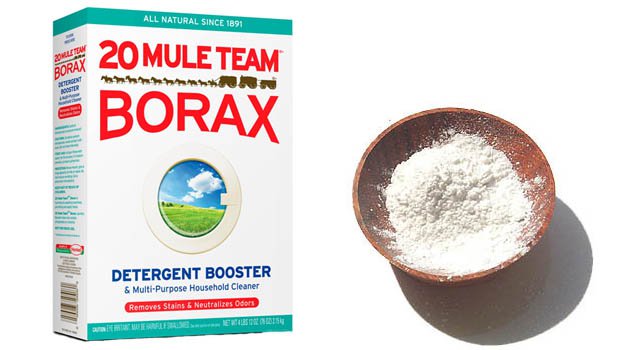
Most people have all the ingredients on hand, probably excluding the Borax powder, but it is cheap and easy to use.  You will find a big box of it in the laundry department for maybe $4.  Borax also descents your clothes.  We are very allergic to fragrances.  If we’ve been to a location where heavy perfumes were present and that scent seeped into your clothes, we use Borax powder in our washing machine.    I put maybe a 1/4 cup into my washer, put it on the soak mode, before it starts washing.  It removes most if not all of the scent.

Safe essential oil scents that do not bother me are orange, lemon, and wintergreen scent.  Those are my favorites.


YOU WILL NEED:

  • A trigger spray bottle (label it with what’s inside for safety)
  • Essential oils in your choice of scent (optional)
  • Funnel for ease!
  • 2 Tbsp. distilled white vinegar
  • 1 tsp. Borax
  • 1/8 cup dish soap (I use unscented 7th Generation dish soap)
  • 1 cup hot water


DIRECTIONS:

  1. Put a funnel into your labeled and empty trigger bottle.
  2. Pour vinegar, borax, and hot water into bottle.
  3. Continue filling spray bottle with cool water, leaving enough head-space room for dish soap and essential oils.  
  4. Add dish soap last.  You do not need to shake this.
  5. Optional: add a few drops of your favorite essential oil, or mix a few scents for a new creation.  I add about 10 drops.


Print Friendly, PDF & Email

Creamy Panna Cotta

panna-cotta-small

I finally made this Italian dessert that I’ve always wanted to try: panna cotta.  It’s a cold Italian custard that magically doesn’t have eggs – great for anyone but especially my egg-allergic husband.  It’s creamy, has the perfect amount of flavor, is fattening, and too delicious.  It’s self-limiting as it’s high in fat and very satisfying!  Don’t die without eating or making this yourself.  I warned you! 

P1080840

Only buy your heavy cream if it has one ingredient.  Otherwise it’s an impostor for this recipe (or any recipe).

P1080839

NOTE: Use only the highest quality ingredients for this dessert.  Do not use heavy cream that has any ingredient other than “heavy cream”.  It shouldn’t have any additives, preservatives, or carageenan etc.  DO NOT use any low fat or reduced fat ingredients.  This is not the time.  Only use full fat sour cream and unadulterated heavy cream.  No substitutes at all.  Follow the directions precisely and you will have an awesome dessert that you won’t believe.

INGREDIENTS:

  • 2 teaspoons gelatin sprinkled over 2 tablespoons room temperature water
  • 3 cups heavy cream (no substitutes)
  • 2/3 cup sugar
  • 1 1/2 tsp. vanilla extract
  • pinch of salt
  • 3/4 cup sour cream (whole fat!)
  • Fresh berries, honey, or other toppings (optional)

DIRECTIONS:

  1. In a small bowl or ramekin: prinkle the gelatin in the room temp. water and let it sit for 5-10 minutes to gel up.
  2. Heat the cream, sugar, and salt until it’s very warm and steam starts to come off of it.  Do not boil it!  
  3. Turn off the heat, add the gelatin, and mix it until it’s melted.
  4. Cool for 5 minutes.
  5. While stirring with one hand, slowly pour a cup of the warm cream into the sour cream.  Mix well.
  6. Continue slowly adding the warm cream to the sour cream mixture, a cup at a time, until you’re done.
  7. Add the vanilla and stir.
  8. Pour it into 6 small, un-greased custard cups.
  9. Cover each cup with plastic wrap to avoid a skin forming.
  10. Refrigerate overnight (mandatory).
  11. I did not un-mold them, but to un-mold: run a sharp knife around the edge.  If necessary, dip the knife into hot water.

Tips: This can be served with honey, fruit syrups, or add a caramel cream.  I chose to go simple and just add fresh berries.


Print Friendly, PDF & Email

Chicken and Spinach Pasta Casserole * (Not IC Safe)

P1080350

This is an exceptional, savory, and yummy recipe.  The textures and flavors melt together so well.  It’s one of our favorites – and I’m not an extreme fan of casseroles, but this one is top notch.  One of the keys is getting the spinach quite dry.  I’m pretty confident you and your family will love this recipe.  It works well with plain cream cheese (even Neuchatel) or the flavored chive & onion variety.  Enjoy!

**A can of Hunt’s basil, garlic, and oregano diced tomatoes work very well here.  

INGREDIENTS:

  • 8 oz. uncooked rigatoni (use whole wheat, if you wish)
  • 1 tablespoon extra virgin olive oil
  • 1 cup chopped onion (or use onion powder like I do)**
  • 1 (10 oz.) pack frozen spinach, thawed
  • 3 cups cubed, cooked chicken breasts
  • 1 (14 oz.) can Italian-style diced tomatoes, undrained**
  • 1 (8 oz.) container Philadelphia chive & onion cream cheese (or use plain or Neuchatel).**
  • 1/2 tsp. salt and 1/2 tsp. freshly ground pepper**
  • 1 1/2 cups shredded mozzarella cheese

**Known IC irritants, tread carefully!


DIRECTIONS:

  1. Prepare rigatoni according to package directions.
  2. Spread oil on bottom of 11×7″ baking dish.  I used a 9×13″ pan; I like a roomy dish.
  3. Add onion in a single layer.  Bake at 375 F for 15 minutes or just until tender.  Transfer onion to large bowl, set aside.
  4. Drain chopped spinach well, pressing between towels.
  5. Stir in rigatoni, spinach, chicken, and next four ingredients into onion in bowl – OR add your onion powder here.
  6. Spoon mixture into dish and sprinkle evenly with shredded mozzarella cheese.
  7. Bake covered at 375 F for 30 minutes.
  8. Uncover and bake 15 minutes more or until bubbly.


Print Friendly, PDF & Email

Chicken Wild Rice Soup

chicken-wild-rice-soup

🙂  Behold, my favorite soup!  I have always loved cream of chicken with rice and especially when wild rice is added.  This recipe has been one of our soup favorites for years.  It always turns out great.  Be sure to add the chicken fond (crusty brown bits on the bottom of your saute pan to the soup).  I usually shred my carrot, but I forgot this time, and chopped it.  It was just fine.  I used red bell pepper instead of green.  Do your own thing with this recipe but follow the basic rules of the amounts of butter, flour, broths etc. I didn’t plan for this recipe and had just milk on hand, so I subbed that for the half-and-half.

For the wild rice, it can be difficult to find.  I found my Lundberg’s wild rice blend (with brown rice) at Whole Foods and later at Jewel.  It’s also available on Amazon.

Use the amount of chicken that works for you.  It doesn’t have to be 3-4 cups.

This recipe makes a lot – but that’s great because you won’t be able to get enough of it.  For single people, you may need to freeze some.

I used my Lodge 7.8 QT. Dutch oven for this recipe for maximum space – Available here on Amazon.  I’m sure the 6 QT. would have fit this recipe well, also.


INGREDIENTS:

  • 3-4 cups cooked, cubed chicken 

  • ¼ cup unsalted butter (I used 3 T. unsalted butter)

  • 4 stalks celery, sliced (about 2 cups)

  • 2 medium carrots, coarsely shredded (2 cups)

  • 1 large onion, chopped (1 cup), or powder

  • 1 medium green bell pepper, chopped (1 cup)

  • Heaping 1/4 cup all-purpose flour

  • 1 tsp. salt

  • ½ tsp. pepper (freshly ground, please!)

  • 3 cups cooked wild rice (1 cup dry=3 cups finished rice)

  • 2 cups water

  • 3 cups chicken broth (I prefer this brand, if not homemade: Better Than Bouillon Chicken Base).

  • 3 cups half-and-half (or milk).  

  • 2/3 cup slivered almonds, toasted, optional but awesome

  • ½ cup chopped Italian flat-leaf parsley

DIRECTIONS:

  1. Begin by getting a head start on cooking your wild rice.  You will need the wild rice pretty soon in step #4.

  2. In a large pot or large Dutch oven, melt unsalted butter over medium heat.

  3. Cook celery, carrots, onion, and bell pepper in butter about 10-15 minutes, stirring frequently, until tender.

  4. Stir in flour, salt, and pepper.  Keep it moving to cook the flour but not too long it burns.

  5. Stir in cooked wild rice, water, and broth.

  6. Heat to boiling, reduce heat.

  7. Cover and simmer 15 mins, stirring occasionally.

  8. Stir in half-and-half or milk, almonds, and parsley. Add cooked chicken.

  9. Heat just until hot (do not boil or soup may curdle and you don’t want to over-cook chicken.)

  10. Serve hot with fresh parsley snipped on top, with crackers, bread, etc.


Print Friendly, PDF & Email

Delicious Double Chocolate Chip Zucchini Muffins * (Not IC Safe)

zucc1

I made this recipe from Damndelicious.net.  I had wanted to try a double chocolate muffin but with a hidden health gem – shredded and peeled zucchini – and Greek yogurt.  I will make these FOREVER and I mean it.  They’re delicious and you’d never even care there’s zucchini in there.  Why? Because you can’t taste it!  My son and his friend didn’t care, and my son is picky!

zucc2

The flavor is really unique and deliciously chocolatey.

zucc3 zucc4 zucc5 zucc6

Her website says they’re only about 195 calories each.  There is absolutely no need to add frosting and ruin this.  It’s delicious all by itself.  I felt zero need for frosting to hide the healthiness.  It’s not a cupcake, it’s a healthy muffin that doesn’t taste too “healthy”!

I am so happy I found this recipe – it’s dessert but it’s on the healthy side – WIN!  

TIP—->  *I always use unsalted butter for baking and cooking, and add the salt myself on the side (when necessary) to control the salt.

INGREDIENTS:

  • 1 cup all-purpose flour
  • 3 tablespoons unsweetened cocoa powder**
  • 1 teaspoon baking powder
  • 1/2 teaspoon cinnamon**
  • 1/4 teaspoon salt
  • 2/3 cup sugar
  • 1/4 cup vegetable oil*
  • 1/4 cup plain Greek yogurt (I used Fage 2%, my favorite).
  • 2 large eggs (I used Egg-land’s Best cage free eggs).  
  • 2 tablespoons unsalted butter, melted
  • 1 teaspoon vanilla extract**
  • 1 cup shredded zucchini (and peeled).
  • 1/2 cup chocolate chips (I used 1/2 milk choc. chips and 1/2 semisweet chips).** 

*Apple sauce can be substituted.

INSTRUCTIONS:

  • Preheat oven to 350 degrees F. Line a 12-cup standard muffin tin with paper liners or coat with nonstick spray; set aside.
  • In a large bowl, combine flour, cocoa powder, baking powder, cinnamon and salt.
  • In a large glass measuring cup or another bowl, whisk together sugar, vegetable oil, Greek yogurt, eggs, butter and vanilla.
  • Pour mixture over dry ingredients and stir using a rubber spatula just until moist. Stir in zucchini and chocolate chips.  No need to squeeze zucchini dry.  Check your oven’s real operating temp, but my convection oven needed about 24-25 minutes for the toothpick to come out clean.
  • Scoop the batter evenly into the muffin tray. Place into oven and bake for 20-22 minutes, or until a tester inserted in the center comes out clean.
  • Remove from oven and cool on a wire rack.


Print Friendly, PDF & Email

A Simple Roast Chicken in the Slow Cooker

P1080076 P1080077

I love this recipe because there is barely any work involved and you have a flavorful chicken with the right texture in just a few hours.  I opt for the low setting of 6.5 to 8 hours, and I use an instant read thermometer to ensure the chicken has reached 165 degrees F to be safe.

This isn’t an exact science: you can use the mixture of spices you like, but this is a general recommendation.  Regarding paprika, I like to use mostly if not all SMOKED paprika.  It lends so much unique aroma it’s unbelievable.

Don’t skip for a second on the aluminum foil balls.  Yes, it does use a good amount of foil but it’s worth it and the result will definitely not be the same without those balls to raise the big chicken up.

**I also like to add onion powder, dried oregano, and smoked paprika.  Don’t add liquids.

Pair with brown rice and a salad, as pictured.


INGREDIENTS:

  • 1 (4 LB.) whole chicken, insides removed and patted dry with a paper towel
  • 1/2 tablespoon paprika (try the smoked paprika!)
  • 2 tablespoons all purpose seasoning (Like Archer Farms House Blend, or make your own like I did)
  • 1/2 tablespoon garlic powder
  • 1 tsp coarse salt
  • (Optional add onion powder and/or dried oregano per your tastes.)


DIRECTIONS:

  1. Mix together paprika, all purpose seasoning, garlic powder, and salt.  (Add any other optional spices here like onion powder or dried oregano).
  2. Ball up 4 medium-sized balls made from aluminum foil.  Place in bottom of your slow cooker.  These four balls act as a stand for your chicken to keep it from drying out.
  3. Rub seasoning from step #1 over your entire chicken (including pouring some of the seasoning inside the chicken’s cavity).
  4. Place the chicken on top of the foil balls.  Cover and cook on high for 4 – 4 1/2 hours, or on the low setting for 6.5 to 8 hours.
  5. Always check the temperature with a thermometer to make sure it gets to 165* F for food safety.
  6. Let rest 15-20 minutes to seal in the juices before carving.
Print Friendly, PDF & Email

Black Bean Burgers via Food.com * (Not IC Safe)

P1070893

After the blended mixture came out of the food processor, it’s mixed with bread crumbs, and the other can of drained and rinsed black beans.  Then salt and pepper is added.

P1070895

Grilled on grill pan or grilled outside.  The left two burgers were overdone, but fine, since I had to run to get the door.


P1070896

The burgers do well on bread or on just lettuce too.  Either way is delicious.

These black bean burgers from Food.com, courtesy of Sandra Lee, are really good!  I’m not just saying that to healthify my cooking blog; they really are good.  I also love that when you go to clean your grill pan, there isn’t globs of beef fat that you have to scoop up.  Just a soapy sponge takes care of it all.  We had to omit the egg because of an egg allergy, but I added 1 tsp. of vegetable oil to help it all stick together.  I used fresh garlic but replaced the onion with onion powder and it turned out fine.

The picture shows the burger on bread but the next day I had another black bean burger plain, without bread, and enjoyed it more!  Bread can get too ‘bready’ and ruin a burger for me.

Makes 5-6 burgers.  Prep time 15 mins, cook time 12 mins, total time 27 mins.

INGREDIENTS:

  • 1/2 medium yellow onion, roughly chopped (or onion powder)**
  • 1 tablespoon chopped garlic
  • 2 (15-ounce) cans black beans, rinsed and drained, divided —(I only use low sodium)**
  • 2 tablespoons freshly chopped cilantro leaves**
  • 2 teaspoons freshly chopped parsley leaves
  • 1 egg
  • 1/2 teaspoon red pepper flakes**
  • 1/2 cup bread crumbs
  • Salt and fresh ground black pepper**
  • 4 hamburger rolls


  • Optional Toppings:
    1 tomato, sliced**
    4 small Romaine lettuce leaves, or any other type you have on hand
    1/4 cup ketchup**

**Known IC irritants, tread carefully!

DIRECTIONS:

  1. Heat a grill or grill pan over medium-low heat.
  2. In a food processor, pulse onion and garlic until finely chopped. Add 1 can black beans, cilantro, parsley, egg, and red pepper flakes and pulse to combine.
  3. Transfer mixture to a large mixing bowl, add the remaining can of black beans and the bread crumbs. Season with salt and pepper, to taste, and mix until well combined.
  4. Divide remaining mixture into 5-6 portions and form into patties. Place on hot oiled grill over medium-low heat and cook about 6 minutes a side or until heated through. Toast hamburger buns on a grill. Place a burger on the bottom of each bun. Top with lettuce, tomato and ketchup, if desired. Cover the burgers with the top of the bun and serve.
Print Friendly, PDF & Email

Slow-Cooker Beef Short Ribs from Food.com * (Not IC Safe)

beef-short-ribs

**Photo by SharonChen above.  My photos weren’t great this time and I forgot a photo of the finished product – I probably was too hungry!

slow-cooker-beef-short-ribs-2-2016  slow-cooker-beef-short-ribs-2-2016-3rd


slow-cooker-beef-short-ribs-2-2016-2nd

Okay, these photos won’t show how amazing this dish is.  There’s no way to explain just how good these beef ribs turned out.  The red wine vinegar tenderized them to perfection.  It’s so good just remembering this dish I want to make it again!

Well, I had to make changes to this dish but it turned out A+.  I used onion powder instead of the chopped onion and omitted the chili sauce because I can’t have it.  It was still wonderful!

INGREDIENTS:

  • 1/3 cup flour
  • 1 teaspoon salt
  • 1/4 tsp. pepper**
  • 2 1/2 lbs. boneless beef short ribs (this part can range in price from $12-20)
  • 1/4 cup unsalted butter
  • 1 cup chopped onion**
  • 1 cup beef broth
  • 3/4 cup red wine vinegar**
  • 3/4 cup brown sugar
  • 1/4 cup chili sauce**
  • 2 tablespoons ketchup**
  • 2 tablespoons Worcestershire sauce**
  • 2 tablespoons minced garlic
  • 1 tsp. chili powder**

**Known IC irritants, tread carefully!

SIMPLE DIRECTIONS:

  1. Put flour, salt, and pepper in a bag.
  2. Add ribs and shake to coat.
  3. Brown ribs in butter in large skillet.
  4. Put browned ribs in slow cooker.
  5. In same skillet, combine remaining ingredients.
  6. Bring to a boil, stirring, then pour over ribs.
  7. Cover lid and cook on low for approximately 9 hours.
Print Friendly, PDF & Email

Black Forest Pumpernickel Bread Machine Loaf * (Not IC Safe)

pumpernickel-bread-2016-smaller

ABOVE: The ingredients in the bread machine pan.  Liquids on bottom, dry ingredients in the middle, and then the yeast on top.  

ABOVE: A few minutes into kneading, open the lid and use a spatula to push any flour pockets down into the dough.  (See top left flour pocket clinging to side of bread pan).


You’re going to love this dark pumpernickel bread with the ease of the bread machine!  It’s just perfect.  I’m not a fan of light rye bread, but I love dark rye!  It does use three types of flour, which may turn off some people, but it’s quite easy.  **Always store your whole wheat flour in the freezer; ask America’s Test Kitchen if you doubt me.  **Spray your measuring cup before pouring molasses into it for easy cleanup!  Enjoy!

INGREDIENTS:

  • 1 1/8 cups warm water
  • 1/3 cup molasses
  • 1 1/2 tablespoon canola oil
  • 1 1/2 cup bread flour
  • 1 cup rye flour
  • 1 cup whole wheat flour
  • 1 1/2 tsp. salt
  • 3 tablespoons cocoa powder**
  • 1 1/2 tablespoons caraway seeds**?
  • 2 tsp. active dry yeast

**Known IC irritants, tread carefully!

DIRECTIONS:

  1. Place all ingredients into your bread maker according to the manual directions.  (Order does matter a lot!)
  2. Select crust type to “light”.
  3. Select basic setting.
  4. Select 1.5 pound loaf size.
  5. Press start.
  6. Check while the machine is kneading.  If mixture is too dry, add a tablespoon of warm water at a time.  If mixture is too wet, add a small amount of flour at a time.  The mixture should go into a ball form and be just soft and slightly sticky to the touch.
Print Friendly, PDF & Email

Easy Roasted Red Pepper Hummus * (Not IC Safe)

P1070449 P1070450 P1070451 P1070453

This is an ultra easy recipe that comes together in minutes in the food processor.  Try it soon and you’ll be amazed.  I like that it doesn’t use tahini paste (sesame seed paste) as I bought a big jar of that one time, used it once, and the rest went bad.  It replaces that tahini with sesame oil and the latter is something I always have on hand.  I had to omit the lemon juice but it turned out very well without it.  The jarred roasted bell pepper, which is often sold in vinegar, turns the hummus a beautiful orange/reddish color.  Enjoy!

INGREDIENTS:

  • 1 (15 oz) can garbanzo beans, drained, liquid reserve
  • 1 tablespoon lemon juice**
  • 1 tablespoon quality extra virgin olive oil
  • 1 clove garlic, crushed
  • 1/2 tsp. ground cumin**
  • 1/2 tsp. salt
  • 2 drops seasame oil, or to taste (optional)
  • 1 length of roasted red pepper from a jar – allow the vinegar to drip off, cut into 1-2″ chunks. (I used Krinos brand)**
  • Serve with baby carrots, celery sticks, pita chips, or toasted bread to dunk into the hummus.

**Known IC irritants, tread carefully!

DIRECTIONS:

  1. Blend garbanzo beans, lemon juice, olive oil, garlic, cumin, salt, and sesame oil in the food processor.
  2. Stream reserved bean liquid from can into the mixture as it blends until desired consistency is achieved. (I only had to add about half the bean liquid to get the desired thickness).
  3. Serve with dippable veggies and starches mentioned above.
Print Friendly, PDF & Email