Spinach and Ricotta-Stuffed Shells (Has Tomato) *

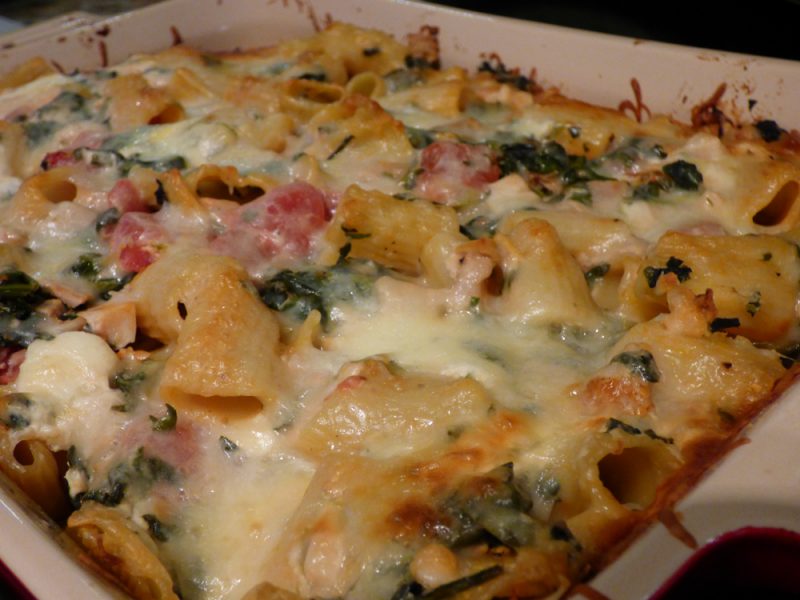
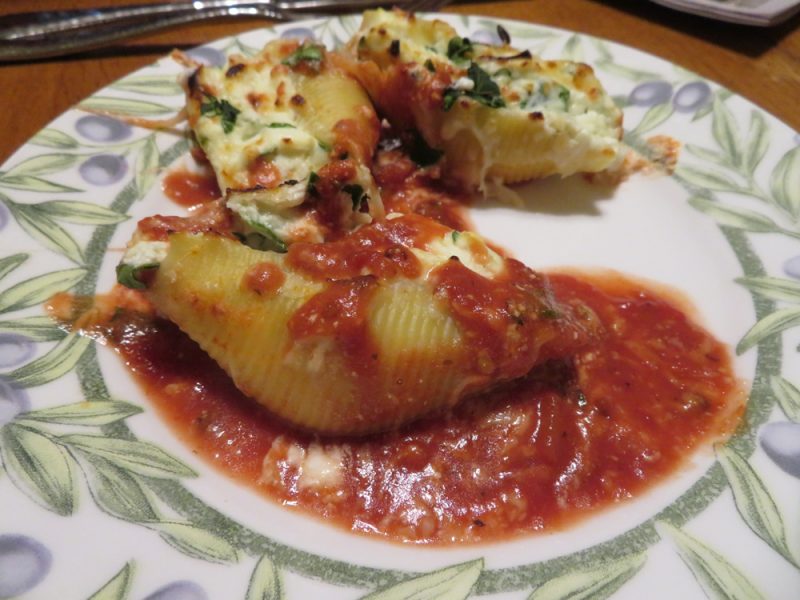
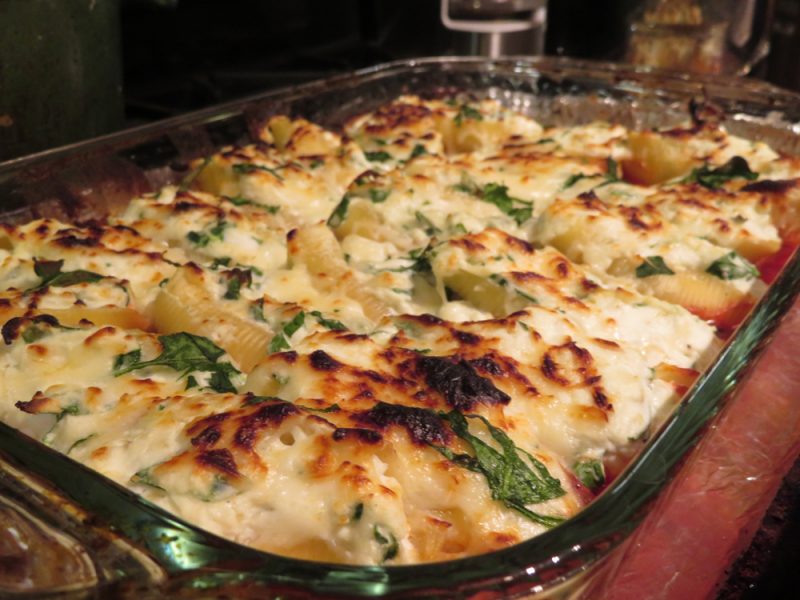
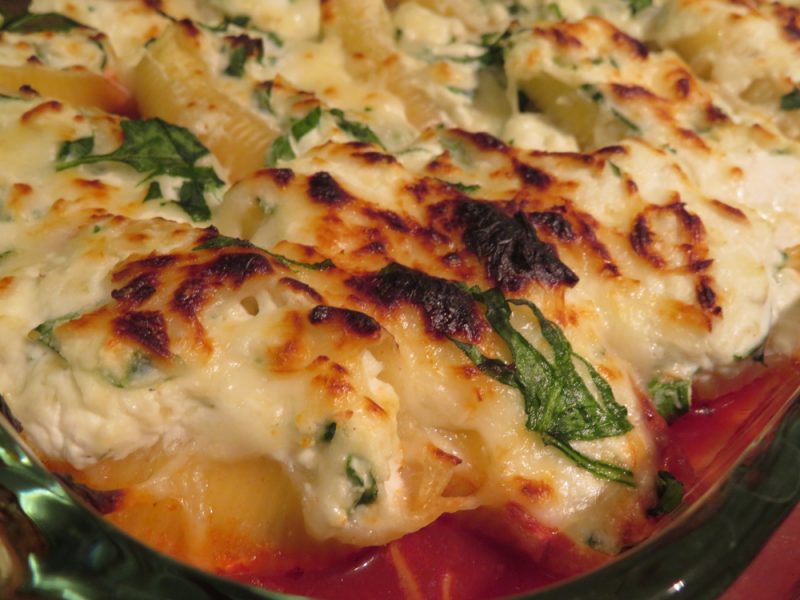
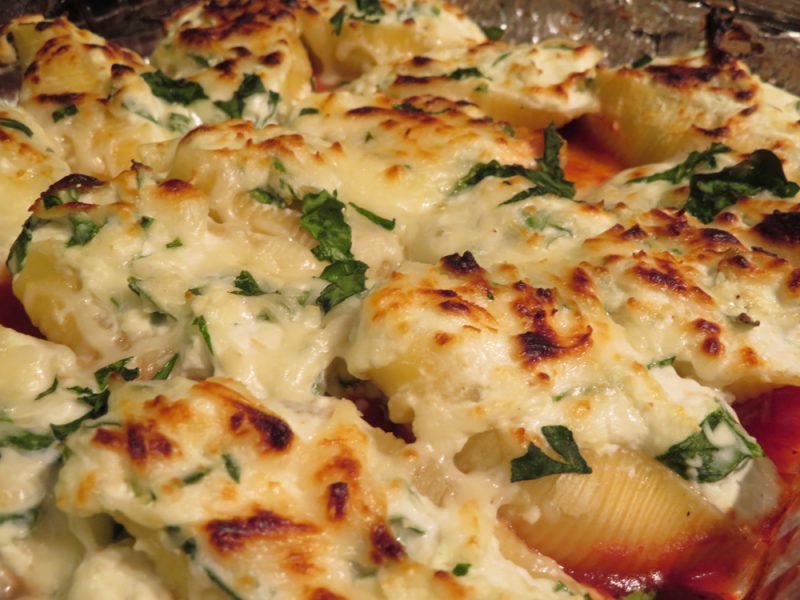
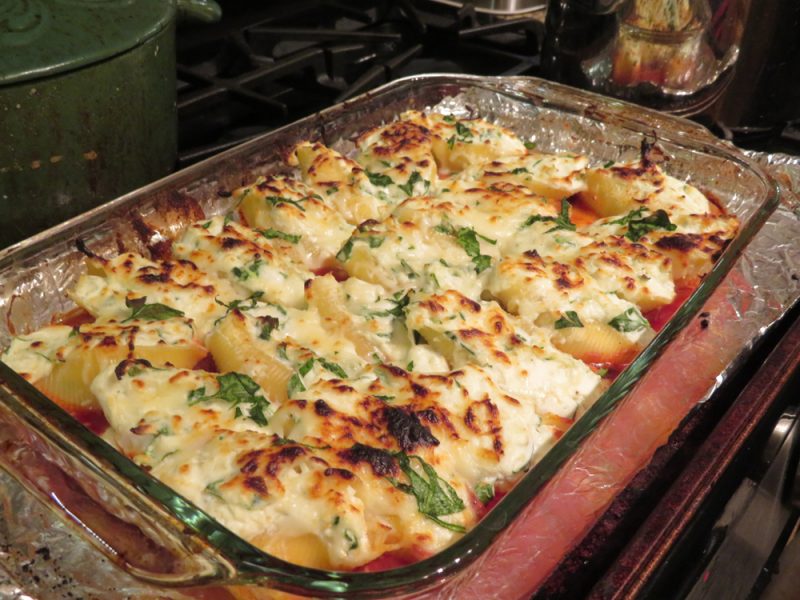
This is really good.  It smells like an Italian restaurant.  If you need to reduce the calories or fat, just substitute part skim ricotta instead of whole fat ricotta.  It’s creamy and wonderful.  Don’t skip the broiler step as it slightly chars the shredded mozzarella topping and gives it a great flavor!  Next time, I’d chop some fresh parsley on top.  

Warning: This recipe is fantastic but it’s not IC safe, given it has tomatoes.  I made sure it isn’t tagged “I.C. Bladder Safe”.  If you can tolerate tomato in quantity, try it.  I used to be able to eat this, now that my IC has worsened, I can’t even have one bite.  

INGREDIENTS:

  • 20 jumbo pasta shells (about half a 12-ounce box)
  • One  24-ounce jar marinara sauce
  • Two  15-ounce containers ricotta
  • 2 cups baby spinach, chopped
  • 1/2 cup grated Parmesan (2 ounces)
  • kosher salt
  • 1/2 cup grated mozzarella (4 ounces)


DIRECTIONS:

  1. Set an oven rack to the highest position and heat oven to 400° F.
  2. Cook the pasta according to the package directions. Drain and run under cold water to cool.
  3. Spread the marinara sauce in the bottom of a large broiler-proof baking dish.
  4. In a bowl, combine the ricotta, spinach, Parmesan, ½ teaspoon salt.
  5. Spoon the mixture into the shells and place them on top of the sauce.
  6. Sprinkle the shells with the mozzarella and bake until heated through, 10 to 12 minutes.
  7. Increase heat to broil. Broil the shells until cheese begins to brown, 2 to 5 minutes.
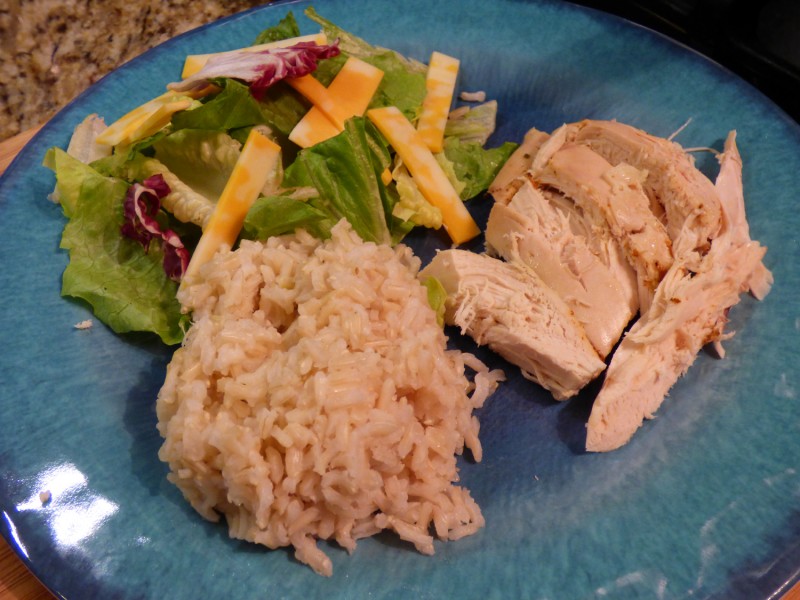
  8. Serve with the salad, if desired.

NOTE: If you want to sneak in an extra helping of green vegetables into this dish, chop up cooked green beans, broccoli, or asparagus and fold it into the ricotta mixture along with the spinach.  

Food.com’s Honey BBQ Chicken Wings * (Not IC Safe)


I will never lose this recipe.  It makes perfect honey BBQ chicken wings.  They are to die for.  It’s a perfect sauce and just enough sweet and savory flavors.  I won’t try another chicken wing recipe!  Just make them and you’ll see for  yourself! 🙂

For anyone sensitive to spicy foods or who has an I.C. bladder like me, I omitted the cayenne and hot sauce and it turned out just perfect!

INGREDIENTS:

  • 18 chicken wings, that have tips discarded, and have been split into two parts: the drumette and the wingette.
  • 1 teaspoon kosher salt
  • 1 teaspoon garlic powder
  • 1teaspoon sugar
  • 1teaspoon paprika**
  • 1teaspoon black pepper**
  • cooking spray

    SAUCE INGREDIENTS:

  • 1 cup barbecue sauce, preferably Hickory Smoke Flavor**
  • 1cup honey
  • 2 tablespoons ketchup**
  • 2 tablespoons hot sauce**
  • 4 tablespoons butter
  • 1teaspoon garlic powder

**Known IC irritants, tread carefully!

DIRECTIONS:

  1. Preheat the oven to 375.
  2. Season the wings with the salt, garlic, pepper, cayenne, sugar, and paprika.
  3. Spray a cookie sheet with a generous spray of cooking spray.
  4. Place the wings in a single layer on the cookie sheet, and place in the oven.
  5. Cook for 35-40 minutes, depending on the size of the wings, turning once.
  6. While they are baking, make the sauce by slowly simmering the sauce ingredients over the lowest heat.
  7. When the wings are done baking, carefully dip them in the sauce, and place them back in the oven for another 5 minutes, or until the sauce is bubbling.
  8. ENJOY!


Tzatziki Sauce

tzaziki-sauce1

20160626_142242 20160626_142456

A perfect sauce to accent your gyros, chicken in a pita, and more.  Or you can use it as a dip for veggies.  Just make sure you use whole fat yogurt.  Next time I’ll be sure to use Greek – or it gets a little watery as time goes on.  But it was excellent!  I frozen the remainder.

INGREDIENTS:

  • 1 cup Greek whole milk yogurt
  • 1 English cucumber, seeded, finely grated and very drained 
  • 2 cloves garlic, finely minced
  • 1 tsp. lemon zest, plus 1 tbsp. fresh lemon juice
  • 2 tbsp. chopped fresh dill
  • kosher salt and freshly ground pepper

DIRECTIONS:

  1. (Hand mixing is preferred as a blender can lead to too wet of a concoction).
  2. In a medium bowl, whisk together the yogurt, cucumber, garlic, lemon zest, lemon juice and dill.  Season with salt and pepper.  Chill.

Tip: For extra flavor, add some olive oil and some coarsely chopped fresh mint.


Chicken and Spinach Pasta Casserole * (Not IC Safe)

P1080350

This is an exceptional, savory, and yummy recipe.  The textures and flavors melt together so well.  It’s one of our favorites – and I’m not an extreme fan of casseroles, but this one is top notch.  One of the keys is getting the spinach quite dry.  I’m pretty confident you and your family will love this recipe.  It works well with plain cream cheese (even Neuchatel) or the flavored chive & onion variety.  Enjoy!

**A can of Hunt’s basil, garlic, and oregano diced tomatoes work very well here.  

INGREDIENTS:

  • 8 oz. uncooked rigatoni (use whole wheat, if you wish)
  • 1 tablespoon extra virgin olive oil
  • 1 cup chopped onion (or use onion powder like I do)**
  • 1 (10 oz.) pack frozen spinach, thawed
  • 3 cups cubed, cooked chicken breasts
  • 1 (14 oz.) can Italian-style diced tomatoes, undrained**
  • 1 (8 oz.) container Philadelphia chive & onion cream cheese (or use plain or Neuchatel).**
  • 1/2 tsp. salt and 1/2 tsp. freshly ground pepper**
  • 1 1/2 cups shredded mozzarella cheese

**Known IC irritants, tread carefully!


DIRECTIONS:

  1. Prepare rigatoni according to package directions.
  2. Spread oil on bottom of 11×7″ baking dish.  I used a 9×13″ pan; I like a roomy dish.
  3. Add onion in a single layer.  Bake at 375 F for 15 minutes or just until tender.  Transfer onion to large bowl, set aside.
  4. Drain chopped spinach well, pressing between towels.
  5. Stir in rigatoni, spinach, chicken, and next four ingredients into onion in bowl – OR add your onion powder here.
  6. Spoon mixture into dish and sprinkle evenly with shredded mozzarella cheese.
  7. Bake covered at 375 F for 30 minutes.
  8. Uncover and bake 15 minutes more or until bubbly.


A Simple Roast Chicken in the Slow Cooker

P1080076 P1080077

I love this recipe because there is barely any work involved and you have a flavorful chicken with the right texture in just a few hours.  I opt for the low setting of 6.5 to 8 hours, and I use an instant read thermometer to ensure the chicken has reached 165 degrees F to be safe.

This isn’t an exact science: you can use the mixture of spices you like, but this is a general recommendation.  Regarding paprika, I like to use mostly if not all SMOKED paprika.  It lends so much unique aroma it’s unbelievable.

Don’t skip for a second on the aluminum foil balls.  Yes, it does use a good amount of foil but it’s worth it and the result will definitely not be the same without those balls to raise the big chicken up.

**I also like to add onion powder, dried oregano, and smoked paprika.  Don’t add liquids.

Pair with brown rice and a salad, as pictured.


INGREDIENTS:

  • 1 (4 LB.) whole chicken, insides removed and patted dry with a paper towel
  • 1/2 tablespoon paprika (try the smoked paprika!)
  • 2 tablespoons all purpose seasoning (Like Archer Farms House Blend, or make your own like I did)
  • 1/2 tablespoon garlic powder
  • 1 tsp coarse salt
  • (Optional add onion powder and/or dried oregano per your tastes.)


DIRECTIONS:

  1. Mix together paprika, all purpose seasoning, garlic powder, and salt.  (Add any other optional spices here like onion powder or dried oregano).
  2. Ball up 4 medium-sized balls made from aluminum foil.  Place in bottom of your slow cooker.  These four balls act as a stand for your chicken to keep it from drying out.
  3. Rub seasoning from step #1 over your entire chicken (including pouring some of the seasoning inside the chicken’s cavity).
  4. Place the chicken on top of the foil balls.  Cover and cook on high for 4 – 4 1/2 hours, or on the low setting for 6.5 to 8 hours.
  5. Always check the temperature with a thermometer to make sure it gets to 165* F for food safety.
  6. Let rest 15-20 minutes to seal in the juices before carving.

Black Bean Burgers via Food.com * (Not IC Safe)

P1070893

After the blended mixture came out of the food processor, it’s mixed with bread crumbs, and the other can of drained and rinsed black beans.  Then salt and pepper is added.

P1070895

Grilled on grill pan or grilled outside.  The left two burgers were overdone, but fine, since I had to run to get the door.


P1070896

The burgers do well on bread or on just lettuce too.  Either way is delicious.

These black bean burgers from Food.com, courtesy of Sandra Lee, are really good!  I’m not just saying that to healthify my cooking blog; they really are good.  I also love that when you go to clean your grill pan, there isn’t globs of beef fat that you have to scoop up.  Just a soapy sponge takes care of it all.  We had to omit the egg because of an egg allergy, but I added 1 tsp. of vegetable oil to help it all stick together.  I used fresh garlic but replaced the onion with onion powder and it turned out fine.

The picture shows the burger on bread but the next day I had another black bean burger plain, without bread, and enjoyed it more!  Bread can get too ‘bready’ and ruin a burger for me.

Makes 5-6 burgers.  Prep time 15 mins, cook time 12 mins, total time 27 mins.

INGREDIENTS:

  • 1/2 medium yellow onion, roughly chopped (or onion powder)**
  • 1 tablespoon chopped garlic
  • 2 (15-ounce) cans black beans, rinsed and drained, divided —(I only use low sodium)**
  • 2 tablespoons freshly chopped cilantro leaves**
  • 2 teaspoons freshly chopped parsley leaves
  • 1 egg
  • 1/2 teaspoon red pepper flakes**
  • 1/2 cup bread crumbs
  • Salt and fresh ground black pepper**
  • 4 hamburger rolls


  • Optional Toppings:
    1 tomato, sliced**
    4 small Romaine lettuce leaves, or any other type you have on hand
    1/4 cup ketchup**

**Known IC irritants, tread carefully!

DIRECTIONS:

  1. Heat a grill or grill pan over medium-low heat.
  2. In a food processor, pulse onion and garlic until finely chopped. Add 1 can black beans, cilantro, parsley, egg, and red pepper flakes and pulse to combine.
  3. Transfer mixture to a large mixing bowl, add the remaining can of black beans and the bread crumbs. Season with salt and pepper, to taste, and mix until well combined.
  4. Divide remaining mixture into 5-6 portions and form into patties. Place on hot oiled grill over medium-low heat and cook about 6 minutes a side or until heated through. Toast hamburger buns on a grill. Place a burger on the bottom of each bun. Top with lettuce, tomato and ketchup, if desired. Cover the burgers with the top of the bun and serve.

Slow-Cooker Beef Short Ribs from Food.com * (Not IC Safe)

beef-short-ribs

**Photo by SharonChen above.  My photos weren’t great this time and I forgot a photo of the finished product – I probably was too hungry!

slow-cooker-beef-short-ribs-2-2016  slow-cooker-beef-short-ribs-2-2016-3rd


slow-cooker-beef-short-ribs-2-2016-2nd

Okay, these photos won’t show how amazing this dish is.  There’s no way to explain just how good these beef ribs turned out.  The red wine vinegar tenderized them to perfection.  It’s so good just remembering this dish I want to make it again!

Well, I had to make changes to this dish but it turned out A+.  I used onion powder instead of the chopped onion and omitted the chili sauce because I can’t have it.  It was still wonderful!

INGREDIENTS:

  • 1/3 cup flour
  • 1 teaspoon salt
  • 1/4 tsp. pepper**
  • 2 1/2 lbs. boneless beef short ribs (this part can range in price from $12-20)
  • 1/4 cup unsalted butter
  • 1 cup chopped onion**
  • 1 cup beef broth
  • 3/4 cup red wine vinegar**
  • 3/4 cup brown sugar
  • 1/4 cup chili sauce**
  • 2 tablespoons ketchup**
  • 2 tablespoons Worcestershire sauce**
  • 2 tablespoons minced garlic
  • 1 tsp. chili powder**

**Known IC irritants, tread carefully!

SIMPLE DIRECTIONS:

  1. Put flour, salt, and pepper in a bag.
  2. Add ribs and shake to coat.
  3. Brown ribs in butter in large skillet.
  4. Put browned ribs in slow cooker.
  5. In same skillet, combine remaining ingredients.
  6. Bring to a boil, stirring, then pour over ribs.
  7. Cover lid and cook on low for approximately 9 hours.

Delicious Won Ton Soup

wontonsoup1

wontonsoup2

We are huge fans of won ton soup and have purchased too many containers of it from take out, so I wanted to learn how to make it myself.  I have been making this a few years now.  It fills your home with a wonderful aroma of simmering broth, sesame oil (a must!), and authentic Chinese flavors.  This recipe is from About.com’s Chinese cooking section, by Rhonda Parkinson.

**I usually double this recipe because it goes so quickly.** 

INGREDIENTS

    • 18 – 24 won ton wrappers

Filling:

    • 1/2 pound boneless lean pork, chopped finely (I used ground pork for ease)
    • 1 tablespoon soy sauce
    • 1 tablespoon oyster sauce
    • a few drops sesame oil
    • 1 teaspoon sherry
    • 1/2 teaspoon sugar
    • 1 green onion, finely minced
    • 1 teaspoon cornstarch
    • 2 dashes of white pepper

Other:

    • Water for boiling won tons
    • 4 1/2 – 5 cups chicken stock
    • green onion, thinly sliced, as desired
    • a few drops sesame oil
  • Prep Time: 15 minutes
  • Cook Time: 15 minutes
  • Total Time: 30 minutes
PREPARATION

Combine all the filling ingredients in a bowl, mixing well. Lay one won ton skin in front of you. Cover the remaining won ton skins with a damp towel to keep them from drying out.
Filling the won tons: Moisten all the edges of the won ton wrapper with water. Place a heaping teaspoon of won ton filling in the center. (My tip:  Don’t overfill wonton or it’ll burst).  If these directions are too confusing, look at the graphic on the won ton package on how to fill and seal.
Fold the won ton wrapper in half lengthwise, making sure the ends meet. Press down firmly on the ends to seal.

Use thumbs to push down on the edges of the filling to center it. Keeping thumbs in place, fold over the won ton wrapper one more time. Push the corners up and hold in place between your thumb and index finger. Wet the corners with your fingers. Bring the two ends together so that they overlap. Press to seal. The finished product should resemble a nurse’s cap. Repeat with remaining won tons.

Alternate method: Place the teaspoon of filling in the middle of the wrapper and twist to seal. The final result should resemble a money bag or drawstring purse.

Boiling the won tons: Bring a large pot of water to a boil. Add the won tons, making sure there is enough room for them to move about freely. Let the won tons boil for 5 – 8 minutes, until they rise to the top and the filling is cooked through. Remove from the pot with a slotted spoon.

To make the soup: bring the chicken stock to a boil. Add the won tons and bring the soup back to a boil. Add the green onion, remove the pot from the heat and add the sesame oil, stirring.

My tip:  To save effort I’ve boiled the won tons in the actual chicken stock, but to each his/her own.

Ladle into soup bowls, allowing 6 won tons per person.

Crock Pot Cannellini Minestrone Soup

Crockpot Minestrone Soup

This recipe came out of a Crock Pot branded book.  It was fantastic and very healthy.  Don’t be scared of using the escarole.  It looks like lettuce; just rinse and dry it well (or use a salad spinner), and cut into ribbon strips as directed.  It really adds a lot to the appearance and provides healthy vitamins and nutrients.  Make sure you cook on low for at least 6 hours+ as you’re using hard beans.  If you don’t want to do that, get a can of the beans, drain, rinse, put in fridge.  Then add in the 30 mins to one hour of cooking.

Makes 6-8 servings, depending on serving size.

INGREDIENTS:

  • 4 cups chicken broth*
  • *(If not homemade broth, make sure the first ingredient is chicken, not salt!  If not making it myself, I buy “Better Than Bouillon”) 
  • 1 can (14.5 oz.) diced tomatoes, undrained
  • 1 can (12 oz) tomato-vegetable juice *****
  • 2 cups escarole, cut into ribbons
  • 1 cup chopped green onions
  • 1 cup chopped carrots
  • 1 cup chopped celery
  • 1 cup chopped potatoes
  • 1/4 cup dried cannellini beans, sorted and rinsed
  • 2 tablespoons chopped fresh chives (I used dried)
  • 1 tablespoon chopped, fresh flat-leaf parsley (I used fresh)
  • 1/4 tsp. salt
  • 1/4 tsp. black pepper
  • 2 ounces uncooked ditalini pasta

*****I didn’t buy the tomato-veg. juice; I used a 1/2 can of 14 oz. tomato sauce and added 1 cup vegetable broth.

DIRECTIONS:

  1. Place all ingredients except pasta into slow cooker.
  2. Stir well to combine.
  3. Cover, cook on low 6-8 hours or on high 4-6 hours.
  4. Stir in pasta.  Cover, cook 20 minutes or until pasta is tender.


ATK Beginner’s Pulled Pork (Slow Cooker) * (Not IC Safe)

ATK_pulled-pork-12-2015-firstpic

ATK-pulled-pork-12-17-2nd pic

ATK-pulled-pork-12-17-3rdpic

This recipe is EXCEPTIONALLY NOT I.C. Safe. I’m keeping this up for people searching for this recipe, but please don’t make it if you have an IC bladder.

This is a great entree from America’s Test Kitchen via the slow cooker.  It is quick to assemble, but it’s just a waiting game in two stages.  First the spice and refrigerate overnight waiting game and then the slow cooker wait.  Pay attention to trim and quarter the roast.  I bought two 2.5 lb. roasts and halved them, but you can purchase a 5 lb. roast and quarter it – if you can find it.  We could only find 2.5 lb-ers and 8 lb-ers.  I omitted the cayenne pepper and it was just fine.  Enjoy!

To un-carb-ify it, I didn’t opt for a bun.  It would have looked better in the photo, but it is what it is.

–Honestly, I didn’t go through the braising liquid step.  Maybe next time!  I was tired and didn’t want another step.  It was just fine without doing that process, but next time I’ll try it.    

INGREDIENTS:

  • 1/4 cup packed brown sugar, plus extra as needed
  • 1/4 cup sweet paprika**
  • 1 T. garlic powder
  • 1 T. onion powder**
  • 1 T. ground cumin**
  • 1 tsp. cayenne pepper**
  • Salt and pepper**
  • One 5LB. boneless pork butt roast, trimmed and quartered
  • 1 cup BBQ sauce, (plus extra for serving if desired)**
  • Cider vinegar**

**Known IC irritants, tread carefully!

DIRECTIONS:

  1. Combine brown sugar, paprika, garlic powder, onion powder, cumin, cayenne, and 1/2 tsp. salt in a bowl.
  2. Using fork, prick pork all over.  Rub sugar mixture over pork, wrap tightly in plastic wrap, and refrigerate for 8-24 hours.
  3. Unwrap pork and place in slow cooker.
  4. Spread BBQ sauce evenly over pork, cover, and cook until pork is tender 9-11 hours on low OR 5-7 hours on high.  (Mine took about 8 hours on low in my Crock Pot).
  5. Transfer pork to large bowl, let cool slightly, then shred into bite size pieces, discarding excess fat.  Cover to keep warm.
  6. Let braising liquid settle for 5 mins, then remove fat from surface using a large spoon.  Season with salt, pepper, sugar, and vinegar to taste (if desired).
  7. Toss shredded pork with one cup of the braising liquid, add more liquid as needed to keep meat moist.  Serve with BBQ sauce.