Quick Elephant Ears *

elephant-ear


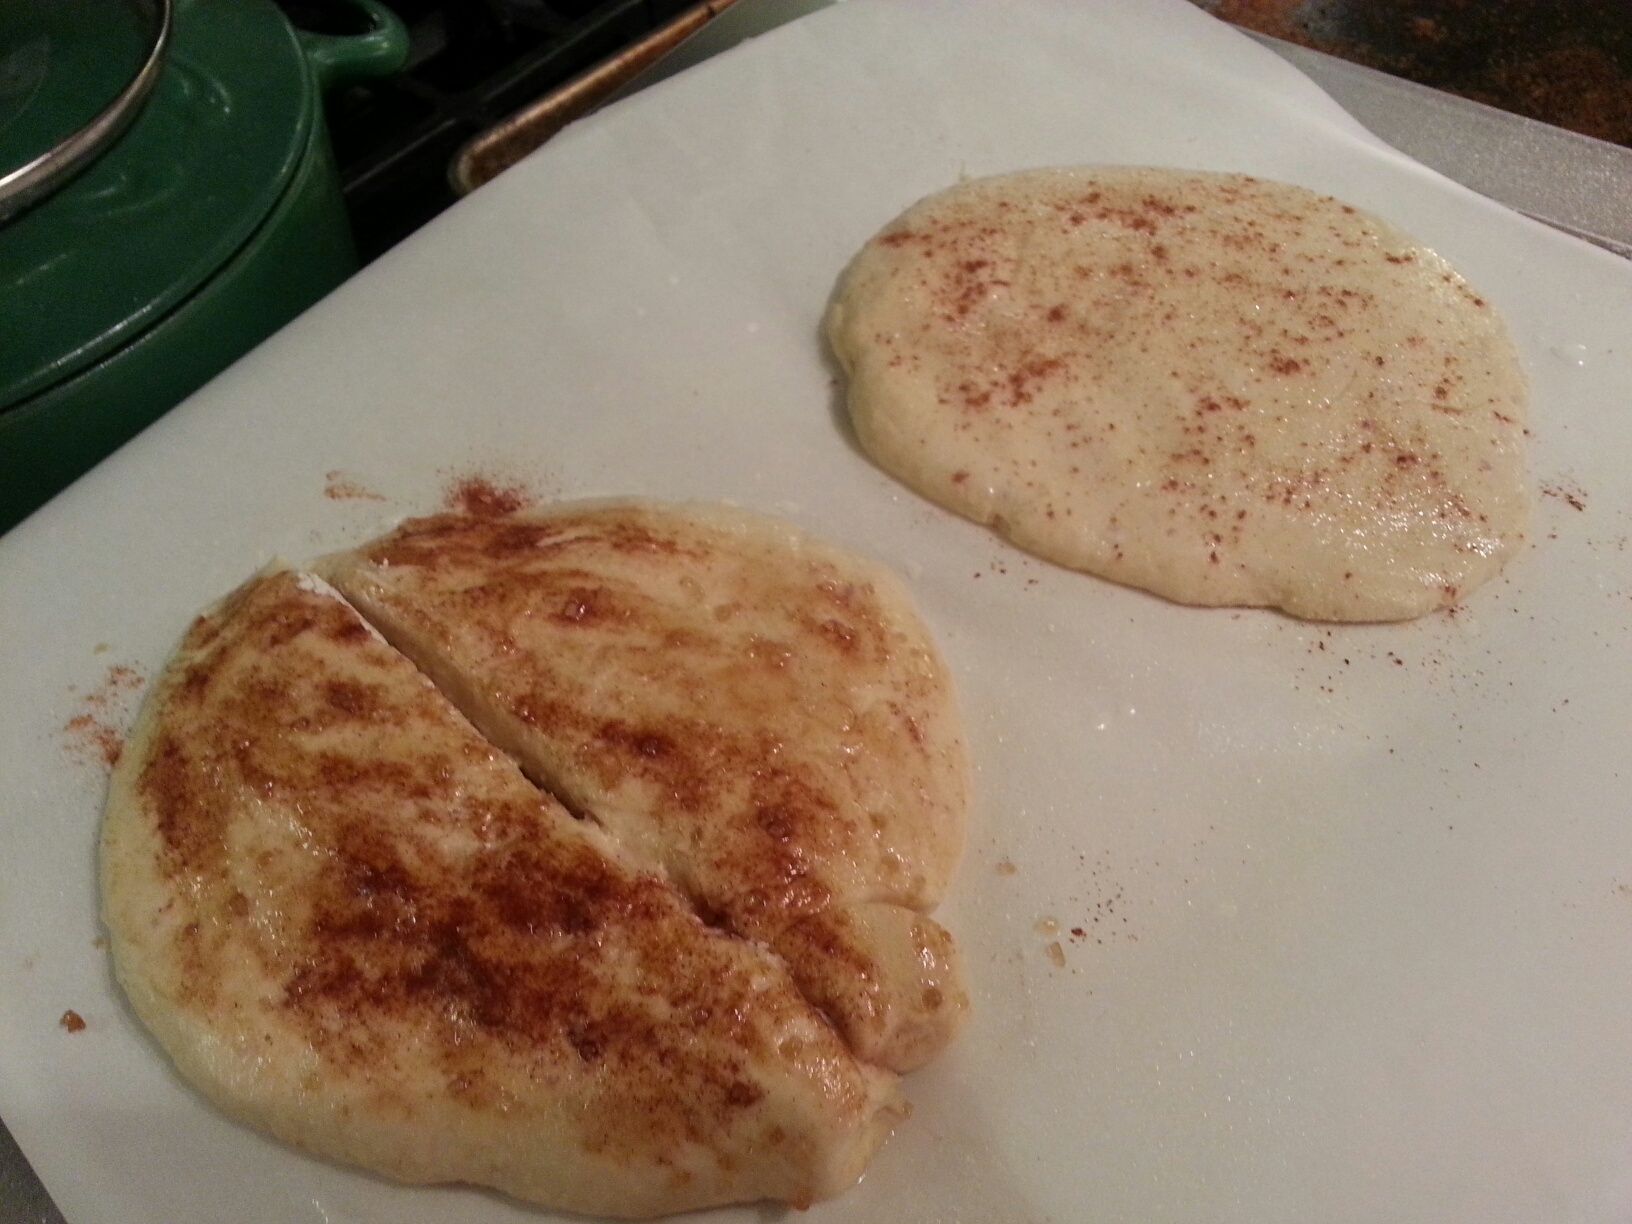
I like this recipe because it is so fast, simple, and tastes like an elephant ear without being deep fat fried!  Or, if you’re very picky, it tastes similar to an elephant ear from the fair!  That amount of sugar and cinnamon mixture yielded us about 3-4 tortilla toppings, but it will depend on how much topping you like.  I like to brush on a little honey to keep the sugar/cinnamon mixture sticking to the tortilla.  You want a fairly medium to high heat here to make the tortilla puff up a little and brown, otherwise it just tastes like a regular tortilla!  


INGREDIENTS:

  • 2 tablespoons plus 2 teaspoons regular white sugar
  • 1/4 tsp. ground cinnamon **
  • vegetable oil for frying (use your judgement)
  • 1 (7 inch) white flour tortilla 

**Known IC irritants, tread carefully!  To make this IC safe remove the awesome cinnamon. I know, I’m sorry!

DIRECTIONS:

  1. Combine sugar and cinnamon in a shallow bowl or large plate, set aside.  
  2. In a skillet, heat some vegetable oil.  Place one tortilla at a time in skillet.  Cook for 5 seconds or until brown in spots on one side.  Turn and cook 10 seconds longer, or until browned on the other side.  
  3. Brush with honey if desired. 
  4. Place in sugar mixture and turn to coat.  
  5. Serve immediately.  

“Energy Balls” – Oatmeal Bites *

1978550_10203660290097501_88301805_o


135268_10203660290217504_828705787_o

I made these as a way to give my growing boy some needed calories but in a tasty way.  I learned a few things by making it so I know what to do better next time.  First, I am glad I made a half batch, it made 25!  Secondly, I tried reducing the honey but it needed all of it to bind together.  Thirdly, I will reduce the chocolate chips next time because it definitely was in the ‘dessert’ category more than I liked.  As written, I’m placing this in the dessert category.  But if the chocolate chips were reduced, I’d place it in the Snacks section.  So halving the chocolate chips to 1/4 cup (for a half batch) would be fine.  I didn’t use the shredded coconut because a) I didn’t have it and b) I don’t have many fans here.  I used ground flax seed, cashews, peanuts, creamy peanut butter, raisins, and everything seen in the photo.  I got this recipe from the Washington Post.  I would definitely try this next time in the food processor for ease!  Enjoy!

INGREDIENTS (FULL BATCH ingredients below, I halved these amounts):

  • 1 cup peanut butter, sunflower butter or almond butter
  • 1 cup raw or regular honey (start with less if regular honey and add more if needed)
  • 3 cups rolled oats
  • 1/2 cup ground chia seed or flax seed
  • 1 cup mini chocolate chips or cacao nibs**
  • 1 cup any combination of nuts, seeds and soft dried fruit, raisins**, cashews/peanuts, such as sunflower seeds, and dried cranberries**
  • Sweetened shredded coconut, for rolling (optional)

**Known IC irritants, tread carefully!


DIRECTIONS:

  1. Combine the nut butter and honey in a large mixing bowl and stir until smooth.
  2. Gradually add the oats and chia seed or flax seed. Add the cacao nibs or chocolate chips and the nut-seed-fruit mixture, and mix gently to combine.
  3. Use your hands to roll the mixture into balls (I used a cookie scoop) approximately the size of ping-pong balls. If desired, roll them in shredded coconut.
  4. Place the balls in paper mini-muffin cups. At this point, you can eat them, but they’ll be less sticky after a night in the refrigerator. They taste best after one day in the fridge.  Layer the balls in an airtight container, using wax paper to separate the layers, and refrigerate for 7 to 10 days or freeze for up to 3 months.

Eggless Chocolate Wacky Cake * (Not IC Safe)

1724405_10203477335283745_250935993_n


If you want an incredible chocolately cake that is eggless, milkless, but full of flavor, this is it.  I’ve been making this so many years.  Since my husband’s allergic to eggs, it is our staple for chocolate cake.  I don’t try any other chocolate cake recipes because this is perfection to us.  It bakes well and has a good crumb.  It’s not too dense either.  This recipe was famous during The Depression because it uses inexpensive and easy to acquire ingredients – all of them are shelf stable.  Enjoy…

INGREDIENTS:

  • 1 1/2 cups all-purpose flour
  • 1 cup white sugar
  • 4 T. unsweetened cocoa powder**
  • 1 tsp. baking soda
  • 1/2 tsp. salt
  • 1 tsp. vanilla extract (always use the good stuff, real vanilla extract)**
  • 1 T. apple cider vinegar**
  • 6 T. vegetable oil
  • 1 cup cold water

**Known IC irritants, tread carefully!

DIRECTIONS:

  1. Preheat oven to 350° F.
  2. Mix flour, sugar, salt, baking soda, and cocoa in a mixing bowl. 
  3. Make three depressions, or wells, in your dry mixture. 
  4. Pour oil into one well, vinegar into the second, and vanilla into the third one.
  5. Pour water all over the mixture and stir well, breaking up all clumps until you have a smooth batter. 
  6. Pour batter into a 8×8″ or 8 or 9″ round cake pan.  (I’ve used all of these sizes and they’ve worked well.  I use a steel pan and spray PAM baking with flour on it.)
  7. Bake at 350° for 30-40 minutes, or until toothpick inserted comes out clean.
  8. Let fully cool and frost with your favorite frosting – optional. 

Kit Kat and M&M Candy Cake * (Not IC Safe)


20140307_120511small

SAMSUNG CAMERA PICTURES

Yes, when I checked out at the register I worried if they thought I was actually eating all this candy by myself. 🙂

SAMSUNG CAMERA PICTURES

I pre-chilled my Kit Kat bars in the fridge so handling them would not bring on melting. 

Never frost a warm cake!

I used my new Wilton cake turntable here and it was extremely handy.  I used an offset spatula to frost the cake and prior to frosting I put down wax paper that was taped on underneath the turntable.  Once the cake set in the fridge a few hours, I removed the wax paper and tape to reveal a clean edge!  

SAMSUNG CAMERA PICTURES

SAMSUNG CAMERA PICTURES

1724405_10203477335283745_250935993_n

 I found this recipe at NOSHWITHME.COM.  It was a perfect addition to our birthday parties.  It was fun, delicious, and very attractive.  Also, it was easy, which is great when you need a break from piping.  You can use any colored 2-layer cake, but it’s preferable to use chocolate frosting so the frosting doesn’t show through the Kit Kats, believe me.  

INGREDIENTS:

  • Two 8″ or 9″ cakes, any flavor  (I used an eggless wacky cake recipe).
  • Chocolate frosting (enough for a 2-layer cake)
  • One 12.60 ounce bag of M&Ms (or any candy you want to top it with)
  • 11-12 full size (not snack size) packages Kit Kats (I bought 5 “XL” Kit Kat bars and barely had any leftover.)

Preparation

  1. Bake cakes and let cool at least an hour, or until room temperature.
  2. Using a cake leveler or serrated knife, level cakes so the tops are no longer domed. (If you are using a serrated knife, it helps to freeze the cake first.)
  3. Separate each Kit Kat so you have sections of two Kit Kats.  The original author put them in the fridge first so they wouldn’t melt while I was handling them.  I personally think you could also split up all the Kit Kats and not even leave 2-Kit Kat sections, I will try that next time. 
  4. Frost the top of one cake, then place the second cake on top of it. Frost the top of the second cake and the sides of the stacked cakes.
  5. Place the Kit Kats around the frosted cake, as close together as possible.
  6. You can also tie a ribbon around the cake to keep the Kit Kats from moving. Pour the M&Ms on the top of the cake. Slice and serve!


Eggless Chocolate Chip Cookies * (Not IC Safe)

SAMSUNG CAMERA PICTURES


If you need to make eggless cookies for someone, such as my husband with an egg allergy, these are the perfect ones.  Honestly, I can eat eggs and I look forward to these!  They’re just perfect to me.  I use a cookie scoop for even proportions, which will give you even baking results.  I put them on parchment paper on top of metal pans; I use AIRBAKE pans.  They freeze well too, but are best fresh. I’ve made a double batch of the recipe below and it works out great for a big crowd.  The mixer works great here to mix the butter/sugars.

INGREDIENTS:

  • 1/2 cup butter or margarine, ROOM TEMPERATURE
  • 1/3 cup white sugar
  • 1/2 cup firmly packed brown sugar
  • 1 1/2 cups flour
  • 1 tsp. baking soda
  • 1/2 T. vanilla extract
  • 3 T. vegetable or canola oil
  • 2 T. water (use up to 3 T. if it’s too dry)
  • About 5 oz. semisweet chocolate pieces (regular size chips work best)**
  • 1/4 cup chopped nuts (totally optional)

**Known IC irritants, tread carefully!

DIRECTIONS:

  1. Preheat oven to 350° F. (Use convection mode if you have it, it works well for us).
  2. In a large bowl, with a handheld mixer or a stand mixer, set on medium speed, cream butter and BOTH sugars until fluffy, about 2 minutes.
  3. Slowly mix in flour and baking soda.
  4. Add vanilla, oil, and water.  Mix until completely combined.
  5. With a spoon, fold in nuts, if used, and chocolate chips.
  6. Using a cookie scoop, drop on cookie sheets (or parchment paper on top of cookie sheets), spacing the cookies 2″ apart.
  7. Bake for 8-10 minutes, watch closely for when they turn light brown.
  8. Cool on wire racks in pans for 3 minutes (WAIT UNTIL THEY HARDEN UNTIL MOVING THEM!)
  9. Then remove with a spatula and transfer onto wire racks and cool.

Apple Scones *

20140101_202443_resized

20140101_204005_resized

20140101_210131_resized

20140101_211221_resized

I saw this recipe and bookmarked it because it has no eggs, a smaller amount of sugar, and got great reviews.  It’s from Food.com.  I did it completely in the food processor. First, I shredded the apple (but only used 1/2 cup), then I removed the shredded apple, and mixed my other ingredients (flour, sugar, baking powder, baking soda, and salt).  Then I added back my apple and then put in the milk.  I even ‘kneaded’ it in the processor instead of on a cutting board.  Easy, just a little sticky recipe, so I added more flour and covered it in flour before shaping into a circle.  DELICIOUS!  Add some butter and preserves, serve with tea!  It goes great with Dutch apple preserves!

INGREDIENTS:

  • 2 cups flour
  • 1/4 cup sugar
  • 2 teaspoons baking powder
  • 1/2 teaspoon baking soda
  • 1/2 teaspoon salt
  • 1/4 cup butter, cold
  • 1/2 cup apple, shredded (1 medium)
  • 1/2 cup milk
  • to taste milk, for topping the scones
  • to taste sugar
  • to taste cinnamon**

**Known IC irritants, tread carefully!  Omit the cinnamon to make it IC safe.

DIRECTIONS:
  1. Preheat oven to 425 degrees.
  2. Measure flour, sugar, b. powder, soda, and salt into large bowl. Cut in butter until crumbly.
  3. Add apple and milk. Stir to form soft dough.
  4. Turn out onto lightly floured board; knead gently 8 to 10 times. Pat into two 6-inch circles. Place on greased baking sheet.
  5. Brush tops with milk; sprinkle with sugar and cinnamon. Score each top into six pie-shaped wedges. 
  6. Bake for 15 minutes or until browned and risen. Serve with warm butter and marmalade.
  7. Optional: Add 1/2 cup currants to batter.


Eggless Sugar Cookies

P1100399

P1100394

P1100396

P1100397


Okay, I swear I don’t usually bake this many cookies, but it’s that time of year!  We hadn’t tried an eggless sugar cookie in many, many years and gave one a try.  It worked beautifully!  Honestly, I couldn’t tell the difference and why not skip eggs once in a while anyway?  My egg-allergic husband was quite happy!  The only cookie cutter it failed on was the snowflake, but that’s okay.  My favorite one is the last photo of the snowman because my husband decorated it!  I got this recipe from  http://socialsavvymom.com and it was excellent!  Enjoy!

INGREDIENTS:

  • 1 1/4 cups butter, softened (2 1/2 sticks)
  • 1 cup sugar
  • 4 teaspoons milk
  • 2 teaspoons pure vanilla
  • 3 cups all-purpose flour

DIRECTIONS:

  1. In a large mixing bowl, preferably with an electric mixer, beat butter and sugar together until fluffy. Add milk and vanilla, beat again and scrape bowl. With mixer on low speed, add flour one cup at a time and beat after each addition. Shape into logs approximately 2″ in diameter. Roll the logs in parchment paper or plastic wrap and chill for at least 2 hours or overnight.  (I chilled it overnight and it turned out just fine).
  2. When ready to bake, preheat oven to 375 degrees F. Line baking sheets with parchment paper or a Silpat liner and give them a light spray with vegetable shortening. Unwrap logs and slice into 1/4″ thick slices or roll out to cut out shapes. Place cookies on prepared cookie sheet and bake for 8-10 minutes or until very light brown and the sides are slightly firm.
  3. Remove from oven and let cool 5 minutes before transferring cookies to a wire rack. Cool completely before storing in air tight containers.

Pumpkin Cookies *

20131006_195517_resized

These are a great pumpkin treat for this time of year AND they get a vegetable in you and/or your children.  What is interesting is that they are not overly sugary, they almost taste a little too healthy without the icing, but they are great!  Baking on parchment paper is always something I recommend.  I froze the remainder since it made 2 dozen cookies.  This is from the book “The Food Allergy Mama’s Baking Book” by Kelly Rudnicki.


COOKIE INGREDIENTS:

  • 1/2 cup shortening**
  • 1 1/2 cups light brown sugar
  • 1/2 cup unsweetened applesauce
  • One 15 OZ. can pumpkin puree
  • 3 cups unbleached all-purpose flour
  • 1 tablespoon baking powder
  • 1 teaspoon ground cinnamon**
  • 1/4 tsp. ground nutmeg**
  • 1/4 tsp. ground ginger**
  • 1/4 tsp. salt
  • Classic icing recipe below

**Known IC irritants, tread carefully!  Omit spices that bother you. Shortening can have soy and other irritants, replace with butter.

DIRECTIONS:

  1. Preheat oven to 400° F.
  2. In the bowl of a stand mixer fitted with the paddle attachment, thoroughly combine the shortening, sugar, applesauce, and pumpkin.
  3. In a separate medium bowl, combine the flour, baking powder, cinnamon, nutmeg, ginger, and salt with a wire whisk.
  4. Add the flour mixture to the shortening mixture and stir until just combined.
  5. Line 2 baking sheets with parchment paper.  Use a cookie scoop to place batter onto the prepared sheets. 
  6. Bake for 12-15 minutes or until lightly browned.
  7. Remove from the oven, and cool on a wire rack. 
  8. Frost with icing recipe below.

ICING RECIPE:

  • 2 cups confectioner’s sugar
  • 1 teaspoon good-quality vanilla extract
  • 3-4 tablespoons milk, as needed to thin icing.

DIRECTIONS:

  1. Blend all ingredients together in a small bowl with a wire whisk.
  2. Drizzle over cookies or dip each cookie into icing bowl. 

Raspberry and Apple Crisp *

apple-rasp-crisp

This is a wonderful recipe I adapted, it just comes out perfectly and is healthier (even though it’s still a dessert) than a traditional apple pie because it is lacking the caloric crusts.  Galas or honey crisp work especially well here.  ENJOY!

INGREDIENTS:

  • 4 cups sliced apples
  • 1/4 cup raspberries, if tolerated
  • 1 teaspoon ground cinnamon**
  • 1/2 cup water
  • 1 cup brown sugar (You can get away with 3/4 cup here to reduce the sugar; I’ve done it successfully).
  • 1/2 stick butter (4 tablespoons)
  • 3/4 cup all-purpose flour (You can do a half all-purpose and half whole wheat mixture)
  • 1/2 cup quick oats, optional but healthier! 

**Make this IC safe by removing the cinnamon. Omit raspberries if they bother you.


DIRECTIONS:

  1. Preheat oven to 350° degrees F. Grease a 8×8″ to a 10×7″ (approximately) pan.  The size doesn’t matter, it just may take longer to cook in a smaller pan.  (I used a glass pan).
  2. Place apples in prepared dish. Sprinkle raspberries randomly in the dish.  Sprinkle with cinnamon.  Pour water over the entire thing.
  3. In a bowl, cream sugar and butter together.  You can use a mixer or your clean hands.
  4. Gently blend in flour and quick oats.  Sprinkle this mixture evenly over apples.
  5. Bake in preheated oven 30-40 minutes until apples are tender and crust is golden.  Mine usually takes 40 minutes.   

Mud and Worms Pudding Cups * (Not IC Safe)

P1100125
P1100123
These pudding cups take a simple treat to such a fun level – even us adults had fun making and eating them!  What is great, from an adult perspective, is that the Oreo topping prevents that yucky pudding ‘skin’ from forming on the top once refrigerated,.  I do suggest putting plastic wrap on top while refrigerating anyway.  IT’S A SUPER CUTE recipe!  We ended up making a larger box of instant pudding as it was on sale and used extra Oreo crumbs; this recipe is not exact.   We made 6 servings.
(Original recipe makes 4 servings)
Ingredients:
  • 12 chocolate cream-filled sandwich cookies, like Oreos**
  • 1 (3.9 ounce) package instant chocolate pudding mix**
  • 2 cups milk
  • 1 (3 ounce) package gummy worms candy**

**Known IC irritants, tread carefully!

Directions

  1. Place the chocolate sandwich cookies into a resealable plastic zipper bag, and crush with a rolling pin into crumbs. For a more mudlike appearance, untwist the cookies and scrape off the creme filling before crushing cookies.
  2. Whisk together the chocolate pudding mix with the milk in a bowl, stirring for 2 minutes.
  3. Sprinkle about 1/3 of the crushed sandwich cookie crumbs into the bottom of a serving bowl, and spoon the chocolate pudding over the crumbs. Smooth out the top of the pudding, then top with the rest of the chocolate cookie crumbs to resemble dirt.
  4. Poke gummy worms halfway into the dirt. Refrigerate until serving.