Lighter Chicken Enchiladas

chicken-enchiladas

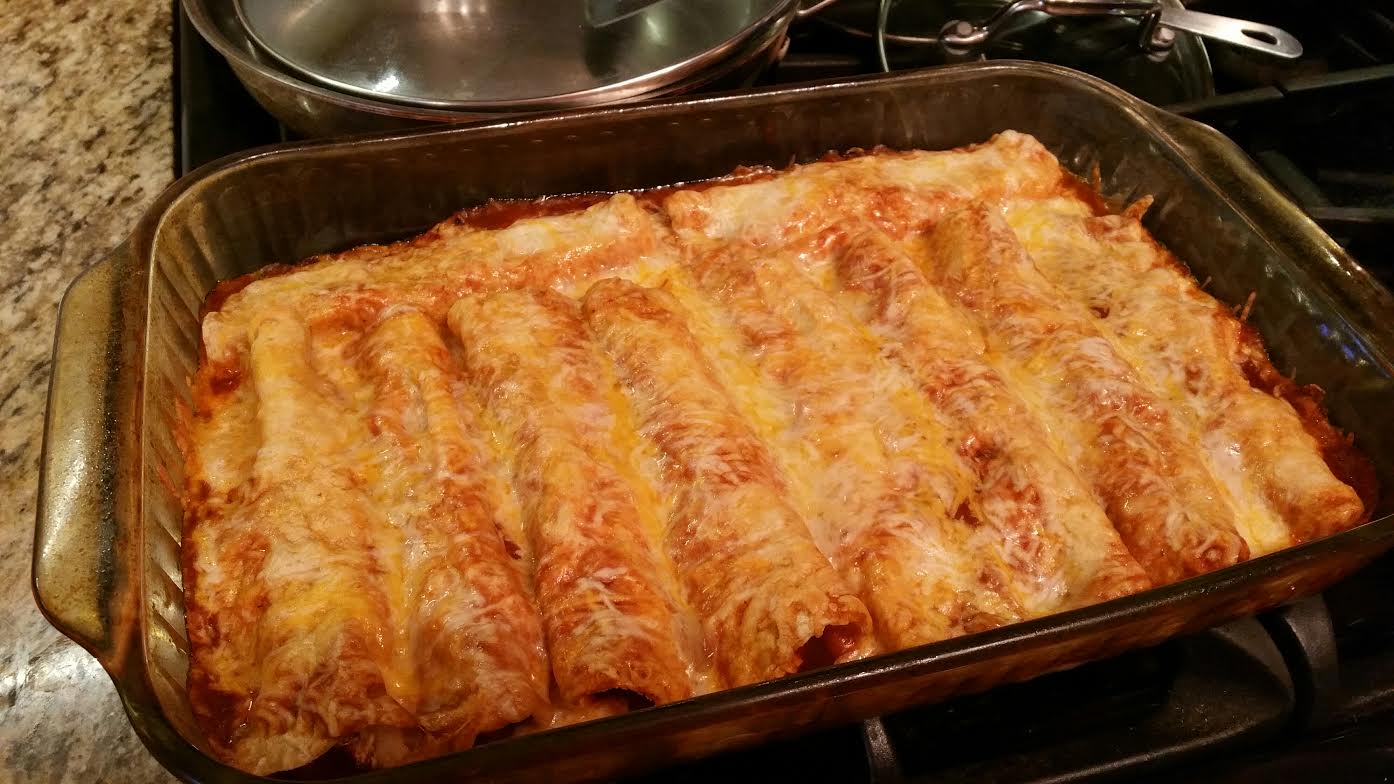
The simplicity and flavor of this four ingredient chicken enchilada amazes me.  It really is easy and delicious.  I LOVE this recipe!  You can accent it with sour cream once it’s cooled out of the oven, or green onions, or whatever you like.  Use as much or as little cheese as you want, but definitely use the entire 28 oz. can of enchilada sauce, it needs it or it will dry out!  A+!

INGREDIENTS:

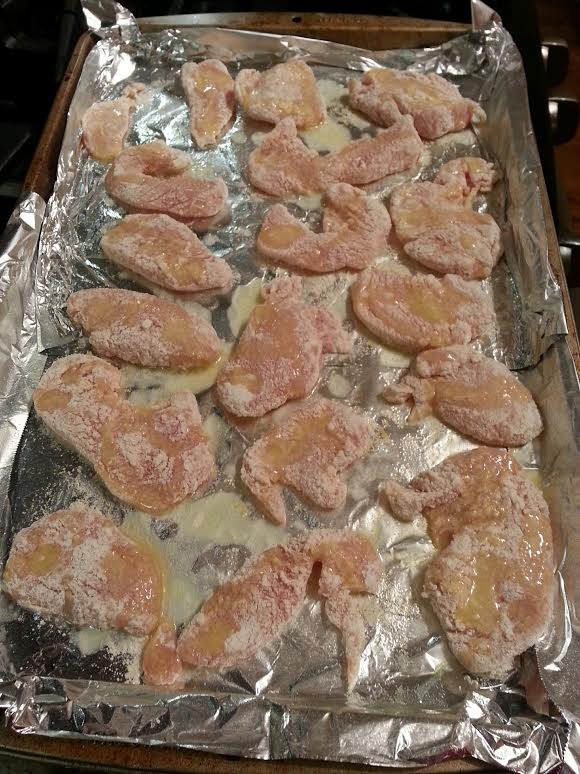
  • 3 boneness, skinless chicken breast halves (a total of approx. 18-24 oz.)
  • A package of corn tortillas (6-inch) *I always buy 2 pkg’s at a time just because.
  • Monterey Jack or Mexican blend cheese
  • One 28 oz. can mild, traditional enchilada sauce**
  • sour cream, green onions**, etc for topping (optional)

** = may be considered irritants to some IC patients resulting in a flare.  Please tread carefully.

DIRECTIONS:

  1. Preheat oven to 400 degrees F.
  2. In a large skillet with lid, bring 1″ water to a boil.
  3. Add chicken and season with salt.  Cover and reduce heat to medium-low.
  4. Simmer 5 minutes, remove skillet from heat.
  5. Let chicken steam, covered, until cooked through or registers safe on an instant-read thermometer, about 12-14 minutes.
  6. When slightly cooled, shred with two forks and transfer chicken to large bowl.
  7. Mix 1 cup enchilada sauce with chicken; toss to combine.
  8. Spread some enchilada sauce evenly in a baking dish.  (I used a 9×13″ Pyrex glass baking dish which has an awesome lid for later storage).
  9. Fill each corn tortilla with chicken mixture.  Roll up tightly and arrange seam side DOWN, in a baking dish.
  10. Cover with remaining enchilada sauce and top with desired amount of cheese
  11. Bake until cheese is melted and sauce is bubbling, 15-20 minutes.
  12. Let cool 5 minutes before serving (believe me!).

Easy Triple-Cheese Lasagna

2lasagna-4-15 lasagna-4-15


This is a very good lasagna.  What we found interesting was the day we made it, it was just in the “okay/good” pile.  The next day, after a night in the fridge, it morphed into something you would taste at a fancy, exotic Italian restaurant.  It got 100x better!  It had more depth of flavor and didn’t taste bland at all.  **We used 85% ground beef, ricotta, and shredded Italian cheese.  For the ricotta, don’t use fat free ricotta, at least use the medium fat one like we did – I think the ricotta was 6g fat a serving.  Enjoy!

INGREDIENTS:

  • 1 can (28 oz) crushed tomatoes with Italian herbs
  • 1 lb. ground beef or Italian sausage (casings removed)
  • 6 uncooked dried lasagna noodles
  • 2 cups (8 oz) shredded Italian cheese blend or mozzarella cheese
  • 1 1/2 cups cottage cheese or ricotta cheese
  • 2 T. grated or shredded Parmesan cheese

DIRECTIONS:

  1. Set oven at 350 degrees and preheat.
  2. Spray 2 qt. rectangular baking dish with cooking spray.
  3. Spoon 1 cup crushed tomatoes into baking dish.
  4. Cook meat in large skillet, drain.
  5. Stir in remaining undrained tomatoes, bring to boil.
  6. Place 2 uncooked noodles in dish, top with 1/3 of the meat/sauce mixture and 1/3 of the Italian cheese.
  7. Repeat layers.
  8. Top with cottage cheese (preferably ricotta!),  then remaining noodles, meat mixture, and Italian cheese.
  9. When in doubt, if that’s confusing, JUST KEEP LAYERING! LOL
  10. Cover with foil and bake in preheated 350 for 1 hour.  Put a jelly roll pan under the baking dish to collect any spillage.
  11. Let stand 15 minutes to cool (or you’ll burn your mouth!)
  12. Sprinkle with Parmesan cheese.

Honey-Mustard Chicken Wings * (Not IC Safe)

honey-chicken-wings-4-15


This is a slow cooker recipe, but I adapted it (see option 2) to make it in the oven when I ran out of time one evening.  It really was great!  We don’t like spicy brown mustard (or many mustards) so we just quartered the mustard ingredient and the flavor still came through and worked well.  Enjoy!

INGREDIENTS:

  • 3 lbs. chicken wings
  • 1 tsp. salt
  • 1 tsp. black pepper**
  • 1/2 cup honey
  • 1/2 cup BBQ sauce**
  • 2 T. spicy brown mustard (we reduced it to 1/2 T.)**
  • 1 clove garlic, minced
  • 3-4 thin lemon slices (optional)**

**Known IC irritants, tread carefully!

DIRECTIONS:

  1. Preheat broiler.  Cut off wing tips, discard.  Cut each wing at joint to make 2 pieces.
  2. Season with salt and pepper.
  3. Place on broiler pan.  Broil 4-5 inches from heat about 5 minutes per side.

SLOW COOKER OPTION 1)

  • Transfer wings to slow cooker.
  • Combine honey, BBQ sauce, mustard, and garlic in small bowl.  Mix well.  Pour sauce over chicken wings.  Top with lemon slices, optional.  Cover, cook on LOW 4-5 hours.
  • Before serving, remove and discard lemon slices.
  • Serve wings with sauce.

OR QUICK OPTION 2)

  • Transfer wings to large baking dish that has sides.
  • Combine honey, BBQ sauce, mustard, and garlic in small bowl.  Mix well.  Pour sauce over chicken wings.  Top with lemon slices, optional.  Cover, cook at about 375 degrees for about an hour, or until thermometer reads safe.
  • Before serving, remove and discard lemon slices.
  • Serve wings with sauce.


Campfired Up Sloppy Joes * (Not IC Safe)

sloppyjoes1

sloppyjoes2 sloppyjoes3


This is a cool recipe I found in my CrockPot slow cooker book that I love.  It takes your classic sloppy joe ingredients and adds flavorful, easy add-ins like baked beans, bell pepper, and BBQ sauce.  It’s really better than I thought it’d be and very yummy!  It’s extremely simple – look at the directions!  This is one you could throw together in the morning in about 10-15 minutes and have a scrumptious meal come dinner time.  We’ll definitely make this again!

Makes 4-6 servings.  

INGREDIENTS:

  • 1 1/2 lbs. lean ground beef
  • 1/2 cup chopped sweet onion (or use powder)**
  • 1 medium red bell pepper, cored, seeded and chopped
  • 1 large clove garlic, crushed (or use powder)
  • 1/2 cup ketchup**
  • 1/2 cup BBQ sauce**
  • 2 T. cider vinegar**
  • 1 T. Worcestershire sauce**
  • 1 T. packed brown sugar
  • 1 tsp. chili powder**
  • 1 can (8 oz.) baked beans
  • 6 kaiser rolls, split and warmed
  • Shredded sharp cheddar cheese (optional, but great!)

**Known IC irritants, tread carefully!

DIRECTIONS:

  1. Brown ground beef, onion, bell pepper, and garlic 6-8 minutes in large skillet, stirring to break up meat.  Drain and discard excess fat.  Transfer beef mixture to slow cooker.
  2. Combine ketchup, BBQ sauce, vinegar, Worcestershire sauce, brown sugar, and chili powder in small bowl.  Transfer to slow cooker.
  3. Add baked beans.  Stir well to combine.  Cover, cook on HIGH 3 hours.  (I did low and it was fine).
  4. To serve, fill split rolls with 1/2 cup sloppy joe mixture.  Sprinkle with cheese, if desired, before topping sandwich with roll lid.

Marie’s Easy Slow Cooker Pot Roast

marie-slow-cooker-pot-roast-feb

I found this recipe on allrecipes.com posted by Marie Thomas.  It’s really great!  It took only about five hours, but slow cookers vary considerably with temperatures and settings.  With my onion problem, I halved the dry onion soup mix amount and omitted the raw onion (and upped the other veggies).  We both think it turned out just spectacular even with those changes.  The veggies were insanely good, flavorful, and fork tender!  With the price of chuck roast, I used a 2# roast, but left the other ingredients mostly as is because we like a lot of juice.  The recipe below is for the full 4# recipe and ingredients – not halved.  It was a PERFECT Sunday meal and we will have many leftovers!  Enjoy!

INGREDIENTS:

  • 4 pounds chuck roast

  • salt 

  • 1 packet dry onion soup mix

  • 1 cup water

  • 3 carrots, chopped

*(see how you tolerate this and check the ingredients in the mix!)
*Onion can be flaring, it’s usually on the try-it list.

DIRECTIONS:

  1. Season the roast with salt and pepper to taste. Brown on all sides in a large skillet over high heat, about 4 minutes per side.
  2. Place the roast in the slow cooker and add the soup mix, water, carrots, onion, potatoes, and celery.
  3. Cover and cook on Low setting for 8 to 10 hours.  *Your time may vary; check after 5 hours, I’d say.
  4. Remove meat from cooker, loosely tent with foil, and let rest at least 10-15 minutes before slicing.  (While the meat was resting on the cutting board, I left the veggies and juice in slow cooker on the “warm” setting and let them remain heated.)


Lazy Day Braised Pot Roast * (Not IC Safe)

Lazy Day Pot Roast Slow Cooker 3-13


I found this recipe in one of my giant cookbooks for slow cookers entitled, “Not Your Mother’s Slow Cooker Cookbook” by Beth Hensperger and Julie Kaufmann.  It was super simple to make, extremely moist (see photo), and had rich flavor.  Serves 6-8 people.  🙂


INGREDIENTS:

  • One 4-LB. boneless chuck roast, trimmed of as much fat as possible and blotted dry
  • 1/2 tsp. salt
  • 1/4 tsp. freshly ground black pepper**
  • 4 large carrots, cut into 3″ lengths
  • 4 large potatoes, peeled and quartered
  • 1 large onion, quartered (I used flakes)**
  • 2 bay leaves
  • 3 cups water
  • 1/2 cup cider vinegar**
  • 3 T. unsalted butter, softened
  • 3 T. all-purpose flour

**Known IC irritants, tread carefully!

DIRECTIONS:

  1. Put the roast in the slow cooker and sprinkle with the salt and pepper.
  2. Add the carrots, potatoes, onion, and bay leaves.
  3. Pour the water and vinegar over the meat and vegetables.
  4. Cover and cook on LOW for approximately 6-8 hours (you be the judge of how quickly your slow cooker cooks).
  5. Transfer the meat and vegetables to a heated platter and cover with aluminum foil.
  6. Turn the cooker to HIGH. You will have about 3 full cups of liquid remaining in the slow cooker.
  7. In a small bowl, mash together the butter with the flour to make a beurre manie.  Add to the hot liquid in the cooker and stir with a whisk until melted and the liquid thickens.
  8. Ladle some sauce over the meat and vegetables and serve the remainder in a bowl.

“Bisquick” Ultimate Chicken Fingers

bisquick-chicken1 bisquick-chicken2

I obviously found this recipe on the back of a Bisquick box.  I usually don’t try many recipes on the backs of packages but had exceptional luck with this one!  It tastes really good – you really taste the Parmesan, the breading stays on, and you taste the perfect idea of drizzling butter over the chicken before baking!  I have tried many non-fried chicken finger recipes over the years and this is the only one I really like.  I made it eggless with a simple change, noted below. Approximately 4 servings but I’d say more 2-3.  Enjoy!

INGREDIENTS:

  • 3 boneless skinless chicken breasts (about 1 lb.), cut crosswise into 1/2-inch strips
  • 2/3 cup powdered Bisquick mix (If you want it eggless buy a brand like powdered Krusteaz’s pancake mix, always check ingredients, click here to see which one I bought.)
  • 1/2 cup grated Parmesan cheese
  • 1/2 tsp. salt or garlic salt
  • 1/2 tsp. paprika
  • 1 egg, slightly beaten (I just substituted whole fat half and half, or you could use milk – anything to get the meat wet).
  • 3 T. butter, melted

DIRECTIONS:

  1. Heat oven to 450* F.
  2. Line cookie sheet with foil and liberally spray it with cooking spray.
  3. In 1 gallon resealable food storage plastic bag, mix pancake mix, Parmesan cheese, salt, and paprika.  Seal bag and shake to combine.
  4. Dip HALF the chicken strips into the egg (half and half or milk), place in bag.  Seal and shake to coat thoroughly.  Place chicken on cookie sheet.  Repeat to use up remaining chicken.
  5. Drizzle melted butter over chicken (it adds a ton of flavor, do it!) (see photo 2 for details.)  Next time I’ll use a bigger pan, I didn’t expect it to be crowded like that, but it cooked just fine.  
  6. Bake 12-14 minutes, turning halfway through bake time with pancake turner, until no longer pink in center and registered safe with an instant-read thermometer.

Fast Homemade Pizza Crust

pizza-fast-crust-1


Happy New Year 2015!

This is a great quick pizza dough!  If you’ve baked with yeast, you know that the words ‘quick’ and ‘dough’ do not go together.  Sure, it’s a quick reaction for the yeast starter, but you usually have to wait for the dough to rest, rise, repeat.  It can be a whole day affair of a waiting game.  

pizza-fast-crust-2

If you’re going to make bread or doughs more often than once or twice a year, I suggest trying this glass jar of yeast, which must be refrigerated after opening.  It is more convenient to dip your measuring spoon in here versus opening tiny packets and deal with waste packaging.  For reference 2 1/4 tsp. equals a standard envelope of active dry yeast.  I know this by heart now.  I spoon out my 2 1/4 tsp. and run it back to the fridge immediately.  

pizza-fast-crust-3

I also put the date I opened the yeast on the top of the jar in Sharpie.  Fresh is best – use within 6 months.  I’ve never had an issue with that because I make a lot of breads and such.

pizza-fast-crust-4

This photo above shows what it looks like about a minute after combining the yeast, sugar, and warm water (110 degrees) together.  You will see a few clumps of yeasty goodness.  But wait a few minutes and the real fun begins.  

pizza-fast-crust-5

Above, after about 5-10 minutes of leaving the three ingredients together, you can see the little yeast reactions have overtaken the top of the water.  If you watch it at the right time, you can see all the bubbles and yeast come up and it’ll spread rapidly across the surface.  It’s fun to watch it at the right time – not that you have to do anything here- just watch. 

pizza-fast-crust-6

Above, after you mix in your flour, salt, and olive oil you will see the dough form.  I made my pizza crust in the dead of dry winter, so it needed additional water to mix thoroughly.  You can see the dry remainders on the bottom of the bowl that won’t absorb into the dough.  Add a tsp. of warm water at at time until it absorbs – but don’t add too much water!  Otherwise, your dough will be gummy and too sticky to roll (and a huge mess!), and you’ll have to add more flour!  And then we get into a circle effect of issues.

pizza-fast-crust-7


Above, a perfect amount of water and flour mixture equals a good dough.  

I’m telling you right now, even though this pizza crust is quick and easy, it is NOT as good as doing it the long way.  My other recipe for a pizza crust always turns out and tastes better, but this is a quick, we-need-it-now! dough.  If you want the best pizza crust, try this one.


INGREDIENTS:

  • One package of active dry yeast (.25 oz) or 2 1/4 tsp. active dry yeast from the scoopable jar
  • 1 tsp white sugar
  • 1 cup warm water (approx. 110 degrees F)
  • 2 1/2 cups bread flour
  • 2 T. olive oil
  • 1 tsp. salt


DIRECTIONS:

  1. Preheat oven to 450 degrees F.
  2. In a medium bowl, dissolve yeast and sugar in warm water.  Let stand until creamy and activated, about 10 minutes.
  3. Stir in bread flour, salt, and oil.  Mix until smooth.  Let rest 5 minutes.
  4. Turn dough out onto a lightly floured surface and pat or roll into a round.
  5. Transfer crust to a lightly greased pizza pan or peel dusted with cornmeal to prevent sticking.
  6. Spread with desired toppings and bake in a preheated oven for 15-20 minutes, or until golden brown.  Cool 5 minutes before serving.


Italian-Flavored Stuffed Peppers * (Not IC Safe)

peppers1

peppers2


We’ve been making this years.  Change it up to how you like it.  It’s a very flexible recipe.  Now that I am 100% banned from citrus products, like lemon juice, (thanks I.C., interstitial cystitis!), I still find a way to enjoy it and savor a lot of its remaining flavor.  ENJOY!

INGREDIENTS:

  • Cooked rice, 1 cup raw, cook as packaging instructs (any rice works here, I’ve used brown rice and white rice at different times).
  • 6 medium to large bell peppers, any color
  • About 1 – 1.5 lbs. ground beef, depending on how meaty you like it
  • 1 onion, chopped**
  • 1-4 cloves garlic, depending on your taste
  • 28-30 oz. Italian flavored diced or chopped tomatoes (I used “Dei Fratelli Chopped Italian tomatoes, herbs, and olive oil tomatoes” 28oz)**
  • 15 or more oz. tomato sauce**
  • salt and pepper, to taste**
  • dried oregano and basil, to taste
  • Fresh dill, chopped, to taste (I use at least a 1/2 cup)
  • Optional: juice of 1-2 lemons.**
  • Aluminum foil to cover

**Known IC irritants, tread carefully!

DIRECTIONS:

  1. Begin by cooking rice, or even use day-old rice.
  2. Cut very thin slice off tops of peppers. Discard stems, seeds, and membranes.  Rinse peppers and set aside.
  3. Here you can choose one of two steps: 1) boil water to cover your peppers, add your peppers once the water boils, boil until soft, approximately 5 minutes and remove. or 2) the way I now prefer: microwave 2-4 minutes on a microwave-safe plate until slightly softened.  Let cool a few minutes before handling hot peppers!
  4. Heat oven to 350* F.
  5. Place six par-cooked peppers in a baking dish with sides (preferably a dish with room for spare rice mixture).
  6. Cook ground beef over medium heat until brown, drain excess fat if necessary, but leave a little for flavor!
  7. Add your raw chopped onions and/or garlic, if desired, to meat mixture.  Cook until softened.  Or, you can add onion and garlic powder, which I did this time. Add salt and pepper.
  8. Slowly add your cans of tomato sauce and chopped/diced tomatoes to your cooked mixture.
  9. Add your oregano, basil, chopped dill, and any other seasonings you desire, including optional lemon juice.  Cook 20 minutes on low simmer to blend flavors.
  10. Stir in some of your cooked rice, until you have a good balance of meat – sauce – rice ratio, for your liking.  Cook a few minutes.
  11. Stuff your peppers with your beef/tomato/rice mixture.  Put any extra rice in dish around peppers.  Pour any remaining tomato sauce to wet your rice to keep it from drying out.  Sprinkle lemon juice, optional, over entire casserole/baking dish.
  12. Cover tightly with foil!  Bake 45 minutes.
  13. Uncover and remove foil, bake an additional 15-20 minutes or until tender.

Simple Stromboli

stromboli3 stromboli2 stromboli1


I haven’t updated in a while, I guess winter causing us to be perpetually ill doesn’t help.  I’ve always wanted to make a stromboli!  It just sounds awesome.  I finally got around to it and make a simple stromboli recipe from Better Homes and Gardens.  It was perfect.  We made our own quick pizza dough from scratch, but you can buy a refrigerated dough if you like.  We will definitely make this again and substitute other ingredients like pancetta, salami, and other meats and veggies!

INGREDIENTS:

  • 2 tsp. olive oil
  • 1 T. cornmeal
  • One 13.8oz. package refrigerated pizza dough (or your favorite recipe from scratch)
  • 4 oz. thinly sliced cooked ham (we used deli ham)
  • 1 cup shredded mozzarella cheese (4 oz)
  • 1 cup fresh baby or torn regular spinach
  • 4 oz. thinly sliced cooked turkey (we used deli turkey)
  • 1/4 cup Kalamata olives, pitted and chopped (we omitted)
  • 1/3 cup chopped red, green, or yellow sweet pepper
  • 1 egg, lightly beaten (we omitted and did vegetable oil)

DIRECTIONS:

  1. Preheat oven to 375 F. Lightly brush a baking sheet with olive oil and sprinkle with cornmeal; set aside.
  2. On a lightly floured surface carefully stretch or roll pizza dough into a 13×10″ rectangle.
  3. Arrange ham slices on dough about 1/2″ from edges.
  4. Sprinkle with half the cheese.
  5. Layer spinach and turkey on cheese.
  6. Top with remaining cheeses, olives, and sweet peppers.
  7. Roll up dough, starting from a long side.  Pinch dough to seal the seam and ends.
  8. Place loaf, seam side down, on prepared baking sheet. Brush with egg or vegetable oil.
  9. Using a sharp knife, cut slits in top for steam to escape.
  10. Bake about 30 mins. or until golden brown.
  11. Let stand for 10 minutes. To serve, slice loaf into serving size pieces.