Vegetable Minestrone Soup *

SAMSUNG CAMERA PICTURES


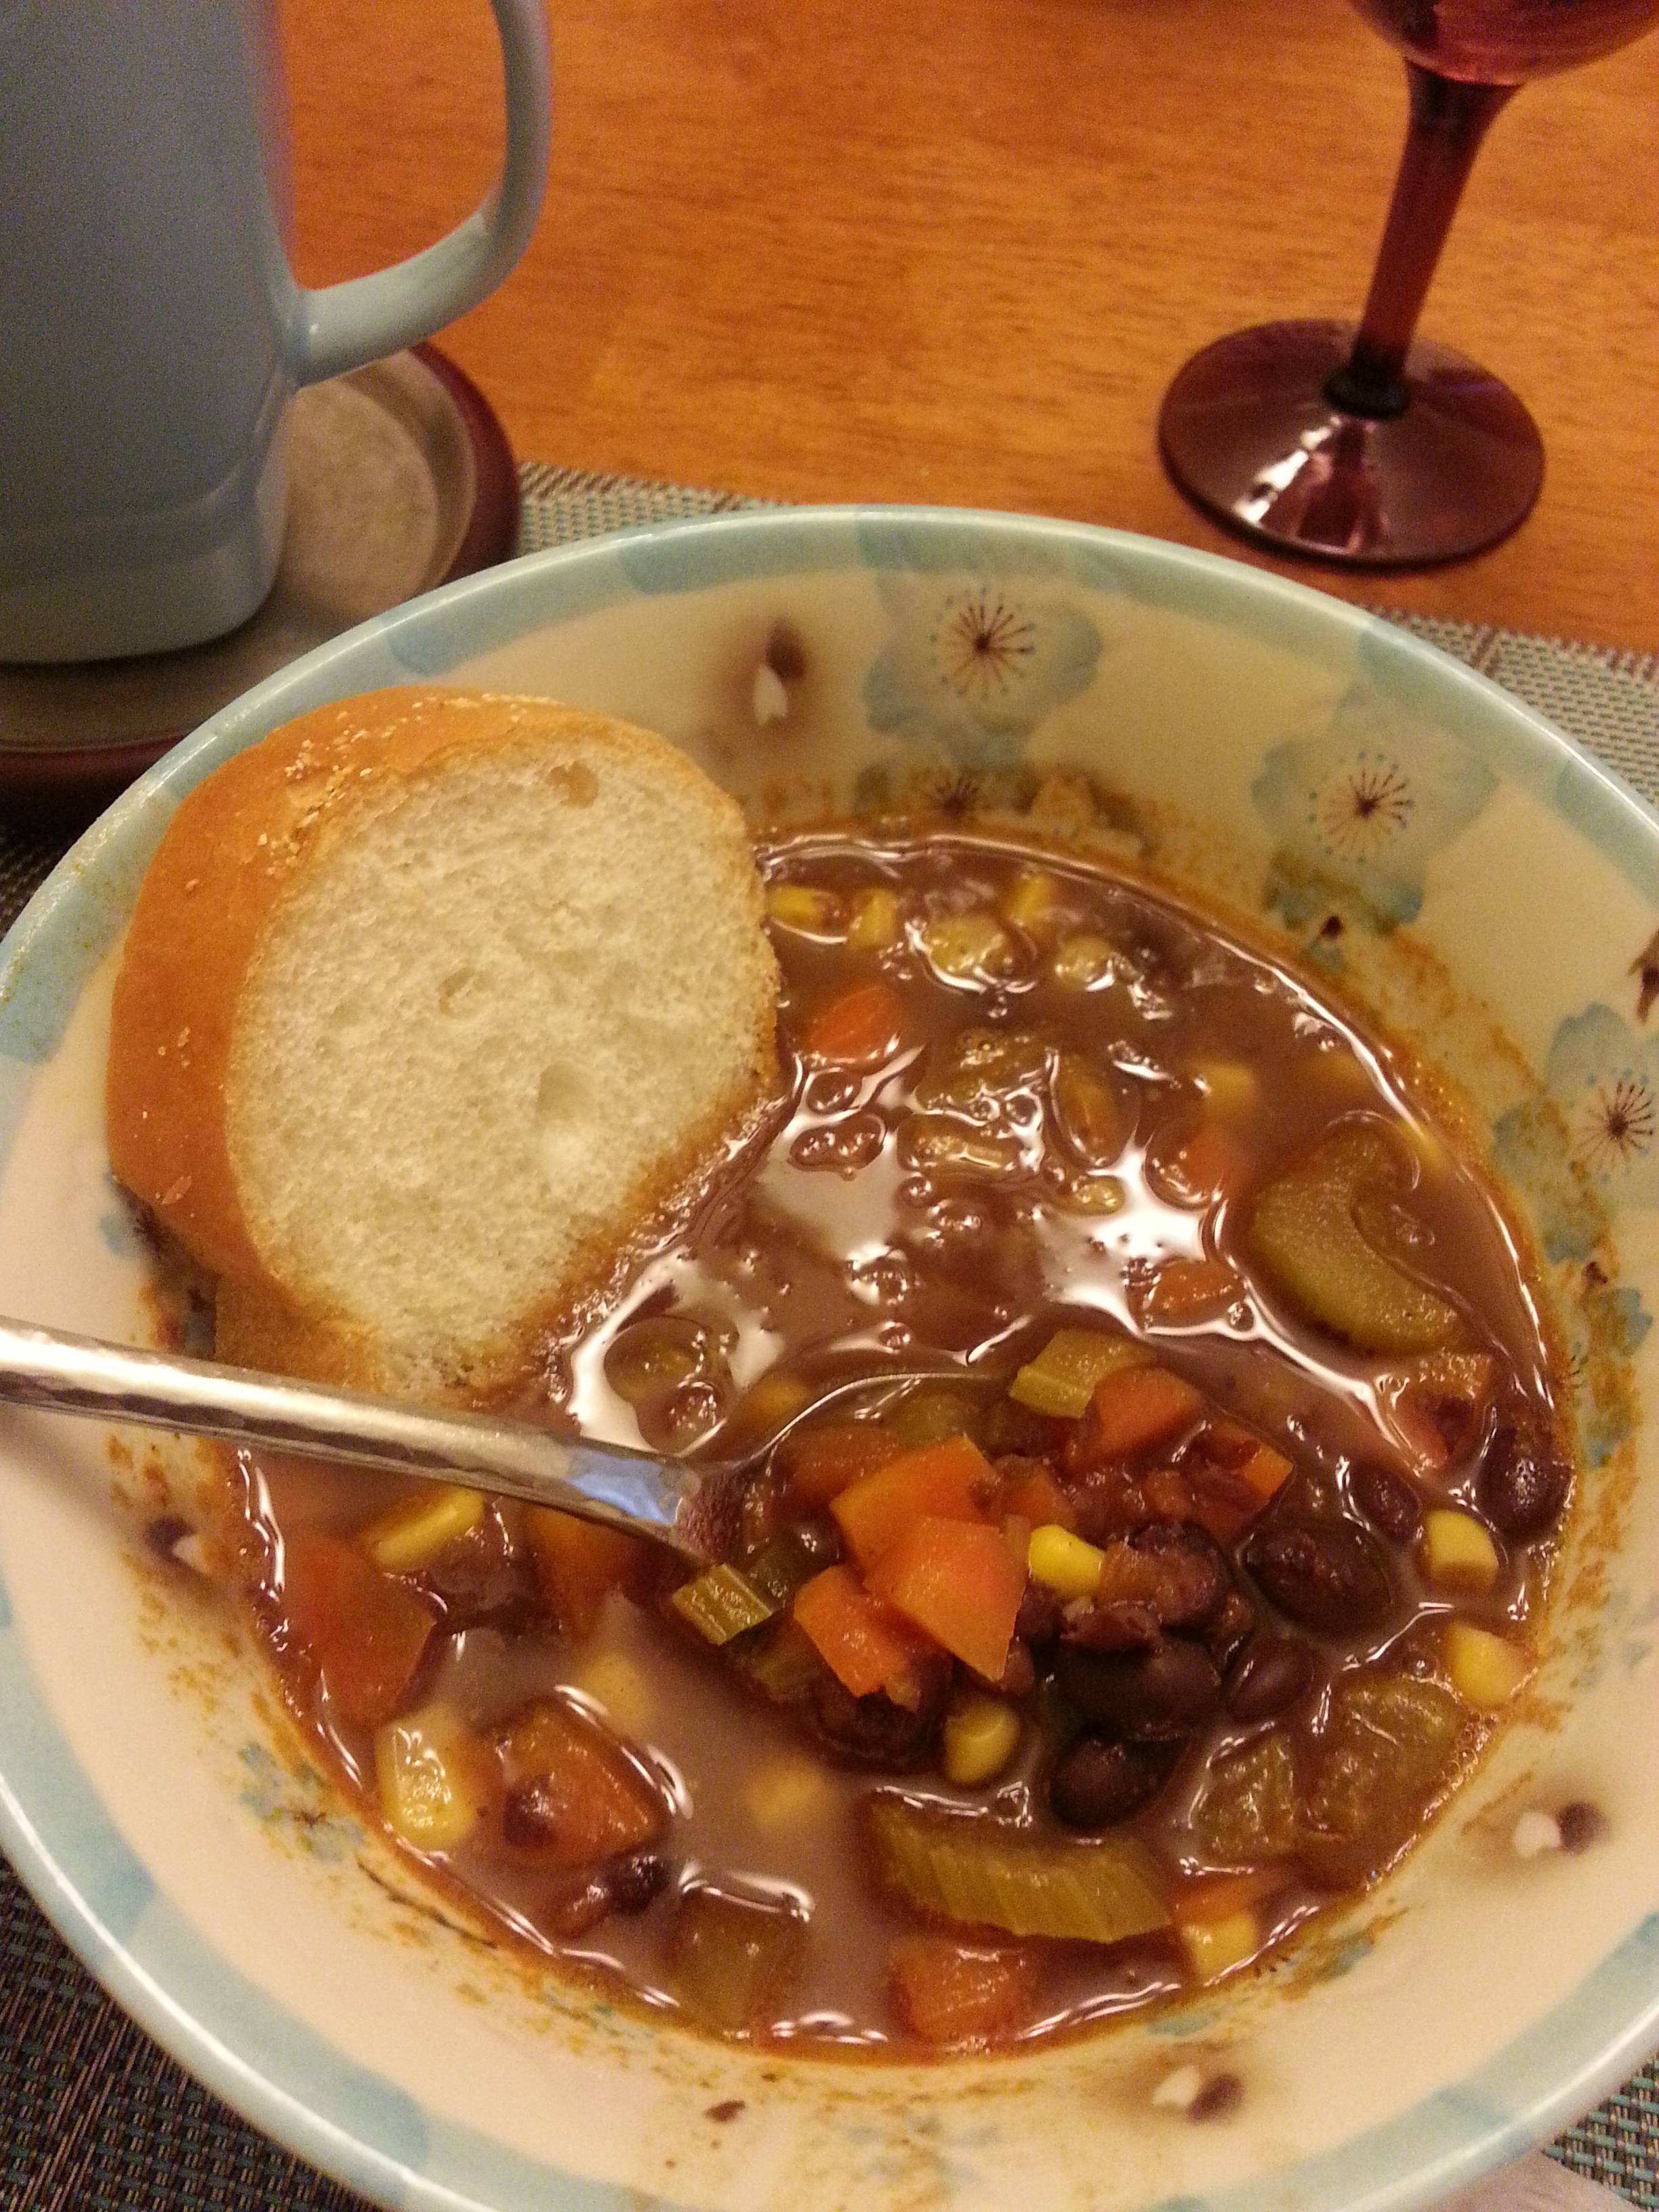
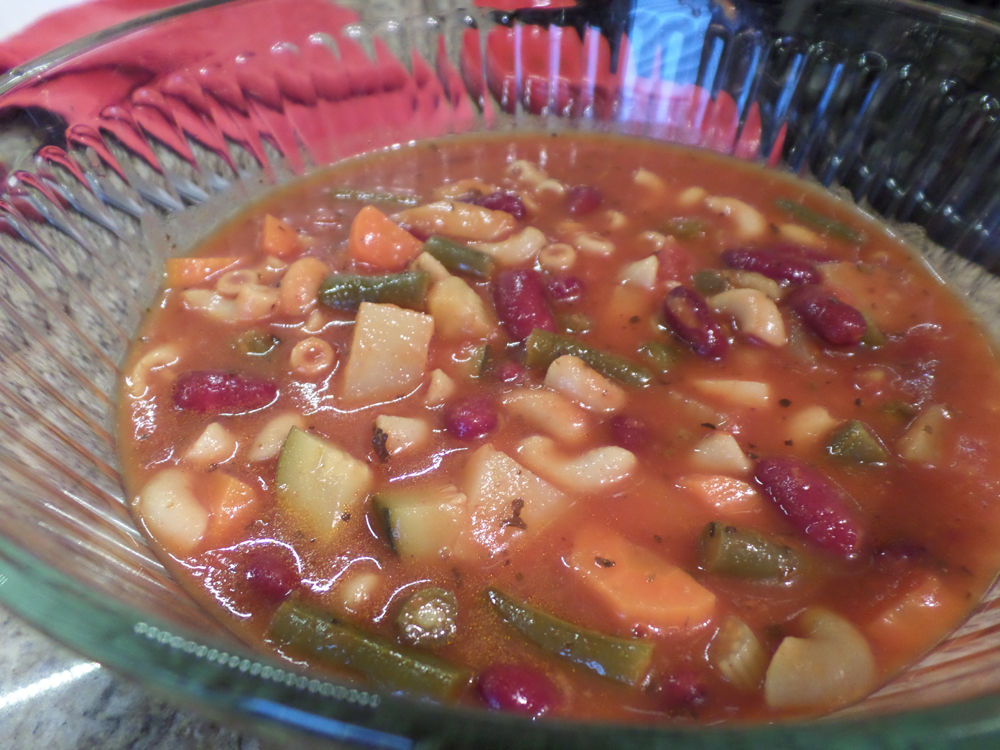
This soup is a winner.  I have ALWAYS wanted to make minestrone soup and usually the 20-30 ingredient list scared me off.  Finally, I found a recipe that looked similar to an Italian restaurant we recently went to.  It’s perfect.  I just suggest cooking it longer than the recipe states to meld the flavors more and make the veggies more tender.  If you use veg. stock instead of chicken stock and omit the cheese, it’s vegan.  As usual, I omitted the onion and garlic and opted for powder.  For ease I used the crushed tomato can. Enjoy!


INGREDIENTS:

  • 4 tsp. olive oil
  • 1 yellow onion, chopped, or onion powder**
  • 4 garlic cloves, minced
  • 2 carrots, peeled, halved lengthwise, and thinly sliced
  • 1-2 celery stalks, thinly sliced, with some celery leaves chopped thin
  • 1 potato (any kind), peeled and cut into 1/2″ cubes
  • 1 medium zucchini, cut into 1/2″ cubes
  • 1/4 cup minced fresh basil or 1 T. dried basil
  • 1 tsp. dried oregano, crumbled
  • 2 large bay leaves
  • 4 med. tomatoes, peeled cored seeded and chopped – or 1 large can (28 oz) crushed tomatoes, with juice**
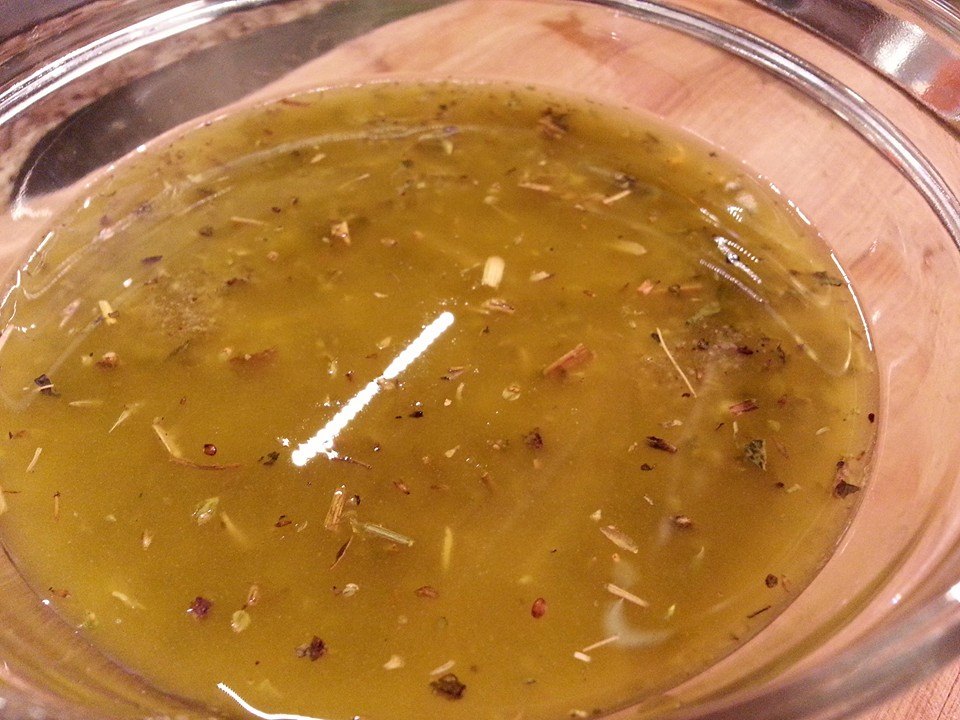
  • 5 cups low-sodium chicken broth
  • 1/4 lb. green beans, trimmed and cut into 1-in. pieces
  • 4 oz. rotelle or other tubular pasta (I used 2 oz. uncooked pasta and boiled it separately).
  • 2 cups cooked and drained white beans, such as Northern beans
  • 1/2 cup Parmesan cheese, grated (optional)
  • 3 T. minced parsley

To make this IC safe, definitely omit the tomatoes and increase chicken broth to 6-7 cups.  

DIRECTIONS:

  1. In a large heavy pot, heat olive oil over low heat 1 minute.
  2. Add onions and garlic, saute 5 mins or until soft.
  3. Increase heat to medium and add carrots, celery, potato, zucchini, basil, and oregano.  Cook, uncovered, 5 mins, stirring occasionally.
  4. Add tomatoes, chicken broth, and bay leaves.  Bring to a boil.
  5. Then reduce heat, simmer uncovered, 20 minutes.
  6. Add green beans, cover and simmer 10 mins. or until beans are tender but still crisp.  Remove bay leaves.
  7. Cook pasta according to package directions, omitting salt.
  8. Drain and add pasta to soup along with beans of your choice.
  9. Cook until heated through, about 3-5 minutes.  Simmer more if potatoes are not tender. 
  10. Ladle into bowls and sprinkle with cheese and parsley. 


“Energy Balls” – Oatmeal Bites *

1978550_10203660290097501_88301805_o


135268_10203660290217504_828705787_o

I made these as a way to give my growing boy some needed calories but in a tasty way.  I learned a few things by making it so I know what to do better next time.  First, I am glad I made a half batch, it made 25!  Secondly, I tried reducing the honey but it needed all of it to bind together.  Thirdly, I will reduce the chocolate chips next time because it definitely was in the ‘dessert’ category more than I liked.  As written, I’m placing this in the dessert category.  But if the chocolate chips were reduced, I’d place it in the Snacks section.  So halving the chocolate chips to 1/4 cup (for a half batch) would be fine.  I didn’t use the shredded coconut because a) I didn’t have it and b) I don’t have many fans here.  I used ground flax seed, cashews, peanuts, creamy peanut butter, raisins, and everything seen in the photo.  I got this recipe from the Washington Post.  I would definitely try this next time in the food processor for ease!  Enjoy!

INGREDIENTS (FULL BATCH ingredients below, I halved these amounts):

  • 1 cup peanut butter, sunflower butter or almond butter
  • 1 cup raw or regular honey (start with less if regular honey and add more if needed)
  • 3 cups rolled oats
  • 1/2 cup ground chia seed or flax seed
  • 1 cup mini chocolate chips or cacao nibs**
  • 1 cup any combination of nuts, seeds and soft dried fruit, raisins**, cashews/peanuts, such as sunflower seeds, and dried cranberries**
  • Sweetened shredded coconut, for rolling (optional)

**Known IC irritants, tread carefully!


DIRECTIONS:

  1. Combine the nut butter and honey in a large mixing bowl and stir until smooth.
  2. Gradually add the oats and chia seed or flax seed. Add the cacao nibs or chocolate chips and the nut-seed-fruit mixture, and mix gently to combine.
  3. Use your hands to roll the mixture into balls (I used a cookie scoop) approximately the size of ping-pong balls. If desired, roll them in shredded coconut.
  4. Place the balls in paper mini-muffin cups. At this point, you can eat them, but they’ll be less sticky after a night in the refrigerator. They taste best after one day in the fridge.  Layer the balls in an airtight container, using wax paper to separate the layers, and refrigerate for 7 to 10 days or freeze for up to 3 months.

Great Crepes


SAMSUNG CAMERA PICTURES


SAMSUNG CAMERA PICTURES

My first crepe experience didn’t go well, thankfully I waited a while and tried again.  This recipe is really easy and works.  Follow it to the letter and you’ll be fine.  I used an 8″ nonstick omelet pan as I don’t own a crepe pan.  Enjoy.

Original recipe makes 8 crepes
INGREDIENTS:
  • 2 eggs
  • 1 cup milk
  • 2/3 cup all-purpose flour
  • 1 pinch salt
  • 1 1/2 teaspoons vegetable oil

DIRECTIONS:

  1. In a blender combine eggs, milk, flour, salt, and oil. Process until smooth.
  2. Cover and refrigerate 1 hour.  (YES, YOU MUST WAIT AT LEAST ONE HOUR.  Preferably, overnight is best.)  During this process the flour slowly absorbs the fluid mixture and this makes a great crepe.  
  3. Heat a skillet over medium-high heat and brush with oil. Pour 1/4 cup of crepe batter into pan, tilting to completely coat the surface of the pan.
  4. Cook 2 to 5 minutes, turning once, until golden. Repeat with remaining batter.

Black Bean and Corn Salad (Salsa)

SAMSUNG CAMERA PICTURES

SAMSUNG CAMERA PICTURES

We made this today, it’s excellent and perfect for summer (or anytime you wish it was summer)!  We halved the recipe and it made about 8 cups!  I’d definitely suggest adding extra salt, cilantro, black pepper, and customizing it to your liking.  I took others’ advice and halved the oil; it seemed right!  Enjoy!

  • /3 cup fresh lime juice
  • 1/2 cup olive oil  (I halved the oil with no ill effect)
  • 1 clove garlic, minced  (I used powder, it was fine)
  • 1 teaspoon salt  (Add some extra sea salt)
  • 1/8 teaspoon ground cayenne pepper  (I added extra black pepper too)
  • 2 (15 ounce) cans black beans, rinsed and drained
  • 1 1/2 cups frozen corn kernels
  • 1 avocado – peeled, pitted and diced
  • 1 red bell pepper, chopped
  • 2 tomatoes, chopped
  • 6 green onions, thinly sliced  (I used onion powder, it was fine)
  • 1/2 cup chopped fresh cilantro (I suggest doubling)

Directions

  1. Place lime juice, olive oil, garlic, salt, and cayenne pepper in a small jar. Cover with lid, and shake until ingredients are well mixed.
  2. In a salad bowl, combine beans, corn, avocado, bell pepper, tomatoes, green onions, and cilantro.
  3. Shake lime dressing, and pour it over the salad. Stir salad to coat vegetables and beans with dressing, and serve.


Homemade Greek Dressing * (Not IC Safe)

Greek-dressing-3-16-14

In an ongoing effort to save money on groceries (haha, what a good joke), I rented a book from the library entitled, “Family Feasts for $75 Per Week: A Penny-wise Mom Shares Her Recipe for Cutting Hundreds from Your Monthly Food Bill” by Mary Ostyn.  I copied a few pages, one of which was “Greek Dressing” page 267.  It was super easy to put together and did not involve a food processor, just shaking.  *Most salad dressings with a high vinegar content will easily last in the fridge 2 months, but sniff it each time.  You can always halve this.  I poured the mixture into my Ball brand Mason jar when I was done mixing.  A+ authentic flavor!

INGREDIENTS:

  • 1/2 cup olive oil
  • 1/4 cup water
  • 1 T. Dijon mustard**
  • 1 T. sugar
  • 1 1/2 tsp. garlic powder
  • 1 tsp. dried oregano
  • 1 tsp. dried basil
  • 1 tsp. black pepper (freshly ground is best)**
  • 1 tsp. salt
  • 1 tsp. onion powder**
  • 2 cloves garlic, minced (I omitted this one, or you can add more garlic powder)
  • 1/2 cup red wine vinegar**

DIRECTIONS:

  1. Combine all ingredients in a pint-size container with a tight-fitting lid.  Shake well.
  2. Store, tightly covered, in fridge up to 2 months. 


Black Bean Vegetable Soup * (Not IC Safe)

20140311_181539


This is a really tasty black bean soup that is vegetarian.  It is healthy and hearty but it’s on the lighter side since it doesn’t have meat.  My husband and I love it!  I used green onions and garlic powder.  Plain or topped with sour cream and cilantro works well too! Enjoy!

INGREDIENTS:

  • 1 tablespoon vegetable oil
  • 1 onion, chopped (ONION POWDER IS FINE, OR GREEN ONIONS)**
  • 1 clove garlic, minced (GARLIC POWDER IS FINE)
  • (You can add other veggies like celery and green pepper like I have and it works wonderfully).
  • 2 carrots, chopped
  • 2 teaspoons chili powder**
  • 1 teaspoon ground cumin (I USED 1/2 TSP)**
  • 4 cups vegetable stock
  • 2 (15 ounce) cans black beans, rinsed and drained (I USED LOW SODIUM)**
  • 1 (8.75 ounce) can whole kernel corn
  • 1/4 teaspoon ground black pepper**
  • 1 (14.5 ounce) can stewed tomatoes**

**Known IC irritants, tread carefully!

DIRECTIONS:

  1. In large saucepan, heat oil over medium heat; cook onion, garlic, and carrots, stirring occasionally, for 5 minutes or until onion is softened.
  2. Add chili powder and cumin; cook, stirring, for 1 minute. Add stock, 1 can of the beans, corn, and pepper; bring to boil.
  3. Meanwhile, in food processor or blender, puree together tomatoes and remaining can of beans; add to pot.
  4. Reduce heat, cover, and simmer for 10 to 15 minutes or until carrots are tender.

Orzo with Parmesan and Basil

SAMSUNG CAMERA PICTURES

Wow, sometimes it’s the most simple recipes that turn out the best.  I knew while the aroma was filling my kitchen, that this recipe would turn out beautifully.  Between the chicken stock, orzo, fresh basil, and the Parmesan, this is just wonderful!  It’s hard to stop eating it even though it does not have MSG.  This is how Rice a Roni should be done!  No preservatives and barely any more work than a boxed meal.  *If you want whole wheat orzo, they have it at certain stores.  In the past, I’ve found it at Whole Foods.  Enjoy! 

INGREDIENTS:

  • 2 tablespoons butter

  • 1 cup uncooked orzo pasta

  • 1 (14.5 ounce) can chicken broth (or homemade or from bouillon)

  • 1/2 cup grated Parmesan cheese

  • 1/4 cup chopped fresh basil

  • salt and pepper to taste

  • 2 tablespoons chopped fresh basil

DIRECTIONS:

  1. Melt butter in heavy skillet over medium-high heat. Stir in orzo and saute until lightly browned. (WATCH IT, YOU DON’T WANT TO BURN IT, JUST BROWN IT).
  2. Slowly stir in chicken stock and bring to boil. Cover. Reduce heat and simmer until orzo is tender and liquid is absorbed, about 15 – 20 minutes.
  3. Mix in Parmesan cheese and basil. Season with salt and pepper. Transfer to shallow bowl. Garnish with basil sprigs.

Chef John’s Crispy Onion Rings (That Stay Crispy!)

Chef-John-onion-rings

This was one of those magical cooking moments.  Don’t ask me why a person, me, who can’t be around raw onion could eat cooked onion rings, but it was great, crispy, and better than a restaurant!  My husband cooked these while I was in another room.  They were extremely crispy and stayed that way hours later.  They were the best I’ve ever tasted.  We didn’t have club soda so we used chilled beer, it worked fine.  The panko really works here, don’t substitute it!  A+!

  • 1/2 cup all-purpose flour
  • 1/4 cup cornstarch
  • 2 tablespoons dry potato flakes
  • 1/8 teaspoon cayenne pepper, or to taste
  • 1 cup chilled club soda
  • 2 cups panko bread crumbs, or as needed
  • 2 cups vegetable oil for frying
  • 2 large onions, cut into 1/4-inch thick slices and separated into rings
  • fine salt to taste

Directions

  1. Whisk together flour, cornstarch, dry potato flakes, and cayenne pepper in a large bowl. Whisk in club soda to make a smooth batter.
  2. Place panko bread crumbs in a shallow bowl.
  3. Heat oil in a deep fryer or large saucepan to 350 degrees F (175 degrees C).
  4. Place a few onion rings at a time into the bowl of batter and turn to coat all sides with batter.
  5. Remove onion rings from batter and place into pan of panko bread crumbs; turn to coat completely with crumbs.
  6. Cook a few rings at a time in the hot oil until golden brown, about 2 to 3 minutes.
  7. Transfer to a cooling rack set over paper towels to drain. Season with salt to taste and serve.

Easy Dill “Hands-Free” Fridge Pickles * (Not IC Safe)

easy-dill-fridge-pickles easy-dill-fridge-pickles2

We love this REAL SIMPLE recipe.  It’s super easy and produces “Claussen”-like pickles at a fraction of the cost, and what’s better than making it yourself?  I actually have taken out the onion and garlic and it was still good.  The next time I added onion and garlic powder and it was still good!  It’s an adaptable recipe.  For best results, refrigerate at least 2 days before eating one, or more.  I need to buy a waterproof jar, this stand in was okay but it easily leaks.  I put a note down to double the liquid in this recipe to cover the pickles, but try whatever you want.  Enjoy!

INGREDIENTS:

  • 4 Kirby cucumbers (about 1 lb), quartered lengthwise*      (*We use the 5″ small cucumbers as we couldn’t find Kirby)
  • 3/4 cup white wine vinegar**
  • 1/4 small sweet onion, such as Vidalia or Walla Walla, thinly sliced**
  • 2 cloves garlic, smashed
  • 2 tablespoons sugar
  • 1 teaspoon dill seed (I’ve even used 1 tsp. dill weed and it was fine, fresh dill is great too)
  • 1 teaspoon black peppercorns**
  • 1 bay leaf
  • kosher salt

**Known IC irritants, tread carefully!


DIRECTIONS:

  1. Place the cucumbers in a 1-qt. jar or some other container with a tight-fitting lid.
  2. In a bowl, combine the vinegar, onion, garlic, sugar, dill seed, peppercorns, bay leaf, 2 tsp. salt, and 3/4 cup hot tap water.
  3. Stir until the sugar dissolves.
  4. Pour the vinegar mixture into the jar with the cucumbers, cover, and refrigerate for at least 1 day before serving.  The pickles will last 1 week. 


Potstickers with Bok Choy (Can be Vegetarian)

20131218_171432_resized


20131218_165644_resized

ABOVE: This takes practice and coordination.  One area is wrapping the potstickers, the next area is cooking them, and the far off area is them cooling! 


20131218_170357_resized

This was not only a tasty Rachael Ray recipe, but a great learning experience!  It was shockingly easy to make the ingredients, but the preparation was the difficult part.  Now I know that I prefer using egg roll wrappers instead of the wonton wrappers.  Wonton wrappers are shockingly small and once you put the recommended amount of filling in, they are nearly impossible to close without bursting open.  My son loved these – I made him a vegetarian version (all the ingredients, less pork) and he wanted more and more!  He thought they were just like the vegetarian egg rolls that he loves.  As I no longer eat Chinese food at restaurants after a recent hellish food poisoning incident, I better learn how to make all my favorites at home fast!  Bok choy was very easy to work with and I will include it in more of my recipes from here on out!  Wilting the bok choy was a fun process to see it go from this giant quantity to a small amount.  I had to overlap three wonton wrappers to get the size of potsticker that I wanted! 

If you want this vegetarian, just omit the pork and add more finely chopped and cooked veggies!  My son loved it that way!


INGREDIENTS:

  • 2 T. vegetable oil, plus more for brushing
  • 3/4 lb. ground pork
  • 1/2 lb. bok choy, finely chopped
  • 1 large clove garlic, finely chopped (I used garlic powder)
  • 1/4 tsp. crushed red pepper
  • 1 T. soy sauce, plus more for serving
  • 20 square wonton wrappers (Definitely use egg roll wrappers if you want they bigger)


DIRECTIONS:

  1. In a large skillet, heat 1 T. oil over medium heat.  Crumble in the pork and cook until done, transfer to bowl.
  2. Cook the bok choy, garlic, and red pepper in the skillet, stirring until wilted, add the soy sauce and cook 1 minute.
  3. Transfer to the bowl and stir to combine (with pork). 
  4. Place 2 T. of the filling down the center of one wonton wrapper (JUST TRY THIS, LOL, 2 T. filling will NOT fit in a wonton wrapper!)
  5. Moisten edges and fold so no filling fall outs.  Repeat with remaining wrappers.
  6. Heat the skillet over medium heat.  Brush the rolls with oil and, working in batches, cook seam side down, turning once, until golden, about 5 minutes. 

(Add a dash of toasted sesame oil and sliced scallions to soy sauce to make an amped-up dipping sauce).