Easy Rotisserie Chicken (Well, Easy-ish) *

20150727_182500_resized20150727_172416_resized 20150727_182044_resized 20150727_182328_resized


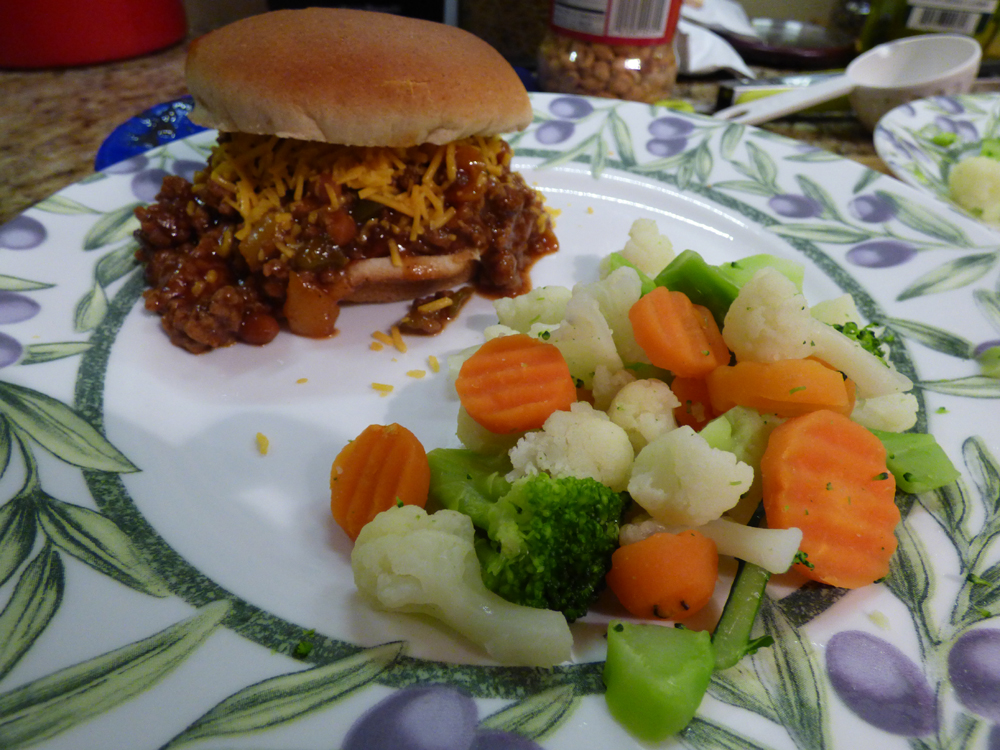
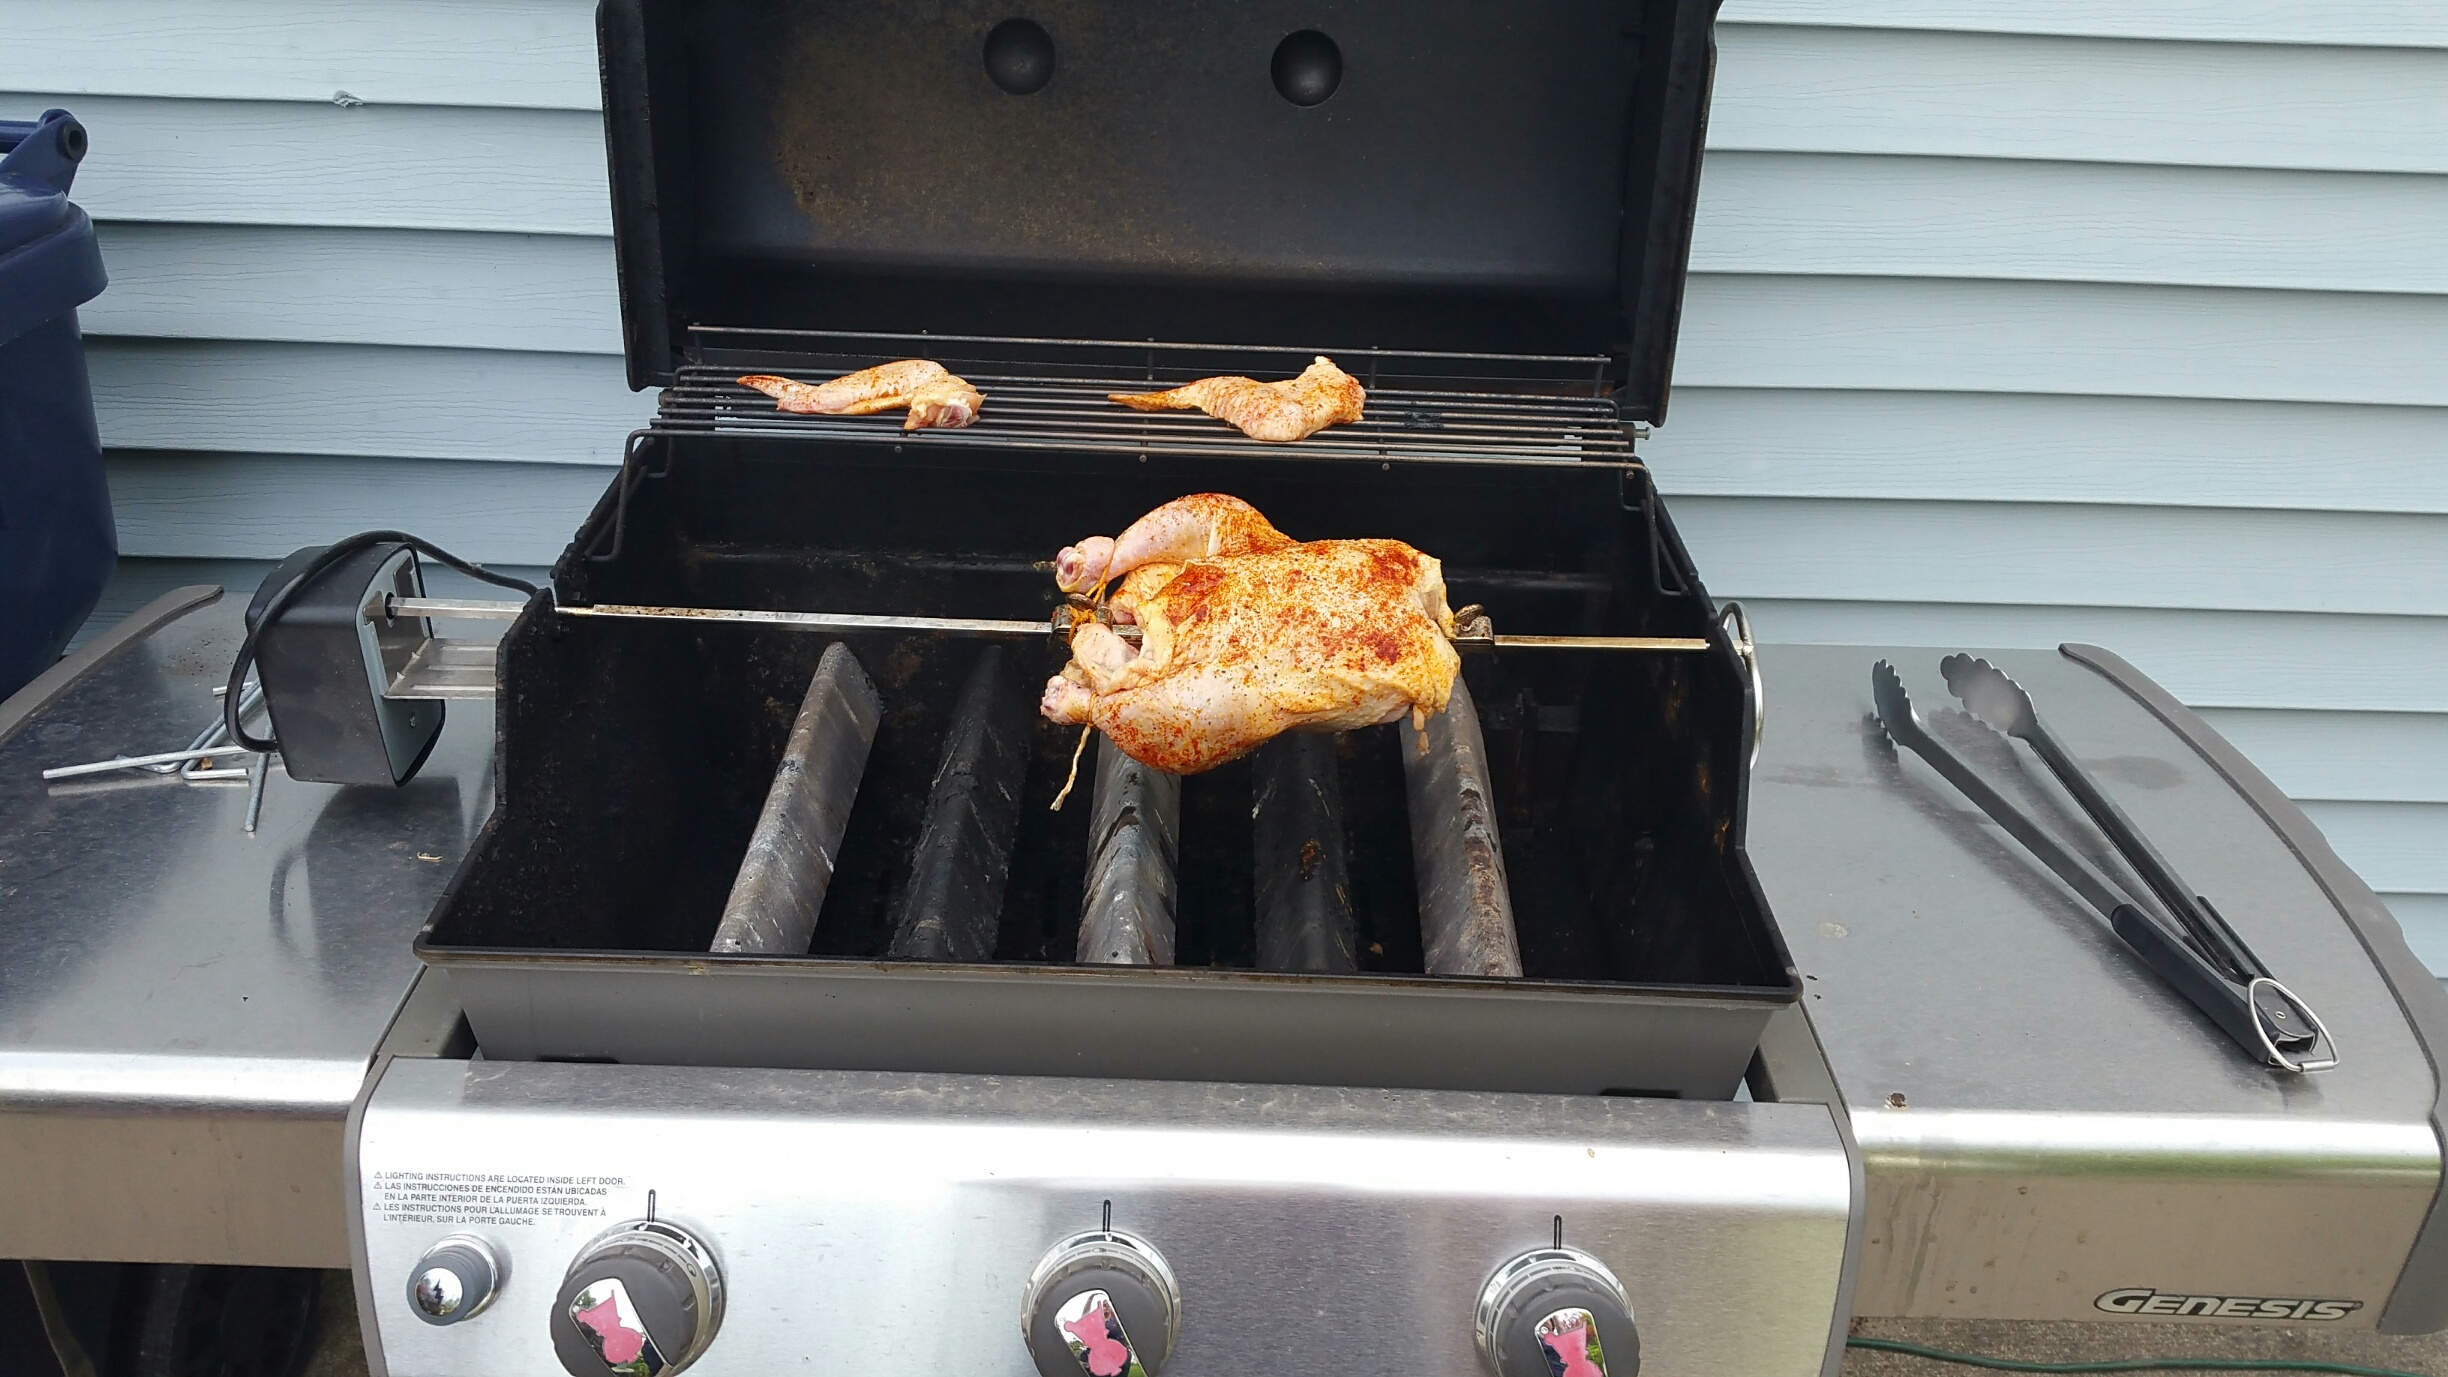
So I’ll preface this with we are not grill masters, but we find our way and make some yummy BBQ.  Nothing special or crazy exotic, just yummy BBQ.  So here’s our recent rotisserie chicken.  I bought a antibiotic-free chicken and went for it.

About grills and rotisseries:  We own the Weber Genesis E-310 propane grill.  It was expensive but it’s worth every single penny.  We had too many cheapie grills that fell apart too early. I’m looking at you, Charbroil $300 special!  The Charbroil was junked in about two years with good care.

When you do certain grill tasks and especially use a rotisserie, you want quality silicone gloves to be able to grab the hot rotisserie and the hot meat.  We purchased the AYL Silicone heat resistant BBQ gloves on Amazon, about $19.99.  Links below.

INGREDIENTS:

  • A large whole chicken, you decide the size.
  • Smoked paprika**
  • Coarse salt
  • Freshly ground pepper**
  • Oregano

**Known IC irritants, tread carefully!

To make this IC safe, omit the paprika and pepper.  The oregano should give enough flavor.  

TOOLS:

DIRECTIONS:

  1. Remove the packaging from your whole chicken.  Remove giblets or any bonus parts you won’t need.  Don’t rinse your chicken; it just spreads bacteria all over your sink and counter.
  2. Pat your chicken dry with paper towels.
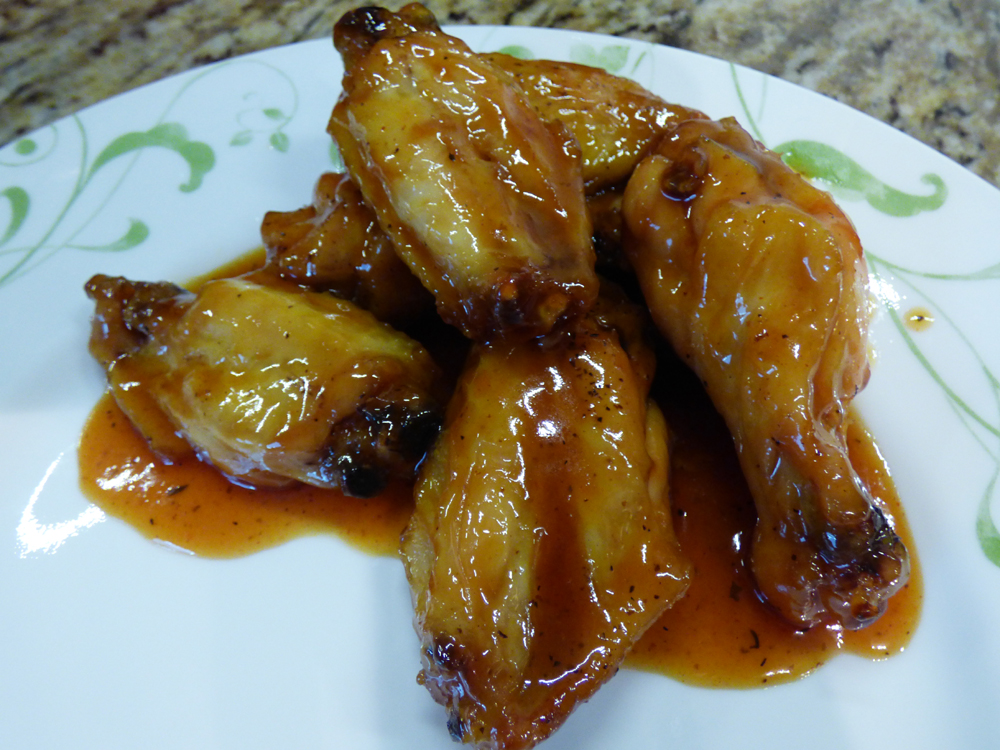
  3. Cut off chicken wings.  (If you leave the thin wings on, they will get burnt to a crisp, so do not).  You can grill them separately or save them for another use.  They crisp up very nicely on the top rack of your grill!
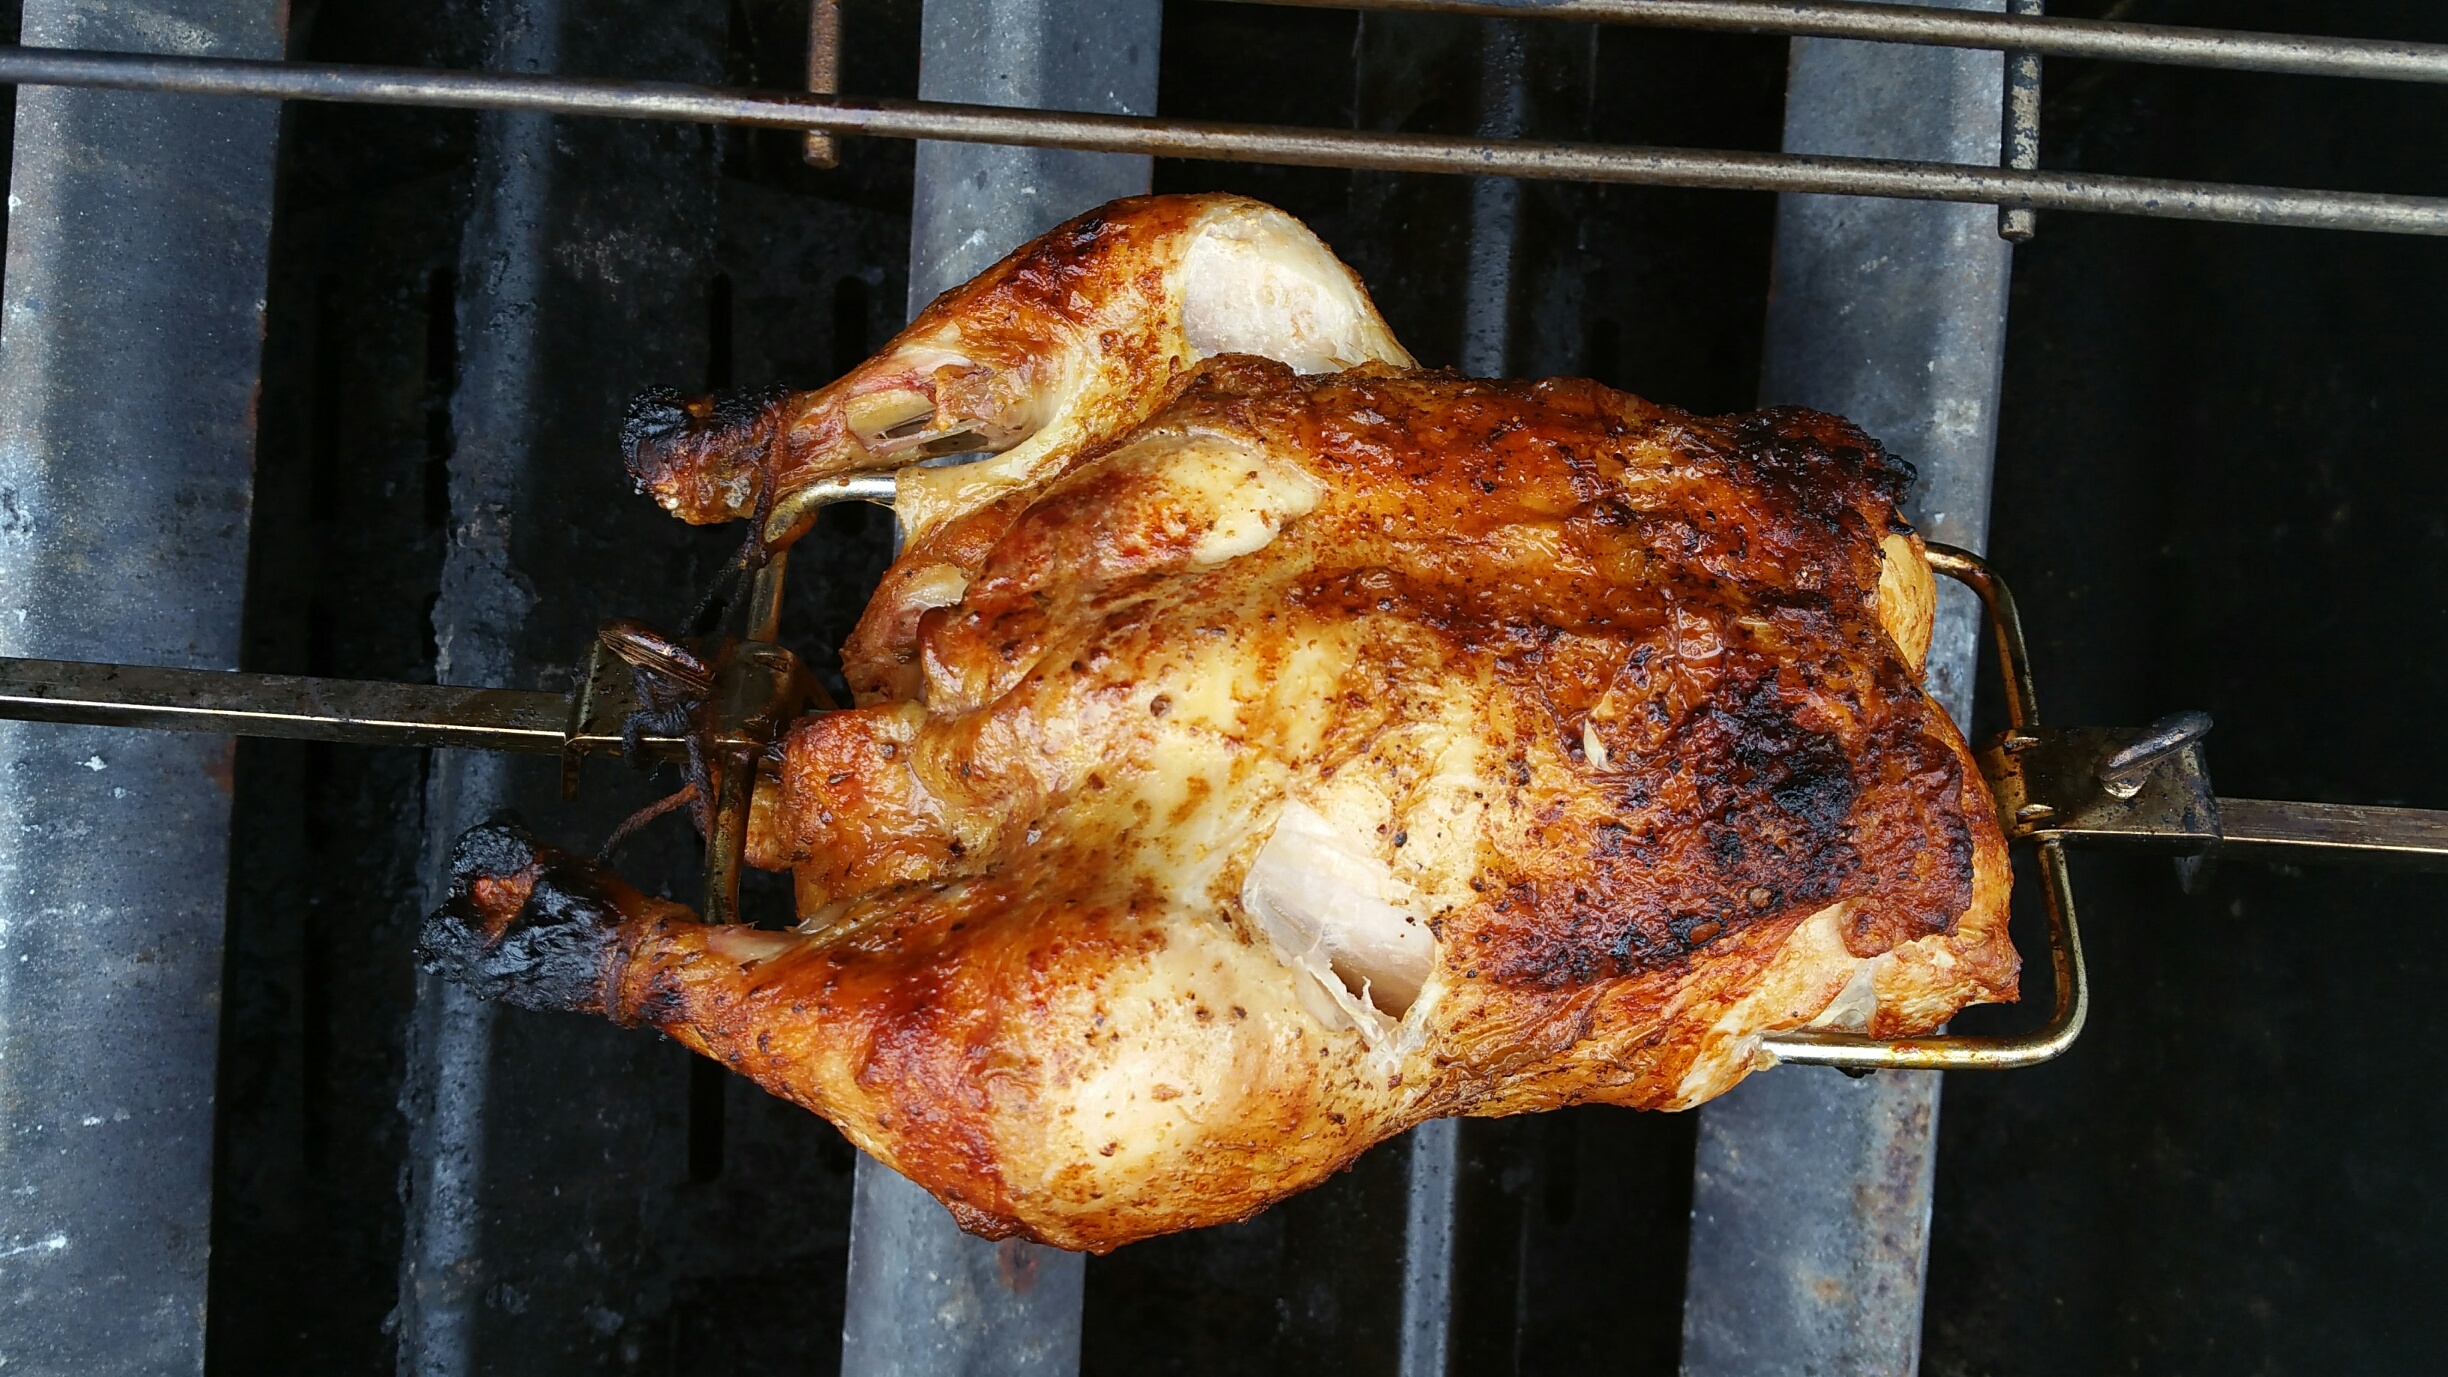
  4. Using kitchen twine, tie the drumsticks to the chicken or the rotisserie tightly, otherwise they will flop around while grilling.
  5. I sprayed my chicken with Original PAM spray because I was especially lazy, but you massage some softened, unsalted butter over the skin.
  6. Sprinkle and rub your spices on the whole chicken (and the wings, if using): smoked paprika gave it an awesome smokey taste, oregano, freshly ground pepper, coarse salt – or whatever spices you like.
  7. Unscrew your rotisserie and thread your whole chicken on it, making sure to insert it into the metal stabilizers.
  8. Prepare your grill per rotisserie directions.  We remove our grill grates and do indirect grilling.  We leave the left and right burners on our 3-burner grill, and turn off the middle burner.  This allows the meat to slowly cook.
  9. After about an hour, temperature your meat, away from the bone.  Cook until 165 degrees F, the safety temp.
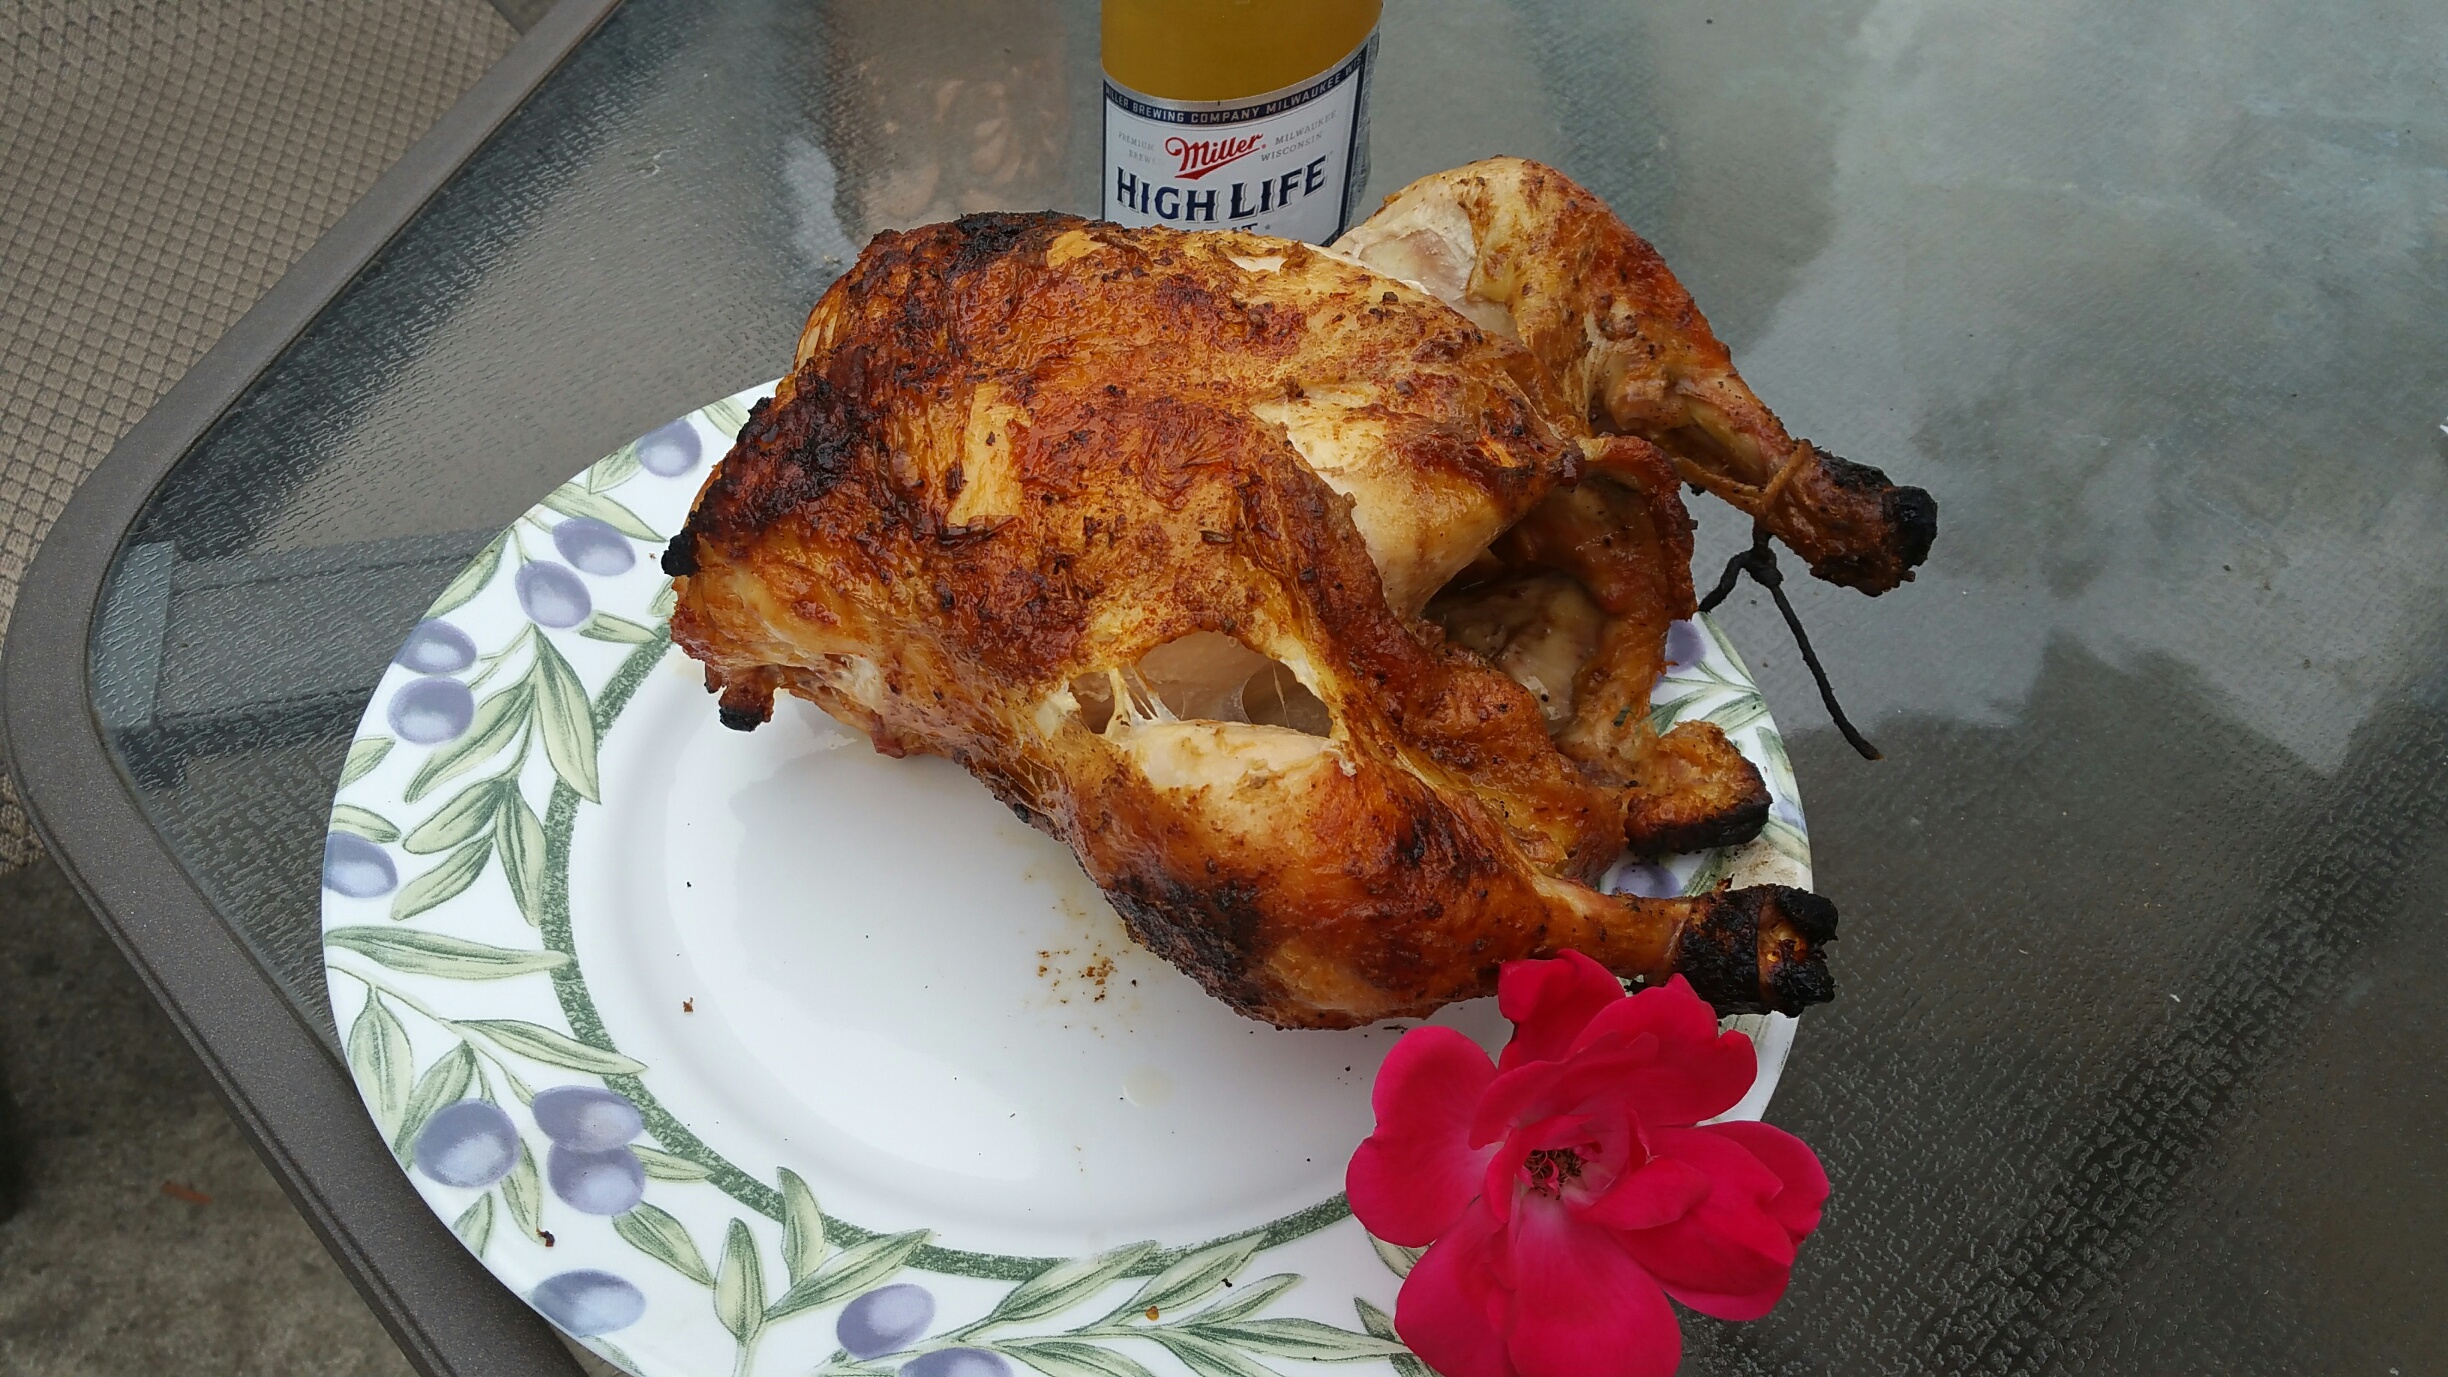
  10. Once it has reached the safe temp., turn off your grill and leave lid open so the meat can cool and rest – a very important step.
  11. Wearing your silicone gloves, remove rotisserie with meat to a clean tray.


Print Friendly, PDF & Email

Oven-Fried, Breaded Pork Chops

breadedpork1 breadedpork2 breadedpork3


It’s well known I do not like many forms of pork that do not involve a) bacon or b) ribs, so I have some difficultly eating a pork chop or pork tenderloin unless it’s absolutely exceptional, moist, and flavorful.  Otherwise, I rather eat the sides on my plate and call it a day.  With that pickiness in mind, I gave this Better Homes & Gardens recipe a try.  Thankfully, it turned out fantastic.  I used my favorite stuffing – Meijer chicken stuffing in a large, tall container.  Since we have an egg allergy in the house, I omitted the egg and milk and used buttermilk instead.  It was great!  Don’t skimp on the butter here.


INGREDIENTS:

  • 4 pork loin chops, cut 3/4″ thick
  • 2 tablespoons butter, melted (unsalted is safest as your stuffing mix will have sodium)
  • 1 egg, beaten
  • 2 tablespoons milk
  • 1/4 tsp. black pepper
  • 1 cup herb-seasoned stuffing mix, finely crushed


DIRECTIONS:

  1. Preheat oven to 425.
  2. Trim fat from meat.
  3. Pour butter into a 13x9x2″ baking pan, tilting pan to coat the bottom.
  4. In a shallow dish, combine egg, milk, and pepper (or combine buttermilk and pepper).
  5. Place stuffing mix in another shallow dish.
  6. Dip chops into egg/milk/pepper mixture or buttermilk/pepper mixture.
  7. Coat both sides with stuffing mix.
  8. Place chops in prepared pan.
  9. Bake uncovered for 10 minutes.  Turn chops and bake additional 10-15 minutes until 160 degrees and juices run clear.

***After trying this recipe once, I figured out another option.  That is to preheat your oven with butter and pan inside.  Then *carefully* add your prepared chops to your hot pan with the hot butter already melted and up to temperature, to get more of a searing effect.

Print Friendly, PDF & Email

Southern Buttermilk Biscuits *

buttermilk-biscuits-6-15-image1 buttermilk-biscuits-6-15-image2


I found this recipe on Food.com and it sat in my “to-make” recipe folder for about a year and a half.  I thought making buttermilk biscuits would be too difficult, but it turns out it was anything but!  This really is a recipe where the food processor shines!  You could do it by hand but it will be better mixed and so much easier on you to just use a food processor!  Please make this!  It’s a very easy recipe, it just sounds complex in the directions!  It tastes so much better than canned biscuits!!

Use real buttermilk, this isn’t a circumstance where the milk soured with lemon would be good enough.

NOTE: Use unsalted butter.  If you only have salted butter on hand, omit the salt so you don’t have overly salted biscuits.  Cook and bake with unsalted butter for best results.  For serving guests, use salted butter.  

INGREDIENTS:


**Make sure your buttermilk ingredients are safe!


DIRECTIONS:

  1. Preheat your oven to 450°F.
  2. Combine the dry ingredients in a bowl, or in the bowl of a food processor.
  3. Cut the butter into chunks and cut into the flour until it resembles course meal.  If using a food processor, just pulse a few times until this consistency is achieved.
  4. Add the buttermilk and mix JUST until combined.  Do not over-mix.
  5. If it appears on the dry side, add a bit more buttermilk. It should be wet.  Honestly, I like my dough a little on the dry side so I can work with it and not have extremely messy hands.  So I covered my hands in flour while manipulating the dough and added more flour when necessary.  It’s a giant mess if your dough is too wet while cutting it into shapes.  
  6. Turn the dough out onto a floured board.  Gently PAT (do NOT roll with a rolling pin) the dough out until it’s about 1/2″ thick.
  7. Flour the top of your dough lightly to prevent the cutter from sticking.  Then, use a round cutter to cut into rounds.
  8. You can gently knead the scraps together and make a few more, but they will not be anywhere near as good as the first ones.
  9. I put parchment paper down on my pan and it turned out beautifully.  Place the biscuits on a cookie sheet- if you like soft sides, put them touching each other.  If you like”crusty” sides, put them about 1 inch apart- these will not rise as high as the biscuits put close together.
  10. Bake for about 10-12 minutes- the biscuits will be a beautiful light golden brown on top and bottom.  Do not overbake.


Note: The key to real biscuits is not in the ingredients, but in the handling of the dough.  The dough must be handled as little as possible or you will have tough biscuits.  I (the original author) have found that a food processor produces superior biscuits, because the ingredients stay colder and there’s less chance of overmixing.  You also must pat the dough out with your hands, lightly. Rolling with a rolling pin is a guaranteed way to overstimulate the gluten, resulting in a tougher biscuit. You can make these biscuits, cut them, put them on cookie sheets and freeze them for up to a month.  When you want fresh biscuits, simply place them frozen on the cookie sheet and bake at 450°F for about 20 minutes.

Print Friendly, PDF & Email

Pasta & Easy Italian Meat Sauce with Fettuccine * (Not IC Safe)

easy-meat-sauce-fettuccine

We loved this recipe from Martha Stewart’s “Great Food Fast” cookbook!  It’s a perfect recipe when you want a homemade meat sauce to go with your pasta and want to avoid a jarred sauce.  It reminded us of the flavors of the Greek dish called Pastichio, but it was infinitely easier to make!  The secret ingredient is shredded carrot and most people would never know!  This was a quick recipe and could be made even on a week night.

This recipe includes milk, which channels Northern Italian recipes like that of the famed Ragu alla Bolognese.

The only change I made was that I used about 1/3 of an onion instead of a whole onion, so I decreased the butter to 2 tablespoons and used the 1 tablespoon olive oil as instructed.  I probably could have decreased the butter to 1 tablespoon looking back, because it left a little oil/butter residue.  Very yummy dish!

*We used a little over 3/4 LB. of lean ground beef (90%).  Next time I’d use a full pound.  

INGREDIENTS:

  • 4 tablespoons butter, which you can reduce (unsalted is best to use)
  • 1 tablespoon olive oil
  • 1 carrot, grated (about 1/2 cup)
  • 1 onion, chopped**
  • 2 garlic cloves, chopped
  • 3/4 lb. to 1 lb. ground beef*
  • 1 can (28 ounces) whole tomatoes**
  • 1/2 cup milk
  • 1 dried bay leaf
  • 1/2 tsp. dried thyme
  • 1/4 tsp. ground nutmeg
  • Coarse salt and freshly ground pepper**
  • 1 LB. fettuccine
  • Grated Parmesan cheese, for serving

**Known IC irritants, tread carefully!

DIRECTIONS:

  1. Heat the butter and oil in a large saucepan over medium heat.
  2. Stir in the grated carrot, onion, and garlic.  Cook a few minutes.
  3. Add the ground beef and cook until it turns from pink to brown, about 5 minutes.
  4. Add the tomatoes and their liquid, crushing them with the back of a large spoon.
  5. Stir in the milk, bay leaf, thyme, nutmeg, 1/2 tsp. salt, and 1/8 tsp pepper.
  6. Simmer for 20 minutes.  Then discard bay leaf.
  7. Meanwhile, in a large pot of boiling salted water, cook the fettuccine until al dente according to the package directions.
  8. Reserve about 1/2 cup of the cooking water, and drain the fettuccine.
  9. Return the pasta to the warm pot.
  10. Add the meat sauce to the pasta, and toss.
  11. Add the reserved pasta water as needed if the sauce seems dry.  (I ended up adding maybe 1/4 cup to make it moister).
  12. To serve, sprinkle with Parmesan cheese.


Print Friendly, PDF & Email

Lighter Chicken Enchiladas

chicken-enchiladas

The simplicity and flavor of this four ingredient chicken enchilada amazes me.  It really is easy and delicious.  I LOVE this recipe!  You can accent it with sour cream once it’s cooled out of the oven, or green onions, or whatever you like.  Use as much or as little cheese as you want, but definitely use the entire 28 oz. can of enchilada sauce, it needs it or it will dry out!  A+!

INGREDIENTS:

  • 3 boneness, skinless chicken breast halves (a total of approx. 18-24 oz.)
  • A package of corn tortillas (6-inch) *I always buy 2 pkg’s at a time just because.
  • Monterey Jack or Mexican blend cheese
  • One 28 oz. can mild, traditional enchilada sauce**
  • sour cream, green onions**, etc for topping (optional)

** = may be considered irritants to some IC patients resulting in a flare.  Please tread carefully.

DIRECTIONS:

  1. Preheat oven to 400 degrees F.
  2. In a large skillet with lid, bring 1″ water to a boil.
  3. Add chicken and season with salt.  Cover and reduce heat to medium-low.
  4. Simmer 5 minutes, remove skillet from heat.
  5. Let chicken steam, covered, until cooked through or registers safe on an instant-read thermometer, about 12-14 minutes.
  6. When slightly cooled, shred with two forks and transfer chicken to large bowl.
  7. Mix 1 cup enchilada sauce with chicken; toss to combine.
  8. Spread some enchilada sauce evenly in a baking dish.  (I used a 9×13″ Pyrex glass baking dish which has an awesome lid for later storage).
  9. Fill each corn tortilla with chicken mixture.  Roll up tightly and arrange seam side DOWN, in a baking dish.
  10. Cover with remaining enchilada sauce and top with desired amount of cheese
  11. Bake until cheese is melted and sauce is bubbling, 15-20 minutes.
  12. Let cool 5 minutes before serving (believe me!).
Print Friendly, PDF & Email

Easy Triple-Cheese Lasagna

2lasagna-4-15 lasagna-4-15


This is a very good lasagna.  What we found interesting was the day we made it, it was just in the “okay/good” pile.  The next day, after a night in the fridge, it morphed into something you would taste at a fancy, exotic Italian restaurant.  It got 100x better!  It had more depth of flavor and didn’t taste bland at all.  **We used 85% ground beef, ricotta, and shredded Italian cheese.  For the ricotta, don’t use fat free ricotta, at least use the medium fat one like we did – I think the ricotta was 6g fat a serving.  Enjoy!

INGREDIENTS:

  • 1 can (28 oz) crushed tomatoes with Italian herbs
  • 1 lb. ground beef or Italian sausage (casings removed)
  • 6 uncooked dried lasagna noodles
  • 2 cups (8 oz) shredded Italian cheese blend or mozzarella cheese
  • 1 1/2 cups cottage cheese or ricotta cheese
  • 2 T. grated or shredded Parmesan cheese

DIRECTIONS:

  1. Set oven at 350 degrees and preheat.
  2. Spray 2 qt. rectangular baking dish with cooking spray.
  3. Spoon 1 cup crushed tomatoes into baking dish.
  4. Cook meat in large skillet, drain.
  5. Stir in remaining undrained tomatoes, bring to boil.
  6. Place 2 uncooked noodles in dish, top with 1/3 of the meat/sauce mixture and 1/3 of the Italian cheese.
  7. Repeat layers.
  8. Top with cottage cheese (preferably ricotta!),  then remaining noodles, meat mixture, and Italian cheese.
  9. When in doubt, if that’s confusing, JUST KEEP LAYERING! LOL
  10. Cover with foil and bake in preheated 350 for 1 hour.  Put a jelly roll pan under the baking dish to collect any spillage.
  11. Let stand 15 minutes to cool (or you’ll burn your mouth!)
  12. Sprinkle with Parmesan cheese.
Print Friendly, PDF & Email

Honey-Mustard Chicken Wings * (Not IC Safe)

honey-chicken-wings-4-15


This is a slow cooker recipe, but I adapted it (see option 2) to make it in the oven when I ran out of time one evening.  It really was great!  We don’t like spicy brown mustard (or many mustards) so we just quartered the mustard ingredient and the flavor still came through and worked well.  Enjoy!

INGREDIENTS:

  • 3 lbs. chicken wings
  • 1 tsp. salt
  • 1 tsp. black pepper**
  • 1/2 cup honey
  • 1/2 cup BBQ sauce**
  • 2 T. spicy brown mustard (we reduced it to 1/2 T.)**
  • 1 clove garlic, minced
  • 3-4 thin lemon slices (optional)**

**Known IC irritants, tread carefully!

DIRECTIONS:

  1. Preheat broiler.  Cut off wing tips, discard.  Cut each wing at joint to make 2 pieces.
  2. Season with salt and pepper.
  3. Place on broiler pan.  Broil 4-5 inches from heat about 5 minutes per side.

SLOW COOKER OPTION 1)

  • Transfer wings to slow cooker.
  • Combine honey, BBQ sauce, mustard, and garlic in small bowl.  Mix well.  Pour sauce over chicken wings.  Top with lemon slices, optional.  Cover, cook on LOW 4-5 hours.
  • Before serving, remove and discard lemon slices.
  • Serve wings with sauce.

OR QUICK OPTION 2)

  • Transfer wings to large baking dish that has sides.
  • Combine honey, BBQ sauce, mustard, and garlic in small bowl.  Mix well.  Pour sauce over chicken wings.  Top with lemon slices, optional.  Cover, cook at about 375 degrees for about an hour, or until thermometer reads safe.
  • Before serving, remove and discard lemon slices.
  • Serve wings with sauce.


Print Friendly, PDF & Email

Campfired Up Sloppy Joes * (Not IC Safe)

sloppyjoes1

sloppyjoes2 sloppyjoes3


This is a cool recipe I found in my CrockPot slow cooker book that I love.  It takes your classic sloppy joe ingredients and adds flavorful, easy add-ins like baked beans, bell pepper, and BBQ sauce.  It’s really better than I thought it’d be and very yummy!  It’s extremely simple – look at the directions!  This is one you could throw together in the morning in about 10-15 minutes and have a scrumptious meal come dinner time.  We’ll definitely make this again!

Makes 4-6 servings.  

INGREDIENTS:

  • 1 1/2 lbs. lean ground beef
  • 1/2 cup chopped sweet onion (or use powder)**
  • 1 medium red bell pepper, cored, seeded and chopped
  • 1 large clove garlic, crushed (or use powder)
  • 1/2 cup ketchup**
  • 1/2 cup BBQ sauce**
  • 2 T. cider vinegar**
  • 1 T. Worcestershire sauce**
  • 1 T. packed brown sugar
  • 1 tsp. chili powder**
  • 1 can (8 oz.) baked beans
  • 6 kaiser rolls, split and warmed
  • Shredded sharp cheddar cheese (optional, but great!)

**Known IC irritants, tread carefully!

DIRECTIONS:

  1. Brown ground beef, onion, bell pepper, and garlic 6-8 minutes in large skillet, stirring to break up meat.  Drain and discard excess fat.  Transfer beef mixture to slow cooker.
  2. Combine ketchup, BBQ sauce, vinegar, Worcestershire sauce, brown sugar, and chili powder in small bowl.  Transfer to slow cooker.
  3. Add baked beans.  Stir well to combine.  Cover, cook on HIGH 3 hours.  (I did low and it was fine).
  4. To serve, fill split rolls with 1/2 cup sloppy joe mixture.  Sprinkle with cheese, if desired, before topping sandwich with roll lid.
Print Friendly, PDF & Email

Super Easy Strawberry Banana Smoothie! * (Not IC Safe)

20150324_212116

This is my creation.  You can’t go wrong with this smoothie – it’s super simple and fast.  I put all the ingredients in my Ninja and it does all the work!  Sometimes we have this for breakfast, or as an afternoon snack, or even a few hours before bed.

All ingredients are approximations, you don’t even need to measure the fruit, just guesstimate, taste, and adjust if necessary.

Makes about two servings.  


INGREDIENTS:

  • One 6 oz. container Yoplait original French vanilla yogurt**
  • About a cup frozen strawberries (freeze them yourself, save money).**
  • About a cup frozen bananas, previously sliced into approximately 1/2″ pieces prior to freezing**
  • Cold water to thin, if necessary.

**Or use whatever your favorite yogurt is, whatever flavor would work with the fruit.  Greek yogurt will change the flavor, so remember that.  Be careful with Yoplait yogurt – if you buy the ‘light’ version, the package will say “No aspartame” but it surely has Splenda in it: look for sucralose, the other name for Splenda, in the ingredient list.  My husband gets horrid headaches from Splenda that last many hours, and I, with I.C. cannot have any fake sweeteners, or I will suffer.

DIRECTIONS:

  1. Pour yogurt into bottom of your food processor, add a little cold water (about a 1/4 cup), add your fruit.  Cover.
  2. Turn on your blender on low and process until your smoothie is thoroughly mixed.  Add additional cold water if mixture gets too thick.  If mixture is not flavorful enough, add more frozen fruit.
  3. Enjoy!
Print Friendly, PDF & Email

Easy Country Apple Dumplings * (Not IC Safe)

apple-dumplings-crescent-roll-feb


I halved and slightly edited this recipe, because I had to.  First I’ll post the original recipe, and beneath it, I’ll post the changes I made.

It’s absolutely delicious and doesn’t taste anything like the sum of its ingredients.  It’s a super delicious recipe that my son loved (he ate two), and all of us adults loved!  A+!  It’d be even better with a scoop of real vanilla ice cream, but we didn’t have any!

ORIGINAL RECIPE:

MY RECIPE:


DIRECTIONS:

  1. Preheat the oven to 350 degrees F. Grease a 9×13″ inch baking dish.
  2. Cut each apple into 8 wedges and set aside. Separate the crescent roll dough into triangles.
  3. Roll each apple wedge in crescent roll dough starting at the smallest end. Pinch to seal and place in the baking dish.
  4. Melt butter in a small saucepan and stir in the sugar and cinnamon.
  5. Pour over the apple dumplings. Pour Mountain Dew(TM) over the dumplings.
  6. Bake for 35 to 45 minutes in the preheated oven, or until golden brown.
Print Friendly, PDF & Email