Easy Country Apple Dumplings * (Not IC Safe)

apple-dumplings-crescent-roll-feb


I halved and slightly edited this recipe, because I had to.  First I’ll post the original recipe, and beneath it, I’ll post the changes I made.

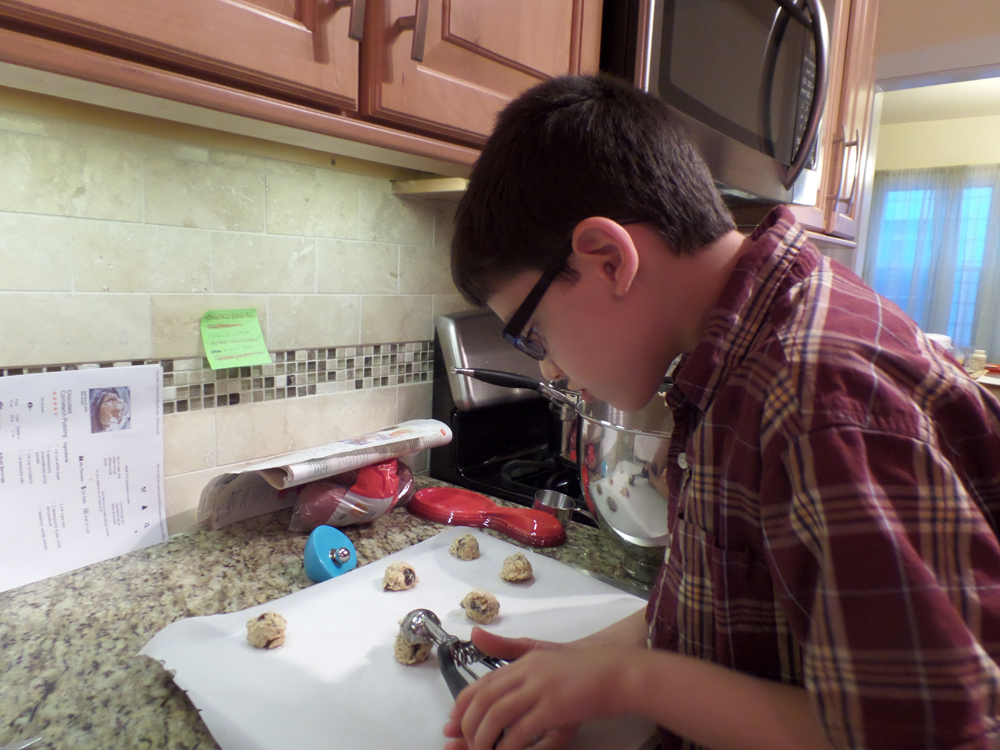
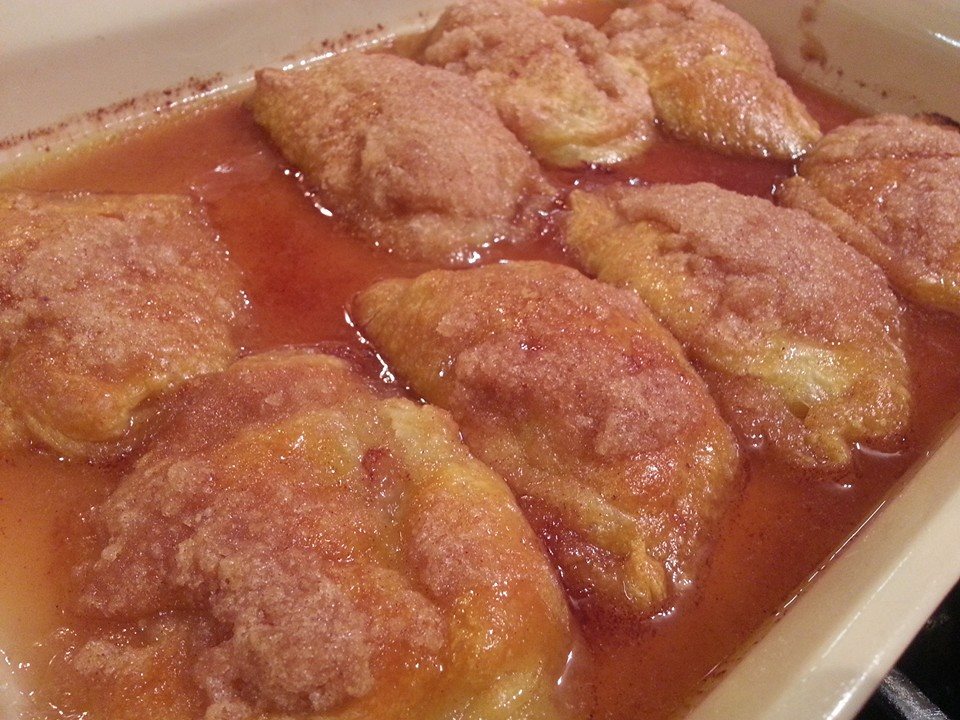
It’s absolutely delicious and doesn’t taste anything like the sum of its ingredients.  It’s a super delicious recipe that my son loved (he ate two), and all of us adults loved!  A+!  It’d be even better with a scoop of real vanilla ice cream, but we didn’t have any!

ORIGINAL RECIPE:

MY RECIPE:


DIRECTIONS:

  1. Preheat the oven to 350 degrees F. Grease a 9×13″ inch baking dish.
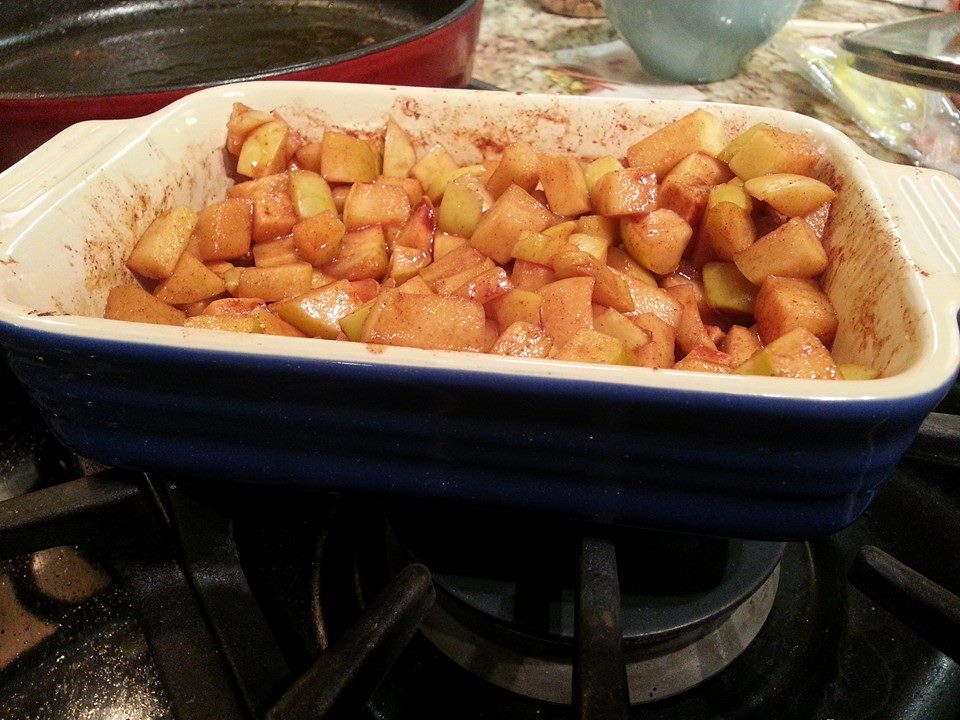
  2. Cut each apple into 8 wedges and set aside. Separate the crescent roll dough into triangles.
  3. Roll each apple wedge in crescent roll dough starting at the smallest end. Pinch to seal and place in the baking dish.
  4. Melt butter in a small saucepan and stir in the sugar and cinnamon.
  5. Pour over the apple dumplings. Pour Mountain Dew(TM) over the dumplings.
  6. Bake for 35 to 45 minutes in the preheated oven, or until golden brown.

ATK’s Zucchini Bread *

americas-test-kitchen-zucchini-bread

This photo is courtesy of America’s Test Kitchen -Cook’s Illustrated.  My bread turned out slightly under-cooked and wasn’t as presentable as I normally like so I’ll just use a stock photo until I can re-make it again.  It’s very delicious bread.  I never knew zucchini could work so well into a dessert type bread!  I cooked it for the full time and even followed the directions for the toothpick coming out with just a few crumbs attached, but it tricked me.  So later, I had to cut it into slices and re-bake on a baking sheet, which helped.  I think the problem was I could only twist and drain so much moisture out of the shredded zucchini.  Next time I will use an orange squeezer to get more moisture out.  My 8 year old loved it – but then again, it is more desserty vs. a hard sell.  Enjoy!

INGREDIENTS:

  • 1 1/2 lbs. zucchini shredded
  • 1 1/4 cups packed (8 3/4 oz.) brown sugar
  • 1/4 cup vegetable oil
  • 2 large eggs
  • 1 tsp. vanilla extract
  • 1 1/2 cups (7 1/2 oz.) all-purpose flour
  • 1/2 cup (2 3/4 oz.) whole-wheat flour
  • 1 T. ground cinnamon**
  • 1 1/2 tsp. salt
  • 1 tsp. baking powder
  • 1 tsp. baking soda
  • 1/2 tsp. ground nutmeg
  • 2/3 cup walnuts (toasted and chopped), optional
  • 1 T. granulated sugar
  • Chocolate chips are a great addition (optional)**

**Known IC irritants, tread carefully! You can make this IC safe by omitting the cinnamon and choc. chips. 

DIRECTIONS:

  1. Adjust oven rack to middle position and heat oven to 325* F.
  2. Grease 8 1/2 x 4 1/2″ loaf pan.
  3. Shred zucchini with either the large holes of a box grated (or use your food processor shredding disc like I did.)
  4. Place shredded zucchini in center of dish towel.  Gather ends together and twist tightly to drain as much liquid as possible, discarding liquid (you should have 1/2 to 2/3 cup liquid).  This method didn’t work well for me, next time I will use an orange squeezer (click here) to remove even more liquid from the zucchini.
  5. Whisk brown sugar, oil, eggs, and vanilla together in medium bowl.  Fold in zucchini.
  6. Whisk all-purpose flour, whole-wheat flour, cinnamon, salt, baking powder, baking soda, and nutmeg together in large bowl.
  7. Fold in zucchini mixture until just incorporated.  Fold in walnuts, if using.  Fold in chocolate chips, if using.
  8. Pour batter into prepared pan and sprinkle with granulated sugar; it makes a nice crust.
  9. Bake until top bounces back when gently pressed and toothpick inserted in center comes out with few moist crumbs attached – 65-75 minutes.
  10. Let bread cool in pan on wire rack for 30 minutes.
  11. Remove bread from pan and let cool completely on wire rack, serve.


Eggless Waffle Recipe *

eggless-waffles

This is one of those recipes you must know about if you a) like good waffles and/or b) have an egg allergy.  Even though my husband is allergic to eggs, yet I can have eggs, I still enjoy these waffles on a monthly basis.  We’ve made them nearly every month (or every other) for over a decade – so you know they are good!  They’re from Rosemarie Emro’s “Bakin’ Without Eggs” book.

INGREDIENTS:

  • 4 cups all-purpose flour (If you want to make it healthier like we do, use up to 3 cups white whole wheat flour or whole wheat flour with 1 cup all-purpose flour.  Or, if you want to play it safer, do 50% all purpose and 50% wheat flour).
  • 2 T. + 2 tsp. baking powder
  • 1/2 tsp. salt
  • 6 T. sugar 
  • 4 cups (1 quart) buttermilk (It’s really best if you use the real buttermilk here and not that trick to make buttermilk out of milk and lemon).
  • 1/2 cup canola oil or applesauce (hint: canola oil works best!)
  • 1 tsp. real vanilla extract
  • Optional: blueberries, chocolate chips*, or your choice of small fruit to mix into batter.

**Omit chocolate chips to make it IC safe.  

DIRECTIONS:

  1. In stand mixer or in a large bowl, combine all ingredients with a whisk attachment or a whisk.  Whisk until smooth.
  2. Preheat your waffle maker according to the maker’s directions.  Decide if you need to spray your waffle maker with nonstick spray.  We have found it helps to release.
  3. Depending on the size of the wells of your waffle maker, pour just enough batter in it to fill up the wells just enough.  Read your manual for recommendations.
  4. Makes approximately 15-20 waffles, depending on size.

Basic Crêpe Batter

crepes


I had a very successful crêpe experience and wanted to share the recipe and tips.  This is one of those recipes high in technique so it’s extra critical to follow the directions to the letter.  Whether you like them sweet or savory, there’s a crêpe for you!  Enjoy!

INGREDIENTS:    (Makes about 7-10 crêpes depending upon batter usage, so you can double this if you like).

  • 2 eggs
  • 1/2 cup milk
  • 1/2 cup water
  • 1 cup flour
  • 1/4 tsp. salt
  • 2 T. melted butter
  • (To make it richer, omit the water and use 1 cup of milk instead.  This is what I did.)
  • (To make it sweeter, add 2 T. sugar and 1/2 tsp. vanilla.  I did this also.)
  • (To make it more savory, add 1 T. chopped fresh herbs.)

DIRECTIONS:

  1. Blend batter ingredients in a blender until combined.
  2. Let batter stand 30 mins. at room temperature, or cover and chill up to 48 hours.  (I left mine to refrigerate one day).   This gives the flour time to absorb the liquid and the bubbles time to subside.
  3. Heat a nonstick skillet or crêpe pan over medium heat.  Brush lightly with melted butter or vegetable oil.  Make sure you brush just a little butter on and you only need to do it every few crêpes, as needed.  With less butter/oil, the crêpe browns better!
  4. Ladle batter (about 1/4 cup for an 8″ skillet) in center of pan.
  5. Working quickly, tilt the skillet, and swirl the batter around to coat the entire bottom.  It should be very thin!
  6. Cook until the edges pull away from the pan, the top loses its sheen, and the bottom is lightly browned, 45 sec to 3 min. depending on your skillet size and heat level. Use a thin heatproof spatula to loosen the crêpe from the pan and lift an edge.
  7. Grasp the raised edge with your fingers and flip the crêpe over in one quick, fluid motion. You can also use the spatula.  Cook until the second side is lightly browned, 15 sec to 1 minute more.
  8. Slide the crêpe onto a plate.  Repeat steps 3 to 5 with the remaining batter, buttering the skillet only as needed and stacking the finished crêpes.
  9. Hint: the first crêpe is usually garbage because your skillet is getting to the proper temperature, so don’t give up!
  10. Eat plain or fill with toppings – sweet, fruity, or savory, roll up and enjoy!

Oatmeal Raisin Cookies

SAMSUNG CAMERA PICTURES SAMSUNG CAMERA PICTURES SAMSUNG CAMERA PICTURES


So you want a cookie but you want it to be remotely healthy and use real ingredients, eh?  Well, here you go.  Here’s my favorite oatmeal raisin cookie recipe!  **This recipe can easily be made eggless, by omitting the egg and making the 1/4 cup applesauce into a heaping 1/4 cup of applesauce.  Be sure to buy the “natural” applesauce that has 2-3 ingredients in it, NOT containing high fructose corn syrup.  Who wants that in their homemade cookies?  Parchment paper works beautifully here, as it does with most cookies!

INGREDIENTS:

  • 1 cup flour (slowly spoon your flour into a dry-measure cup and level off with the back of a knife).
  • 1 tsp. baking powder
  • 1/2 tsp. baking soda
  • 1/2 tsp. salt
  • 2 T. unsalted butter, at room temperature 
  • 1/2 cup granulated sugar
  • 1/2 cup packed light brown sugar
  • 1 large egg (OR use Egg replacer powder, **OR make your applesauce into a heaping 1/4 cup)
  • 1/4 cup unsweetened, “natural” applesauce **
  • 1 tsp. pure vanilla extract
  • 1 1/3 cups rolled, or old fashioned oats (not instant)
  • 1/2 cup dark raisins, (or cranberries, if desired)
  • Supplies: 2 baking sheets lined with parchment paper, foil, or silicone mats

DIRECTIONS:

  1. Preheat oven to 375* and set the rack on the lower and upper thirds of oven.
  2. In a small bowl, whisk together the flour, baking powder, baking soda, and salt.
  3. In a large bowl (or use your mixer), beat the butter and sugar until smooth. Mix in the brown sugar, then egg (or replacer**), applesauce and vanilla.
  4. Stir in the dry ingredients.  Then add oats and raisins.
  5. Drop the batter by rounded teaspoons (or use your cookie scoop) at least 2 inches apart on the baking sheets.  Leave enough room between cookies, they spread!
  6. Use a fork to gently flatten the dough.
  7. Bake for 10-12 minutes or until they look slightly browned, yet moist and soft.
  8. Cool on wire racks for a few minutes so the cookies can firm up before you attempt to remove them.  If you move them too early, they will crack and fall apart.

Eggless Pumpkin Pie With Graham Cracker Crust *


pie1

pie2

pie3

pie4

This is an awesome pumpkin pie recipe that I make every year around this time.  It’s an eggless version of pumpkin pie with a sweet graham cracker crust.  To save time (and money), I buy the crust pre-made. I need to take a new look at the ingredients of the premade crust.  Some have cinnamon and I have to avoid that as it’s an irritant. To be really safe you can use a plain dough piecrust.

I let the pie cool at room temp. for about two hours.

Then I put it in the fridge UNCOVERED until serving.  If you cover it, even loosely with anything (Saran Wrap, aluminum foil, etc) it will create a very wet condensation on top of the pie that is unsightly but harmless.  The longer it chills before being served, the better it tastes!  I suggest at least 6 hours, but longer is great too, up to 1-2 days.  I highly suggest making this one day before you need it, it will taste much better!  After that, you can divide it into pieces and freeze or put in a storage container – but it will have some condensation.


Ingredients:

  • Graham cracker crust (make it yourself or buy it premade)^, or use a plain premade dough crust
  • 1/4 cup brown sugar
  • 2 tablespoons cornstarch
  • 1 teaspoon pumpkin pie spice mix* (For some this is not safe – see note)
  • 1 16-oz can pure, plain pumpkin (about 2 cups)
  • 1 14-oz can sweetened condensed milk**

NOTES:

  • ^Graham cracker crusts can sometimes have cinnamon and other spices.
  • **I tried low fat S.C.milk for the first time in a decade, don’t do it.  It needs that extra fat and it also helps the “mouth feel” consistency.
  • *For pumpkin pie spice, you can use McCormick or a big label, but I’ve had great success with Aldi’s brand.  They only sell it seasonally though.  ALDI’s canned pure pumpkin cost me $0.79 this year – 2016.  Whereas the big store wanted $1.99 for it.  (Same ounces and quality!)
    *I can no longer use pumpkin pie spice, it’s too irritating for me. So I omit it. Unfortunately, it definitely will have less flavor but is safe. 🙁 

Directions:

  1. Remove packaging (plastic, paper etc) from graham pie crust or plain dough crust, until you have just the foil pan and the crust inside remaining.  Set aside.
  2. In a large bowl, combine all ingredients: brown sugar, cornstarch, pumpkin pie spice (if safe for you!), pure pumpkin, and condensed milk. You can use a mixer here but I found that a good whisk will do the job just fine and there’s less to clean.
  3. With a spoon or whisk, stir until completely mixed.
  4. Pour mixture into unbaked pie shell; smooth top of pie with spatula.
  5. Put your filled pie on top of a baking sheet just in case anything spills, but it shouldn’t.  Cover edge with pie guard, if desired.
  6. Bake on middle or top rack for 55-60 minutes until knife/toothpick inserted in center comes out clean.
  7. Cool on wire rack until mostly cool.  Then refrigerate for many hours before serving, as the flavor amps up the longer it’s refrigerated!  I make it the day before it’s needed and it’s especially good.


Pumpkin Chocolate Chip Brownies * (Not IC Safe)

pumpkin-choc-chip-brownies

OK I swore I wouldn’t bake, BUT:

a.) I had exactly 1/2 cup pumpkin puree staring me down in the fridge that was going to spoil,

b.) it has pumpkin and pumpkin is a vegetable,

c.) I didn’t have to get out any special bakingware for this (I used my 11″x7″ glass pan),

d.) I divided it into 12 servings and each serving was 4 Weight Watchers Plus Points so it’s very DOABLE!  I don’t even feel like cheating and going back for another, one is enough!  So there’s the justification!

The recipe says it can make 24 small brownies, but we’re talking sub-toddler small in size and that doesn’t work for me.  Maybe it works for a mouse.   It makes 12 sizable brownies that you’d actually want to eat – about 3 1/2″ by 1 3/4″.

Source:   From Small Home Big Start.   She has better and many more pictures than me. 🙂

INGREDIENTS:

  • 1/2 cup pumpkin puree
  • 1 whole egg
  • 2 egg WHITES
  • 1 T. veg. or canola oil
  • 1 cup white flour
  • 1 tsp. baking powder
  • 1 tsp. unsweetened cocoa powder**
  • 1/2 tsp. ground cinnamon**
  • 1/2 tsp. ground allspice**?
  • 1/4 tsp. ground nutmeg
  • 1/4 tsp. salt
  • 2/3 cup brown sugar, packed
  • 1/2 cup semisweet chocolate chips (I used minis)**

**Known IC irritants, tread carefully!

DIRECTIONS:

  1. Preheat oven to 350 degrees.  (After using an inexpensive, <$5 oven thermometer recommended by America’s Test Kitchen, I found that my newer oven runs 25 degrees too cool so I set my oven to 375.)
  2. Line a 11″ x 7″ pan with parchment paper (NOT WAX PAPER, IT’LL MELT!)
  3. In a large bowl, combine pumpkin puree, eggs, and oil until smooth. Set aside.
  4. In a separate medium bowl, mix together the flour, baking powder, spices, salt, and brown sugar.
  5. Add to the wet ingredients and mix until thoroughly incorporated.
  6. Stir in the chocolate chips.
  7. Pour into prepared pan and spread evenly.
  8. Bake for 15-20 minutes or until passes toothpick test.
  9. Cool completely before cutting (If you can wait, I couldn’t).

Starbucks-esque Copycat Hot Cocoa * (Not IC Safe)

P1010313


I have had no luck making hot cocoa in the past even though I’ve tried a few recipes.  They were either way too bitter, or had too much headache-inducing cocoa powder, something was always wrong! I used a Pyrex glass container with a handle and it was easy to whip up in the microwave.  I followed this recipe to a “T” and it came out so smooth, tasty, and was my ideal hot cocoa – excluding the fact it was missing whip cream, but we can’t always have everything!  Next time, yes.  This recipe is from Top Secret Recipes, please check them out!  A+!!

star-hot-cocoa

Downeast Maine Pumpkin Bread *

maine-pumpkin-bread1 maine-pumpkin-bread2


I was in search of a new pumpkin bread recipe.  I have a recipe that is eggless but wanted to try one with eggs.  This one fits the bill and was excellent with a little whip cream on top.  I reduced the sugar from 3 cups to 2.5 cups (1 cup white, 1.5 cup brown sugar) and it was just sweet enough, but not too sweet.  I wanted it more on the savory side.  Also, to make it healthier, I did 1 cup wheat flour and 2.5 cups regular white flour.  Great recipe!


INGREDIENTS:

  • 1 (15 ounce) can pumpkin puree

  • 4 eggs

  • 1 cup vegetable oil

  • 2/3 cup water

  • 3 cups white sugar (or a mixture of brown sugar and white)

  • 3 1/2 cups all-purpose flour (a mixture of wheat and all purpose worked for me)

**Known IC irritants, tread carefully!  Check all the spices and make sure they’re safe for you! To make this safe, omit the cinnamon and only use safe spices.


DIRECTIONS:

  1. Preheat oven to 350 degrees F (175 degrees C). Grease and flour three 7×3 inch loaf pans.   I just used two standard loaf pans, even though this recipe says three 7×3″ pans. 
  2. In a large bowl, mix together pumpkin puree, eggs, oil, water and sugar until well blended.
  3. In a separate bowl, whisk together the flour, baking soda, salt, cinnamon, nutmeg, cloves and ginger.
  4. Stir the dry ingredients into the pumpkin mixture until just blended. Pour into the prepared pans.
  5. Bake for about 50 minutes in the preheated oven. Loaves are done when toothpick inserted in center comes out clean.


Baked Cinnamon Apples * (Not IC Safe)

baked-cinnamon-apples


I saw this recipe in passing and had three spare apples on hand and just went for it.  It’s a great way to get that apple pie taste without all the fat and carbs of that double pie crust.  It’s extremely simple and the half recipe I made fit perfectly in my Le Creuset mini casserole dish.   We enjoyed this as a sweet side to our dinner, but we could also definitely see it as a topping for pure vanilla ice cream.  I used our apple staple – Galas!  From the PBS website. 


INGREDIENTS:

  • 2 lbs apples (either Cortland or Gala for best results), cored and chopped
  • 2 tsp cinnamon**
  • juice of 1 lemon**
  • 1/3 cup brown sugar (I reduced the sugar as the apples release their sweetness as well).  

**Known IC irritants, tread carefully!

DIRECTIONS:

  1. Preheat your oven to 375 degrees.
  2. Toss the chopped apples with the cinnamon, lemon juice, and brown sugar and place in a baking or casserole dish.
  3. Cook apples, stirring occasionally, for about 30 minutes until soft and juicy. Serve for dessert with ice cream or with roast meat for dinner.