ATK Buttermilk-Ranch Pita Chips *

pita-chips-1

pita-chips-3

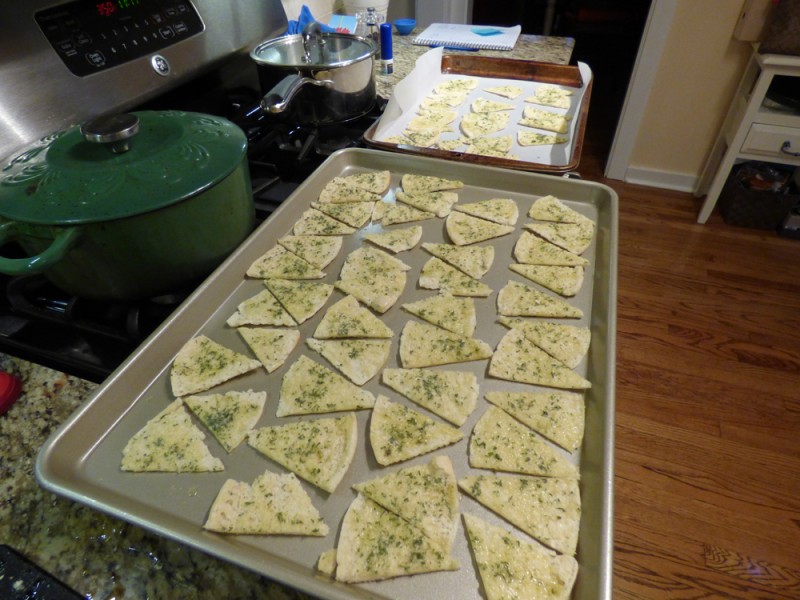
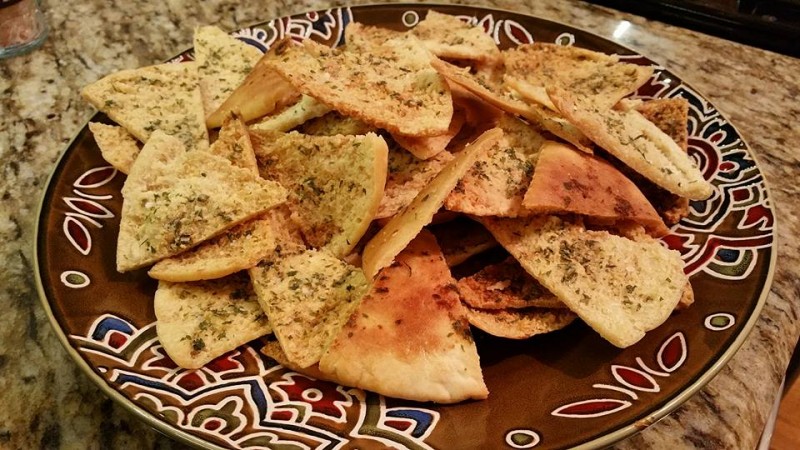
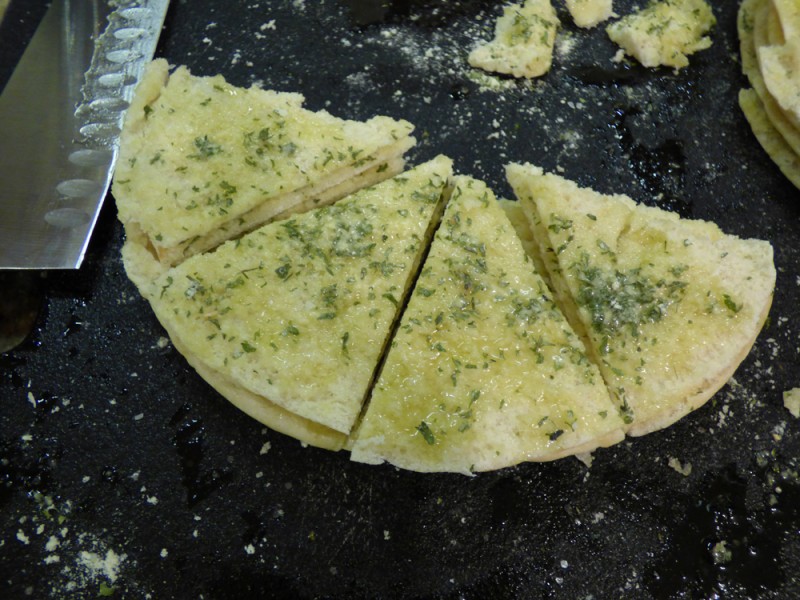
ABOVE: Use pita pockets for easiest cutting.  I have made this recipe twice and using the pita pockets was infinitely easier to cut and resulted in uniform thickness chips versus cutting a non-pita pocket myself.

pita-chips-4

(ABOVE: Alternate wedges in order to fit maximum number of chips on the pan).

Buttermilk-powder-I-like

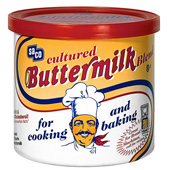
(ABOVE: The brand I buy for buttermilk powder).


I just subscribed to the three website deal on Americastestkitchen.com, that includes access to Cook’s Country website and Cook’s Illustrated.  So, you may be seeing a lot of these recipes from now on, since they are such a trusted source I will be making many of them.  I saw this recipe on the Cook’s Country website and had to try it immediately!  Everyone that has tasted it has ranted and raved about it.

Buttermilk powder is in the baking aisle at your larger, well-equipped stores.  It was maybe $5-6 and I had just bought it a month before this recipe came along for those instances where you need 1 cup of buttermilk and don’t want to buy a $4 container and have the rest go to waste.

****I had just run out of dried dill, it had lost all flavor and I threw it out.  So I went with dried parsley and it was fantastic!

Note: Use good quality extra-virgin olive oil here as this recipe uses a bit of it and it’s a major component!

Note #2: You can use regular or whole-wheat pita bread here.

Serves 8

INGREDIENTS:

  • Four 8″ pita breads (if you want to make life easy, but the pocket style!)
  • 1 T. buttermilk powder (see photo above)
  • 2 tsp. dried dill****
  • 1 tsp. kosher salt
  • 1/4 tsp. garlic powder (not salt)
  • 1/4 tsp. onion powder (not salt)**
  • 1/2 cup extra-virgin olive oil

**Onion can irritate some people, be careful.


DIRECTIONS:

  1. Adjust oven racks to upper-middle and lower-middle positions and heat oven to 350 degrees F.
  2. Using kitchen shears, cut around perimeter of each pita and separate into 2 thin rounds.
  3. Combine buttermilk powder, dill (or parsley), salt, garlic powder, and onion powder in bowl.
  4. Working with 1 round at a time, brush cut side generously with olive oil and sprinkle with spice mixture.
  5. Stack round on top of one another, cut side up, as you go.
  6. Using chef’s knives, cut pita stack into 8 wedges.
  7. Spread wedges, cut side up and in single layer, on 2 rimmed baking sheets. (See my photo for alternating pita chips on baking sheet to get maximum number of chips on each sheet).
  8. Bake until wedges are golden brown and crisp, about 15 minutes, rotating and switching sheets halfway through baking.
  9. Let cool slightly before serving. (They are best served slightly warm, but are great at any temperature!)
 

Print Friendly, PDF & Email

Easy French Toast Casserole *

French-toast-casserole

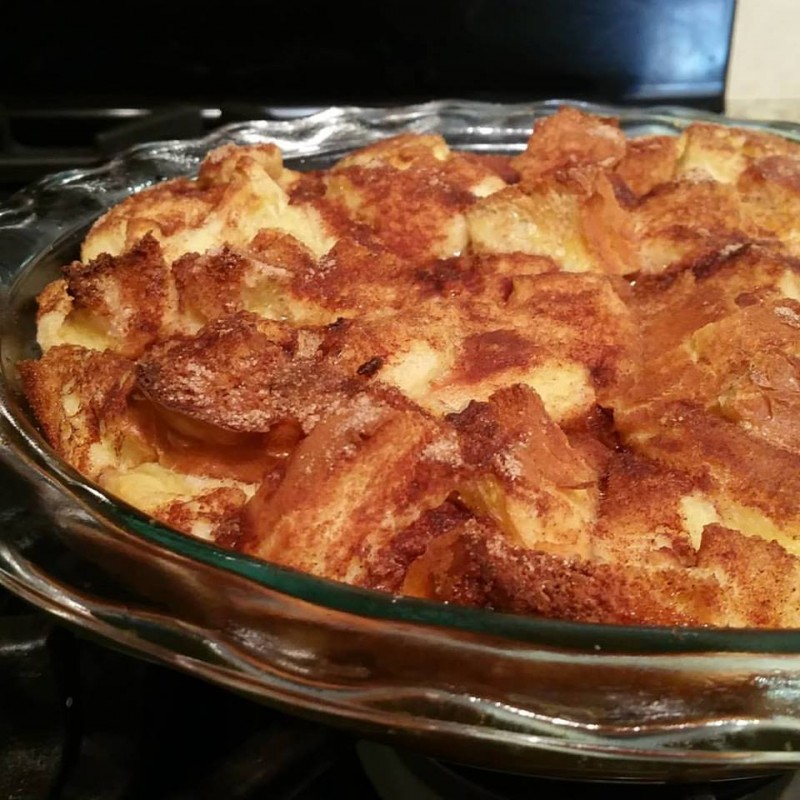
This is an excellent French toast casserole for breakfast or brunch.  It’s crispy on the top but just enough softness inside – NOT too gooey inside as that’s a pet peeve of mine for any French toast product.  I found this recipe in a French toast ebook.  Yes, French toast ebooks exist; c’mon get with the times! LOL  It is fantastic.  I’d say it will give you four servings if you’re famished and six servings if you appear to eat normally, or are eating it with something else.  Enjoy!

INGREDIENTS:

  • 5 cups bread cubes
  • 4 eggs
  • 1 1/2 cups milk (I used 2%)
  • 1/4 cup white sugar, divided
  • 1/4 tsp. salt
  • 1 tsp. vanilla extract**
  • 1 T. margarine or butter, softened
  • 1 tsp. ground cinnamon**

NOTE: Cinnamon is a known irritant, omit it if it bothers you.  Vanilla bothers me, so I omit it.  


DIRECTIONS:

  1. Preheat oven to 350 F.
  2. Lightly butter a 8×8″ baking pan.  (I used a 9″ round!)
  3. Line bottom of pan with bread cubes.
  4. In a large bowl, beat together eggs, milk, 2 T. sugar, salt, and vanilla.
  5. Pour egg mixture over bread.
  6. Dot with margarine/butter.  Let stand 10 minutes.
  7. Combine remaining 2 T. sugar with 1 tsp. cinnamon and sprinkle over the top.
  8. Bake in preheated oven about 45-50 minutes, until top is golden.


Print Friendly, PDF & Email

Mahogany Chicken with Pan Roasted Broccoli Side Dish * (Not IC Safe)

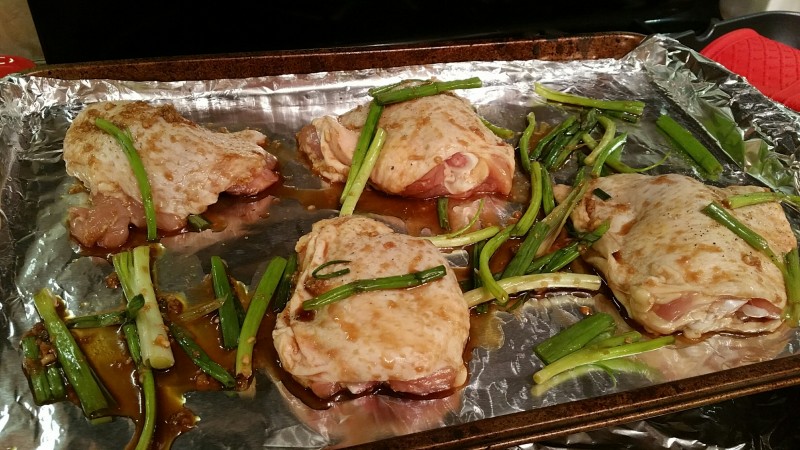
mahogany-chicken-1mahogany-chicken-3  mahogany-chicken-2

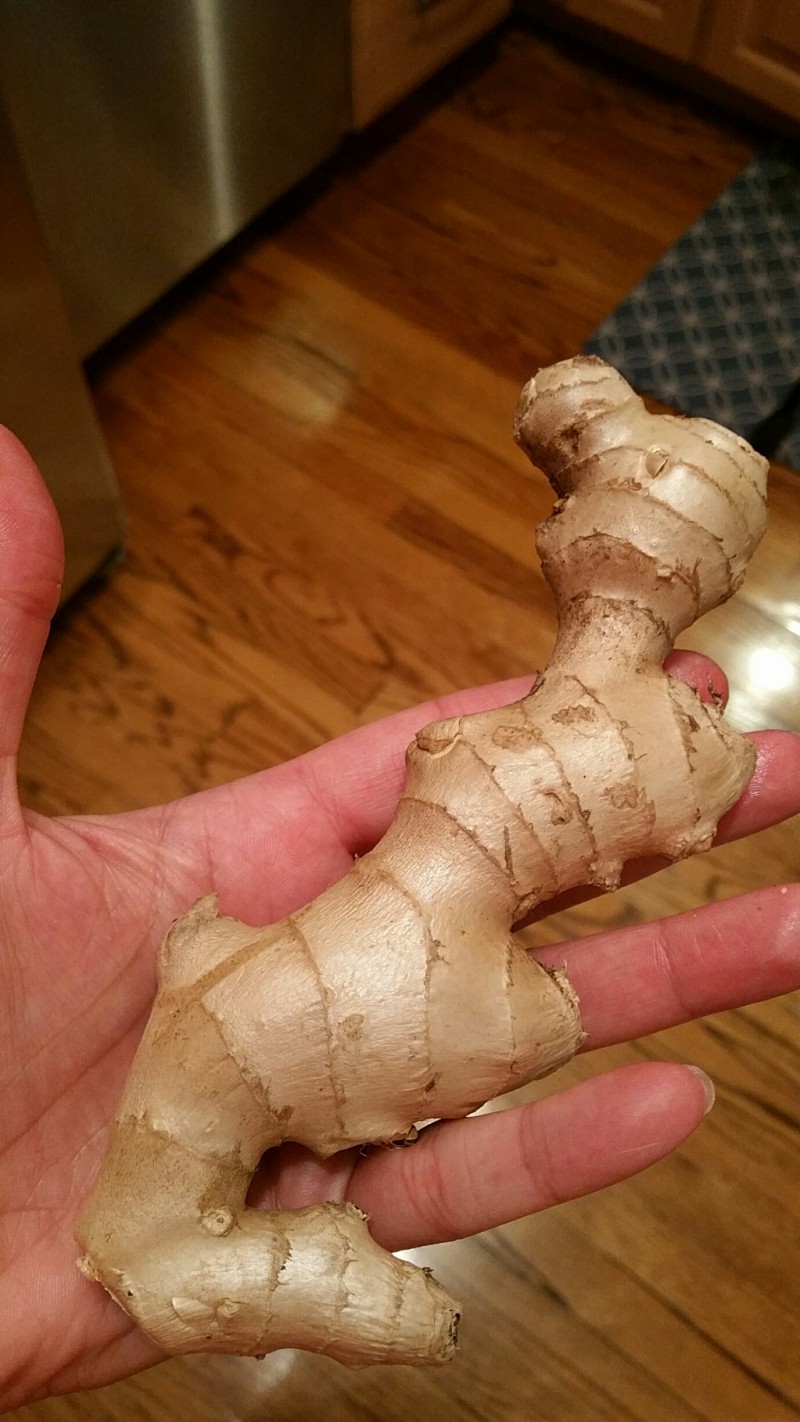
Above: Non-peeled fresh ginger.  Fresh ginger’s a unique art form by itself.  I prefer the smell of ginger freshly sliced than any fake room freshener out there (especially since I can’t even be around those artificial room fresheners).


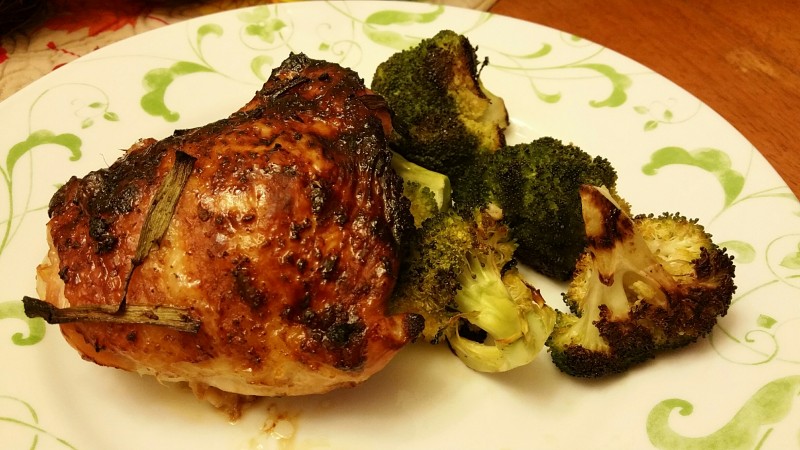
Hot New Glaze! It’s called Mahogany.  It’s usually a mix of soy and honey that gives a dish’s glaze its rich color and caramelized flavor.  It works on pork tenderloin as well, the recipe states.

Next time the only change I’ll make is using bone-in chicken breasts and doubling the entire sauce mixture to cover to bigger breasts.  We are more white-meat people for stand-alone chicken dishes.  But we will definitely make this again and again!

INGREDIENTS:

  • 2 T. lower-sodium soy sauce**
  • 2 T. honey
  • 2 cloves garlic, pressed
  • 2 tsp. grated and peeled fresh ginger (see photo above)
  • 1 1/2 lbs. chicken thighs, fat trimmed – (or chicken breasts if you prefer)
  • 1 bunch green onions, cut into 2-inch lengths**

**Known IC irritants, tread carefully!

Optional Side Dish Ingredients:

  • 1 lb. fresh broccoli florets
  • 2 T. vegetable oil
  • 1/8 tsp. salt

DIRECTIONS:

  1. Line 2 rimmed baking sheets with heavy duty foil.
  2. In large bowl, whisk 2 T. lower-sodium soy sauce, 2 T. honey, 2 cloves pressed garlic, and 2 tsp. grated peeled fresh ginger.
  3. Add 1.5 lbs. chicken thighs (fat trimmed) and 1 bunch green onions (cut into 2″ lengths).  Toss to coat.
  4. Arrange chicken, skin side up, and greens onions on 1 prepared baking sheet.
  5. If making side dish: On other baking sheet, toss 1 lb. broccoli florets with 2 T. vegetable oil and 1/8th tsp salt.  Arrange in single layer.
  6. Roast chicken and broccoli in 450 degree F oven 30 mins or until chicken is cooked through (165 degrees F) and broccoli is tender.
Print Friendly, PDF & Email

Food.com Crock Pot Lasagna

Foodcom Crockpot Lasagna 9-2015

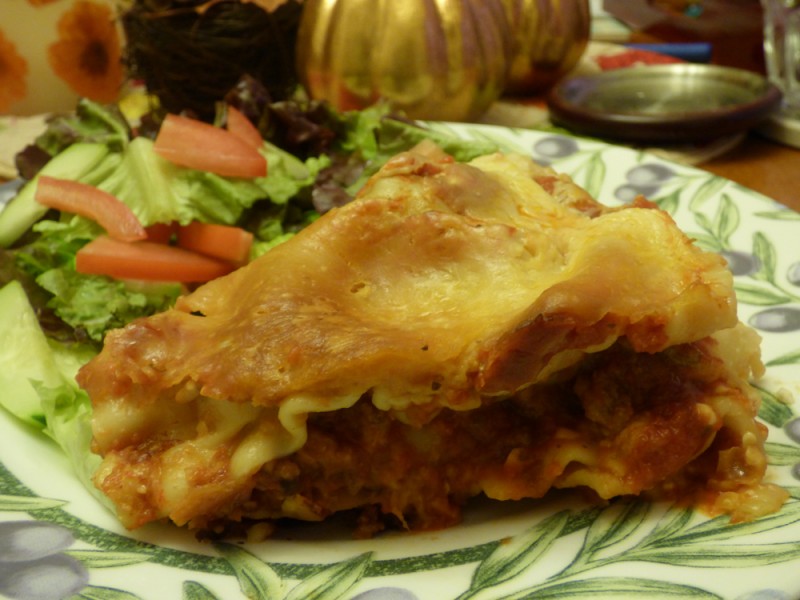
I have only a few requirements for a good lasagna: savory, not too dry and definitely not too oily (gross!), and it has to reheat well on leftover day.  This one is our new “go to” recipe and I threw out my other recipes!  Usually I use 85% ground beef for a mix of fat and flavor.  Sometimes I even mix 85% with 90% for hamburgers.  Usually I would not use such a low fat ground beef as it can really get dried out, but there are so many other ingredients that keep the meat moist and flavorful in this crockpot – and the worst thing in the world is oily lasagna in my opinion!  And with it being in a crockpot, oily is a definite possibility – BUT, this recipe turned out beautifully!  Add a salad and call it a day!  Enjoy! 🙂

INGREDIENTS:

  • 1 LB. lean ground beef (I used 90% to avoid an oily crockpot, usually I use higher fat ground beef for other tasks like hamburgers etc).
  • 1 onion chopped**
  • 2 garlic cloves, smashed**
  • 1 (28 oz) can tomato sauce
  • 1 (6oz) can tomato paste (I used the one with basil and added spices)
  • 1 1/2 tsp. salt
  • 1 tsp. dried oregano
  • 12 oz. cottage cheese (I used Breakstone’s 2%, again to avoid an overly-fatty, oily mess)
  • 1/2 cup grated Parmesan or 1/2 cup Asiago cheese (I used the grated cheese in the bag)
  • 12 oz. lasagna noodles, uncooked
  • 16 oz. shredded mozzarella cheese (I used slightly less)

**Because of allergies, I used onion and garlic powder as replacements, not onion salt and garlic salt, that would be overkill in the salt dept.!  The powders worked fine; I just used a few dashes of each.  You can also do this if you want to save money or feel lazy! 🙂
DIRECTIONS:

  1. Brown ground beef, onion, and garlic (or powders), in frying pan.
  2. Add tomato sauce, tomato paste, salt, and oregano.
  3. Cook long enough to warm ingredients.
  4. Spoon a layer of meat sauce onto bottom of the slow cooker.
  5. Add a double layer of uncooked lasagna noodles (break them to fit) and top with cheeses.
  6. Repeat with sauce, noodles, and cheese until all are used up.
  7. Cover and cook on low for 4-5 hours.  (Mine took about 4 hours.)
Print Friendly, PDF & Email

Kate Gosselin’s Two-Meat Chili * (Not IC Safe)

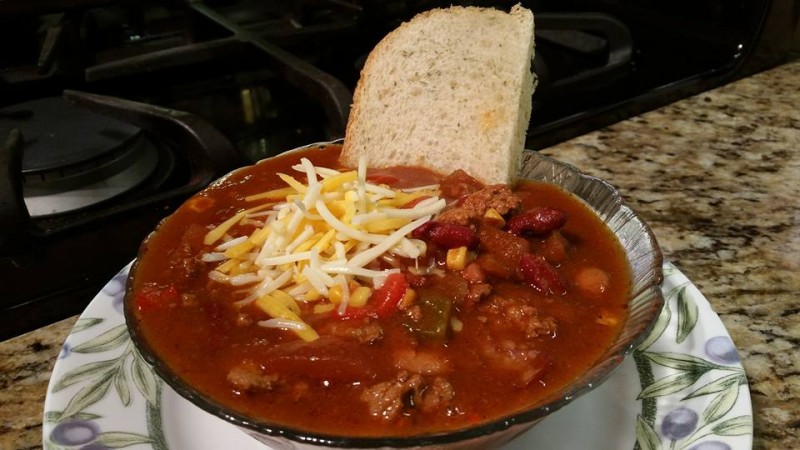
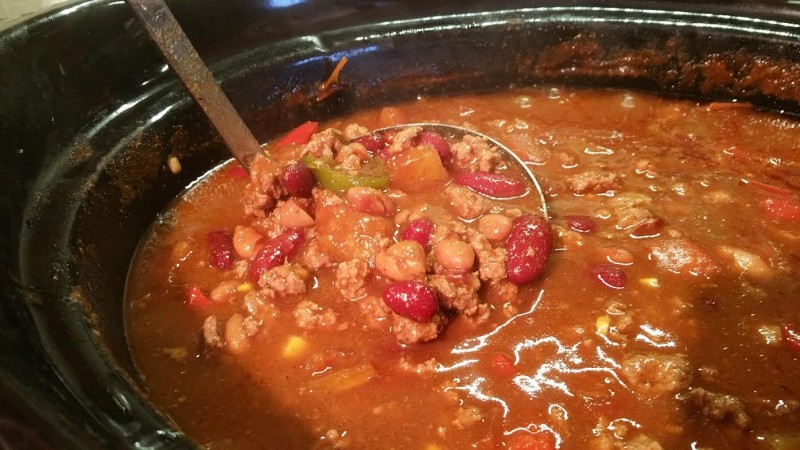
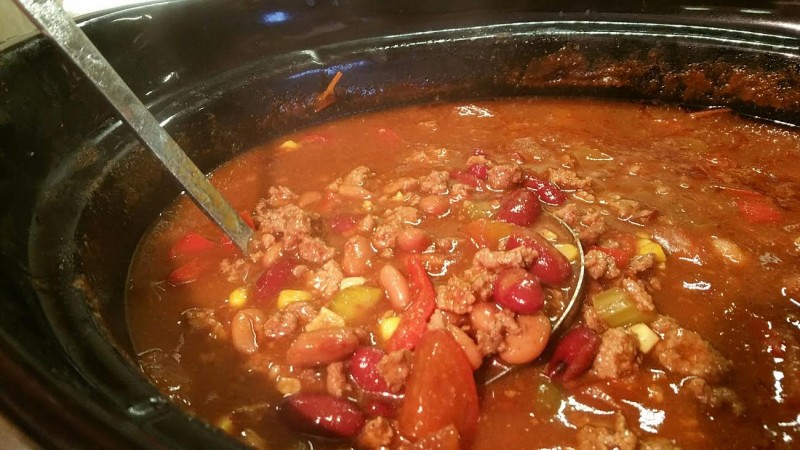
Kate-gosselin-chili-9-23-3rdKate-gosselin-chili-9-23 Kate-gosselin-chili-9-23-2nd

Update: We decided to throw out our other chili recipes.  This is a KEEPER and the sauce/broth is wonderful and thick!

I am very happy with this chili out of Kate Gosselin’s book “Love Is In The Mix”.  There’s a lot of people that hate her, but ‘haters gonna hate’.  I’m just looking for another rendition of a quality chili, and I don’t care who it comes from.  (I like her and give her the benefit of the doubt, btw).  I really like this one, it mixes low fat ground turkey with higher fat ground beef.  I used 85% fat ground beef and drained off some of the fat.  The only confusing part was if the meat should be browned first.  It didn’t say, I lightly browned both the ground turkey and beef first for safety reasons and I don’t like putting raw ground products into the slow cooker.  I didn’t overcook the meats on the stove though, just enough to brown it and get it safe.

Corn: It wasn’t part of the recipe but I had some to use up.  It was the only change I made.

INGREDIENTS:

  • 1 LB. ground beef
  • 1 LB. ground turkey
  • 1 (29 oz) can tomato sauce**
  • 1 (29 oz) can kidney beans with liquid**
  • 1 (29 oz) can pinto beans with liquid
  • 1 cup diced onion (I used onion powder, but I have issues)**
  • 1/2 to 3/4 cup diced green pepper (I used one cup)**
  • 1/2 cup to 3/4 cup diced celery
  • 3 medium tomatoes, chopped, or 1 (15 oz) can stewed tomatoes (I used fresh tomatoes)**
  • 2 tsp. cumin**
  • 4 T. chili powder**
  • 1 1/2 tsp. black pepper**
  • 1 T. garlic powder or salt (I just used a few shakes, I didn’t use the full tablespoon)
  • Added at serving time: grated cheddar or Monterey Jack cheese, for garnish.

**Known IC irritants! Please tread carefully!

DIRECTIONS:

  1. Place all of the ingredients, (except the cheese!), in a slow cooker and cook on low for 6-8 hours.
  2. Serve with white rice, if desired, and top with grated cheddar or Monterey Jack cheese.
Print Friendly, PDF & Email

Italian Herb Bread – 2 LB. Loaf (Bread Machine)

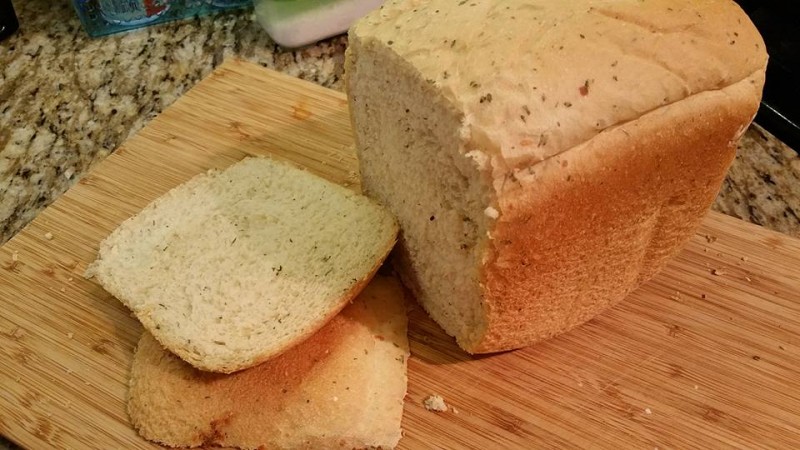
herb-bread-machine-9-18-15

I just made this herb bread – it’s super fantastic and ultra easy.  I threw all the ingredients in in the morning; I’d estimate it took about five minutes to put it all in and clean up!  I’ve made many bread machine recipes: cheese bread, whole wheat bread, dark rye pumpernickel, and more I have forgotten.  This is a good one!  Here’s the recipe:

Remember to follow your bread machine’s instructions for order of ingredient placement.

INGREDIENTS:

  • 1 and 1/4 cup water (I used lukewarm)
  • 1 and 1/2 tablespoon vegetable or olive oil (I used olive oil)
  • 1 tsp. salt
  • 3 and 1/2 cups bread flour
  • 2 teaspoons sugar
  • 1 tablespoon dried parsley (I crushed all the herbs with my fingers to release more flavor before adding to pan).
  • 1/4 cup grated parmesan cheese
  • 2 tsp. dried onion flakes (I just used a dash of onion powder)
  • 1/2 tsp. dried basil
  • 1/2 tsp. garlic powder (I just used a few dashes)
  • 2 teaspoons active dry yeast


DIRECTIONS:

  1. Measure and add liquid ingredients to the bread pan, fitted with paddle.
  2. Measure and add dry ingredients (EXCEPT YEAST) to the bread pan.
  3. Use your finger to form a well (hole) in the flour where you will pour the yeast.  Yeast must NEVER come in contact with a liquid when you are adding ingredients.  Measure the yeast and carefully pour it into the well.
  4. Snap the baking pan into the breadmaker and close lid.
  5. Choose your mode on your bread machine, mine said “French” bread.
  6. Press the loaf size button and select 2 LB.
  7. Select your crust color, I select medium.
  8. Press “Start”.


Print Friendly, PDF & Email

Mexican Nachos: Chicken, Black Beans, Salsa, Cheese, and More! * (Not IC Safe)

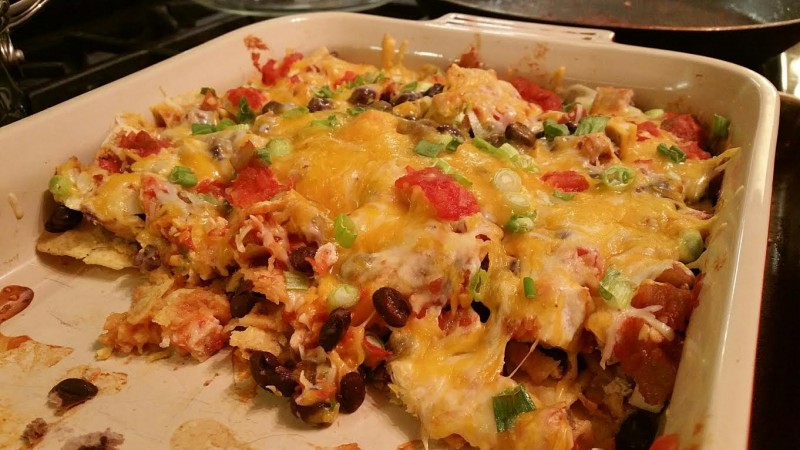
Mexican-bake-8-17-15

This finished dish never lasts more than two days in our house.  It’s that tasty.  It’s hard to even put it in the fridge, you just want more.  It’s a perfect meal: protein of the beans and chicken, carb of the tortilla chips, fat of the cheese (and optional sour cream), and veggies: salsa, green onion, and beans (which have fiber too).  It’s just perfect, believe me.  You can health it up by doing multigrain or high fiber tortilla chips.

—–I put some ground cumin on my raw chicken, pan-fried it with some olive oil (via the Misto), let it rest 5 mins, then I chopped it into bite-sized pieces.  I am not often a fan of shredding, it takes forever.

—–I used organic low sodium black beans.  If you only have regular black beans, drain and rinse them multiple times – it removes 40% of the salt!

Makes 6 servings

Prep Time 10 Mins.

Oven Time 15 Mins.


INGREDIENTS:

  • 6 oz. baked or regular tortilla chips (c’mon put some more in the pan, live a little. I did probably 10 oz.)
  • 2 cups (8 oz.) cooked shredded chicken
  • 1 can (15 oz) black beans, rinsed and DRAINED**
  • 1 cup jarred salsa or Picante sauce (or add more!)**
  • 1 cup shredded reduced-fat or regular Mexican cheese blend**
  • 4 scallions, trimmed and thinly sliced (I used green onions)**
  • Optional: sour cream as a topping right before serving
  • Optional variation: replace chicken and beans with 1/2 LB. coarsely chopped cooked shrimp and 1 can (8 oz.) drained crushed pineapple**

**Known IC irritants, tread carefully!

DIRECTIONS:

  1. Preheat oven to 350 degrees.
  2. If you do not already have your chicken cooked and ready, cook it now.  Let it rest a few minutes before chopping or shredding.
  3. Line bottom of a 13x9x2″ baking dish with tortilla chips.
  4. Scatter cooked chicken and beans over the chips.
  5. Spoon salsa over the beans and top with cheese and scallions (or green onions).
  6. Bake at 350 for 15 mins. until heated through and cheese is melted.
  7. Serve immediately!  (Who could wait anyway?)


Print Friendly, PDF & Email

Grilled Margherita Sandwiches


Grilled Margherita Sandwiches Cooking Light


I saw this recipe in my newest magazine subscription – Cooking Light.  “This quick five-ingredient entree transforms a favorite pizza combo into a melty grilled sandwich.  To thinly slice fresh mozzarella with ease, freeze the cheese for about 30 minutes before cutting.”.

We all know Margherita pizza is just a culinary delight, so this sandwich is wonderful.  Next time I will, a) use the panini press, b) I think the recipe forgot to say to seed your tomatoes, a very important step to avoid a soggy sandwich.

INGREDIENTS:

  • 1/4 cup lower-sodium marinara (I just used my Newman’s Own spaghetti sauce)
  • 8 (1 ounce) slices of whole-grain bread
  • 4 ounces fresh mozzarella cheese, thinly sliced
  • 1 large tomato, seeded, cut into 8 thin slices
  • 1/2 teaspoon freshly ground black pepper
  • 1/4 teaspoon kosher salt
  • 12 large fresh basil leaves
  • Cooking spray
  • 1 tablespoon olive oil, divided

DIRECTIONS:

  1. Spread 1 tablespoon marinara over 1 side of each of 4 bread slices.
  2. Top evenly with cheese and tomatoes.
  3. Sprinkle tomatoes evenly with pepper and salt.
  4. Top tomatoes with basil and remaining bread slices.
  5. Lightly coat sandwiches with cooking spray.
  6. Heat a large skillet over medium-low heat.  Add 1 1/2 teaspoons oil to pan, swirl to coat.
  7. Add sandwiches to pan, cook 2 1/2 minutes or until browned.
  8. Brush tops evenly with remaining 1 1/2 tsp. olive oil.
  9. Turn sandwiches over, cook 2 minutes or until browned.
  10. Serve immediately.
  11. (Alternatively, after step 5 you could use your panini press.)  


Print Friendly, PDF & Email

Hoisin Chicken Wings * (Not IC Safe)

Hoisin Chicken Wings 6-2015

This is a super delicious recipe.  I have been meaning to post it

INGREDIENTS:

  • Marinade (see step #1)
  • 2 garlic cloves, minced
  • 1/2 cup Hoisin sauce (look in the Asian aisle)**
  • 2 tablespoons white rice vinegar**
  • 1 teaspoon sesame oil (don’t replace it with anything else!)
  • 1 teaspoon Chinese five-spice powder**
  • 1 teaspoon cayenne pepper**
  • 1/4 teaspoon salt
  • 2 pounds chicken wings, drumsticks and wingettes separated
  • 1 teaspoon white sesame seeds (optional)
  • My idea: Chopped green onions can be added to marinade for flavor – or decor once the dish is plated **

**Known IC irritants, tread carefully!


DIRECTIONS:

  1. In a large bowl, whisk together the garlic, hoisin sauce, rice wine vinegar, sesame oil, five-spice powder, cayenne, salt, and chopped green onions, if using.
  2. Add the wings to the mixture and use your hands to toss and coat the wings with the marinade.
  3. Let stand at room temperature for 10 to 15 minutes to marinate.
  4. Preheat the oven to 400 degrees F.
  5. Line a large baking pan with aluminum foil.  I double lined it for drip security.  
  6. Remove the wings from the marinade, shaking off the excess and saving marinade for basting.  Arrange the wings in a single layer on the baking pan.
  7. Roast for 20 minutes.
  8. Remove from oven and baste the wings with the leftover marinade, and sprinkle the sesame seeds, if using, over the wings.
  9. Return the wings to the oven and roast for another 10-15 minutes, or until the outsides are golden brown and crispy (also do a temperature check, always!)
  10. Transfer to a platter and serve.  Sprinkle with chopped green onions for decoration, if desired.
Print Friendly, PDF & Email

Ghirardelli White Chocolate Muffins with Fresh Raspberries * (May or May Not Be IC Safe For You)

muffin1 muffin2 muffin3

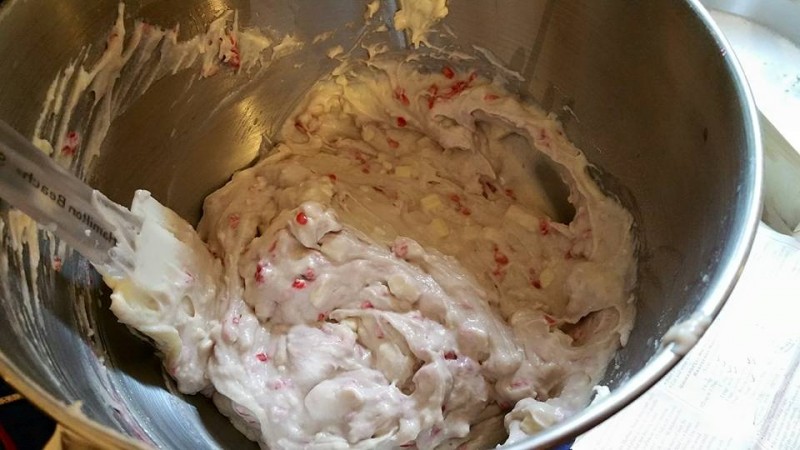
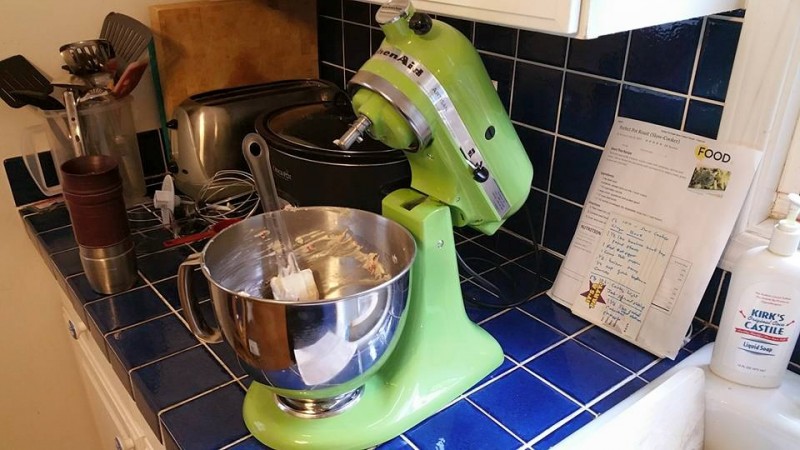
I had the pleasure of spending time with my sister-in-law and her daughter and baking this recipe with them.  It was pretty straight-forward and easy, as far as baking goes!  Her new mixer came in handy.  I have owned the same Kitchenaid Artisan mixer for years and it is very easy to use.  Two controls: one side is the lock, the other is the speed.  Easy and makes light work of something like kneading bread dough or whipping cheesecake batter that must be fully mixed or else.  Also, it’s a star at creaming butter and sugar.

This recipe yielded approximately 12 servings, but for us, it yielded about 15 muffins.

INGREDIENTS:

  • 1cup butter, softened (a half normal sized stick of butter)
  • 1cup sugar
  • 1 tablespoon sugar
  • 1 large egg
  • 1 cup milk
  • 1 teaspoon vanilla extract
  • 1 tablespoon baking powder
  • 2 cups flour
  • 1 tablespoon flour
  • 8 ounces Ghirardelli white chocolate, chopped (a total of two 4 oz. bars)**
  • 1cup fresh raspberries**

**White chocolate and raspberries can irritate some IC patients, so please be careful. 


DIRECTIONS:

  1. Preheat oven to 400*F.
  2. Grease 12 standard-size muffin cups, or line with paper muffin liners.
  3. In a medium bowl, using an electric mixer on medium speed, cream together the butter and sugar until smooth.
  4. Add the egg, milk, and vanilla; blend well.
  5. In a separate large bowl, combine the baking powder, 2 cups of the flour, and the chopped white chocolate; whisk to combine.
  6. Gradually add to the butter mixture; stirring just until combined.
  7. Gently fold in the raspberries–the batter will be slightly lumpy.
  8. (The original directions on the Ghirardelli wrapper did not say to gently fold in, so we mixed them in which crushed them.  Either way, it will turn out just fine, it depends on your preference).  
  9. Fill the muffin cups 3/4 full of batter.
  10. In a small bowl, combine the 1 Tbsp. of flour and 1 Tbsp. sugar; mix thoroughly.
  11. Dust muffin tops with the sugar mixture.
  12. Bake for 20-25 minutes, or until the center of a muffin springs back when lightly pressed.
  13. Cool for 5 minutes in the tins; carefully transfer muffins to wire racks and cool further.
  14. Serve warm or cool; store in an airtight container at room temperature.


Print Friendly, PDF & Email