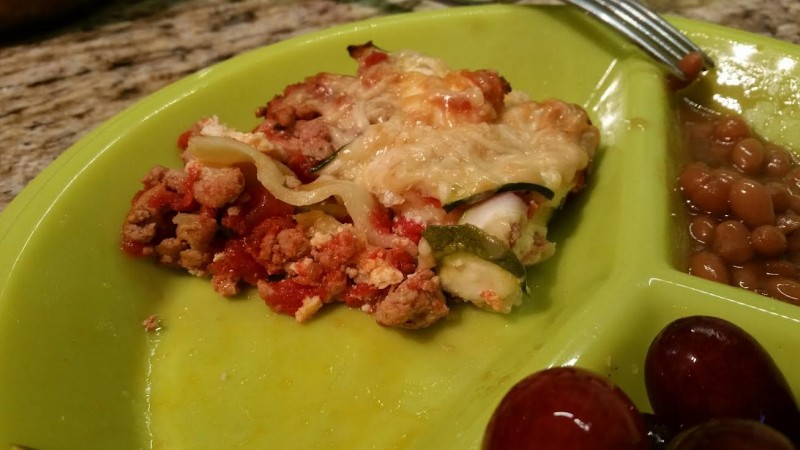
Zucchini & Turkey Lasagna

zucchini-lasagna-11-2015

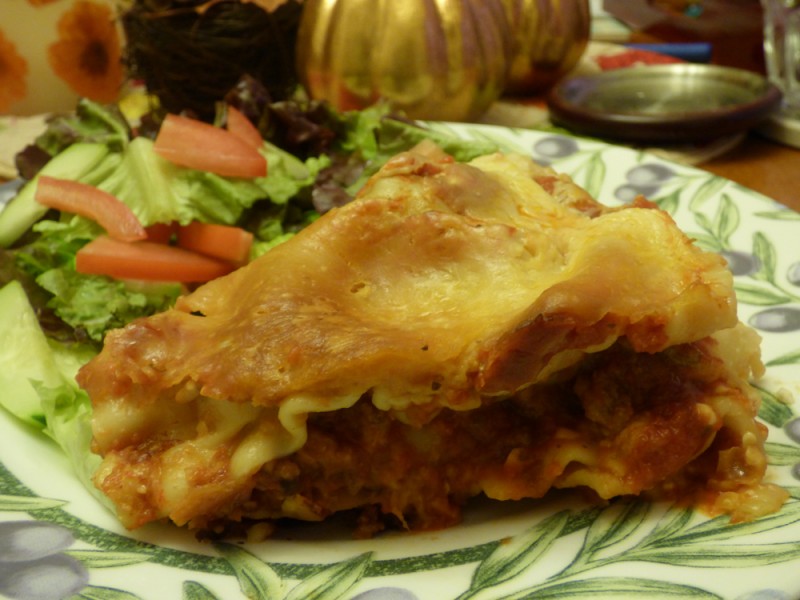
This is a wonderful, healthy recipe I took a chance on.  I had never made lasagna without the standard lasagna pasta noodles, ground beef, and multiple cheeses.  The downside of the typical lasagna it can be excessively heavy and greasy.  This healthier version was lighter, filling, and tasty, and packed a good vegetable punch.  We weren’t sure how it would turn out, so we added pasta layers to every other layer.  It was just fine without the pasta layer!

Even though the directions look lengthy, it actually was one of the easiest lasagnas I’ve ever made!

INGREDIENTS:

  • 2 1/2 tablespoons extra-virgin olive oil
  • 1 small onion, finely chopped (I used onion powder)
  • 1/2 teaspoon red pepper flakes
  • 1 lb. ground turkey
  • 1 (28 oz.) can petite diced tomatoes (Plain or Italian-flavored, if you desire)
  • 3 tablespoons chopped fresh oregano (I used dried this time)
  • 2 teaspoons salt
  • 2 medium zucchini
  • 1 cup part-skim ricotta cheese (I used 2%)
  • 1/4 teaspoon freshly ground black pepper
  • 1/2 cup freshly grated Parmesan cheese (2 ounces)

DIRECTIONS:

  1. Preheat oven to 375 degrees F.
  2. In a large skillet over medium heat, heat 2 tablespoons of the oil.
  3. Add the onion and red pepper flakes and cook, stirring occasionally, until the onion is tender, about 8 minutes.
  4. Add the turkey and cook, breaking up any large pieces with the back of a spoon, until brown throughout, 3-4 minutes.
  5. Add the tomatoes and bring mixture to a boil.  Reduce the heat to medium and simmer until it thickens, about 20 minutes.
  6. Stir in the oregano and salt.  Let cool.
  7. Slice the zucchini lengthwise into thin strips (about 1/8″ thick).
  8. Put 5-6 zucchini slices, overlapping slightly, in the bottom of a 8×8″ baking dish.
  9. Top with 1 cup of the sauce/meat mixture.
  10. Dot with 1/4 cup of the ricotta.
  11. Repeat the layers twice, alternating the direction of the zucchini  (I didn’t find the alternation especially pertinent).
  12. Top with the remaining zucchini and brush the top with the remaining 1/4 tsp. oil.
  13. Dot with the remaining 1/4 cup ricotta and season with the black pepper.  Top with Parmesan cheese.
  14. Bake for 50-60 minutes, until the lasagna is bubbling and the top is brown.
  15. Let stand for 10 minutes before serving.
 

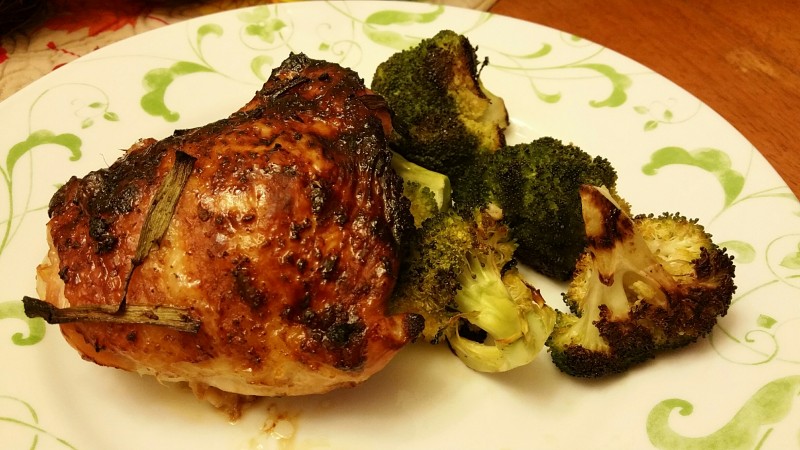
Mahogany Chicken with Pan Roasted Broccoli Side Dish * (Not IC Safe)

mahogany-chicken-1mahogany-chicken-3  mahogany-chicken-2

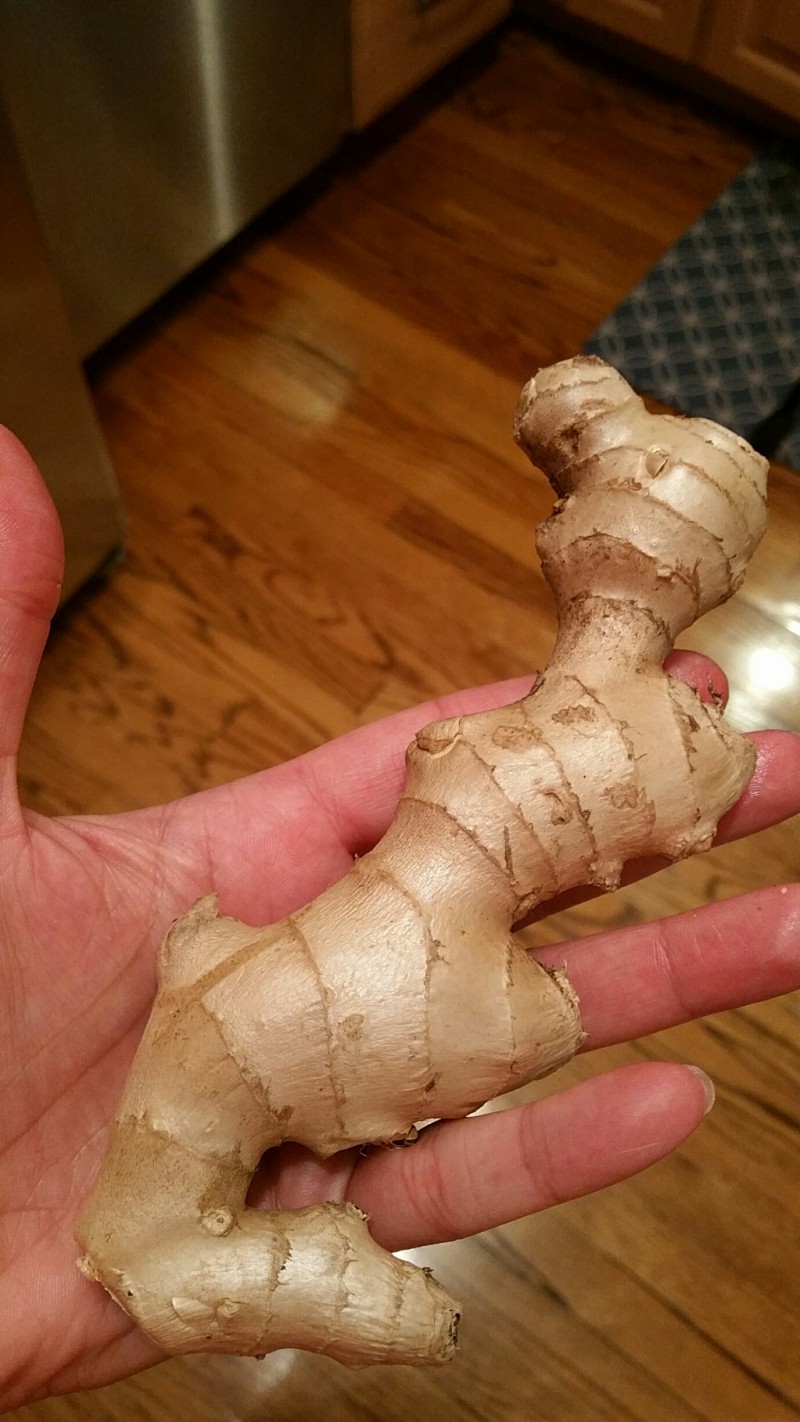
Above: Non-peeled fresh ginger.  Fresh ginger’s a unique art form by itself.  I prefer the smell of ginger freshly sliced than any fake room freshener out there (especially since I can’t even be around those artificial room fresheners).


Hot New Glaze! It’s called Mahogany.  It’s usually a mix of soy and honey that gives a dish’s glaze its rich color and caramelized flavor.  It works on pork tenderloin as well, the recipe states.

Next time the only change I’ll make is using bone-in chicken breasts and doubling the entire sauce mixture to cover to bigger breasts.  We are more white-meat people for stand-alone chicken dishes.  But we will definitely make this again and again!

INGREDIENTS:

  • 2 T. lower-sodium soy sauce**
  • 2 T. honey
  • 2 cloves garlic, pressed
  • 2 tsp. grated and peeled fresh ginger (see photo above)
  • 1 1/2 lbs. chicken thighs, fat trimmed – (or chicken breasts if you prefer)
  • 1 bunch green onions, cut into 2-inch lengths**

**Known IC irritants, tread carefully!

Optional Side Dish Ingredients:

  • 1 lb. fresh broccoli florets
  • 2 T. vegetable oil
  • 1/8 tsp. salt

DIRECTIONS:

  1. Line 2 rimmed baking sheets with heavy duty foil.
  2. In large bowl, whisk 2 T. lower-sodium soy sauce, 2 T. honey, 2 cloves pressed garlic, and 2 tsp. grated peeled fresh ginger.
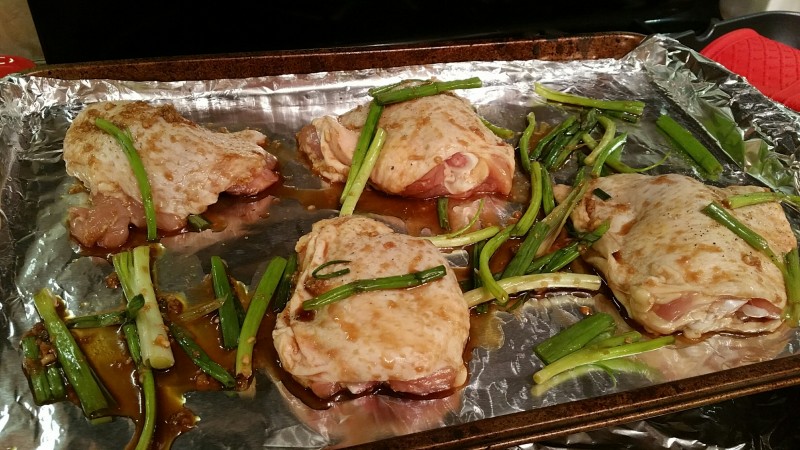
  3. Add 1.5 lbs. chicken thighs (fat trimmed) and 1 bunch green onions (cut into 2″ lengths).  Toss to coat.
  4. Arrange chicken, skin side up, and greens onions on 1 prepared baking sheet.
  5. If making side dish: On other baking sheet, toss 1 lb. broccoli florets with 2 T. vegetable oil and 1/8th tsp salt.  Arrange in single layer.
  6. Roast chicken and broccoli in 450 degree F oven 30 mins or until chicken is cooked through (165 degrees F) and broccoli is tender.

Food.com Crock Pot Lasagna

Foodcom Crockpot Lasagna 9-2015

I have only a few requirements for a good lasagna: savory, not too dry and definitely not too oily (gross!), and it has to reheat well on leftover day.  This one is our new “go to” recipe and I threw out my other recipes!  Usually I use 85% ground beef for a mix of fat and flavor.  Sometimes I even mix 85% with 90% for hamburgers.  Usually I would not use such a low fat ground beef as it can really get dried out, but there are so many other ingredients that keep the meat moist and flavorful in this crockpot – and the worst thing in the world is oily lasagna in my opinion!  And with it being in a crockpot, oily is a definite possibility – BUT, this recipe turned out beautifully!  Add a salad and call it a day!  Enjoy! 🙂

INGREDIENTS:

  • 1 LB. lean ground beef (I used 90% to avoid an oily crockpot, usually I use higher fat ground beef for other tasks like hamburgers etc).
  • 1 onion chopped**
  • 2 garlic cloves, smashed**
  • 1 (28 oz) can tomato sauce
  • 1 (6oz) can tomato paste (I used the one with basil and added spices)
  • 1 1/2 tsp. salt
  • 1 tsp. dried oregano
  • 12 oz. cottage cheese (I used Breakstone’s 2%, again to avoid an overly-fatty, oily mess)
  • 1/2 cup grated Parmesan or 1/2 cup Asiago cheese (I used the grated cheese in the bag)
  • 12 oz. lasagna noodles, uncooked
  • 16 oz. shredded mozzarella cheese (I used slightly less)

**Because of allergies, I used onion and garlic powder as replacements, not onion salt and garlic salt, that would be overkill in the salt dept.!  The powders worked fine; I just used a few dashes of each.  You can also do this if you want to save money or feel lazy! 🙂
DIRECTIONS:

  1. Brown ground beef, onion, and garlic (or powders), in frying pan.
  2. Add tomato sauce, tomato paste, salt, and oregano.
  3. Cook long enough to warm ingredients.
  4. Spoon a layer of meat sauce onto bottom of the slow cooker.
  5. Add a double layer of uncooked lasagna noodles (break them to fit) and top with cheeses.
  6. Repeat with sauce, noodles, and cheese until all are used up.
  7. Cover and cook on low for 4-5 hours.  (Mine took about 4 hours.)

Kate Gosselin’s Two-Meat Chili * (Not IC Safe)

Kate-gosselin-chili-9-23-3rdKate-gosselin-chili-9-23 Kate-gosselin-chili-9-23-2nd

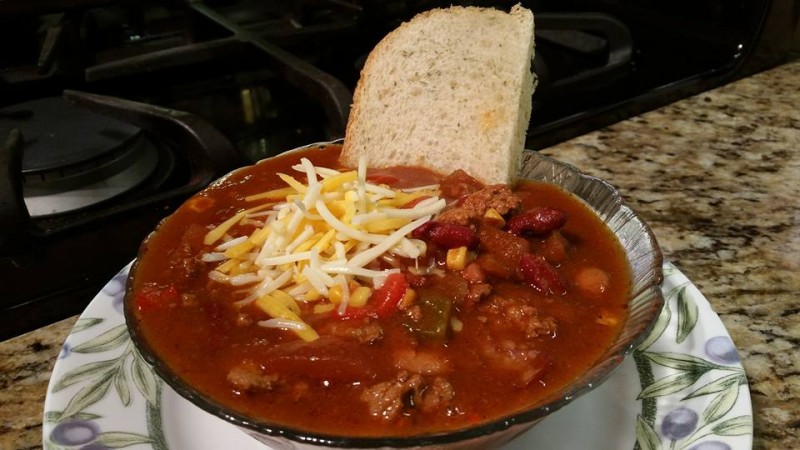
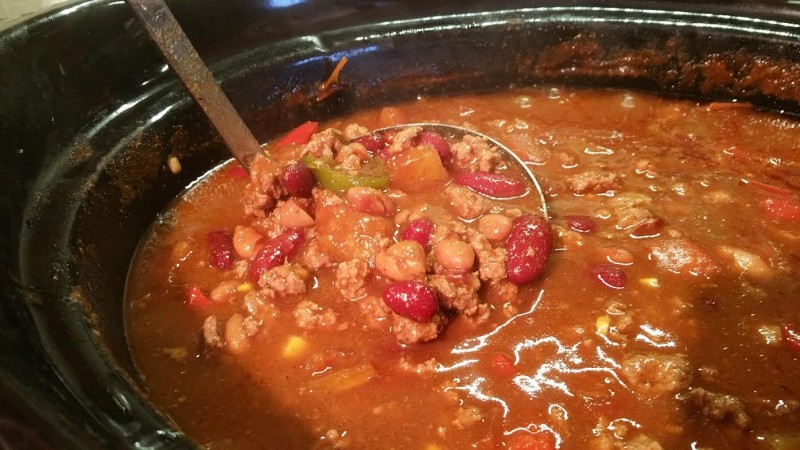
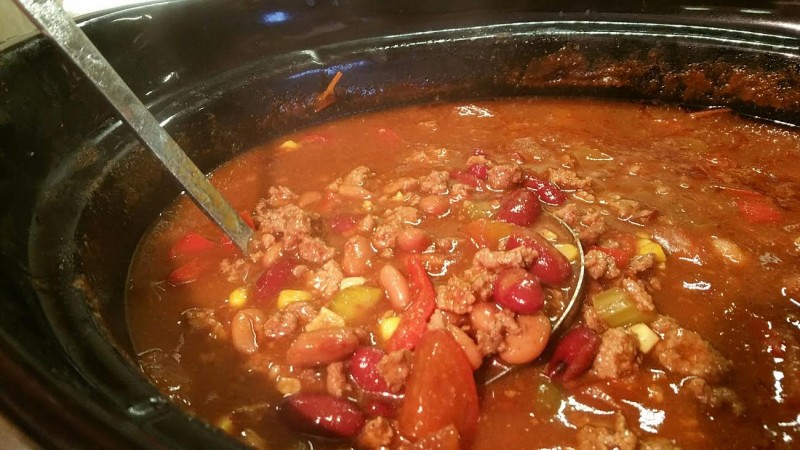
Update: We decided to throw out our other chili recipes.  This is a KEEPER and the sauce/broth is wonderful and thick!

I am very happy with this chili out of Kate Gosselin’s book “Love Is In The Mix”.  There’s a lot of people that hate her, but ‘haters gonna hate’.  I’m just looking for another rendition of a quality chili, and I don’t care who it comes from.  (I like her and give her the benefit of the doubt, btw).  I really like this one, it mixes low fat ground turkey with higher fat ground beef.  I used 85% fat ground beef and drained off some of the fat.  The only confusing part was if the meat should be browned first.  It didn’t say, I lightly browned both the ground turkey and beef first for safety reasons and I don’t like putting raw ground products into the slow cooker.  I didn’t overcook the meats on the stove though, just enough to brown it and get it safe.

Corn: It wasn’t part of the recipe but I had some to use up.  It was the only change I made.

INGREDIENTS:

  • 1 LB. ground beef
  • 1 LB. ground turkey
  • 1 (29 oz) can tomato sauce**
  • 1 (29 oz) can kidney beans with liquid**
  • 1 (29 oz) can pinto beans with liquid
  • 1 cup diced onion (I used onion powder, but I have issues)**
  • 1/2 to 3/4 cup diced green pepper (I used one cup)**
  • 1/2 cup to 3/4 cup diced celery
  • 3 medium tomatoes, chopped, or 1 (15 oz) can stewed tomatoes (I used fresh tomatoes)**
  • 2 tsp. cumin**
  • 4 T. chili powder**
  • 1 1/2 tsp. black pepper**
  • 1 T. garlic powder or salt (I just used a few shakes, I didn’t use the full tablespoon)
  • Added at serving time: grated cheddar or Monterey Jack cheese, for garnish.

**Known IC irritants! Please tread carefully!

DIRECTIONS:

  1. Place all of the ingredients, (except the cheese!), in a slow cooker and cook on low for 6-8 hours.
  2. Serve with white rice, if desired, and top with grated cheddar or Monterey Jack cheese.

Mexican Nachos: Chicken, Black Beans, Salsa, Cheese, and More! * (Not IC Safe)

Mexican-bake-8-17-15

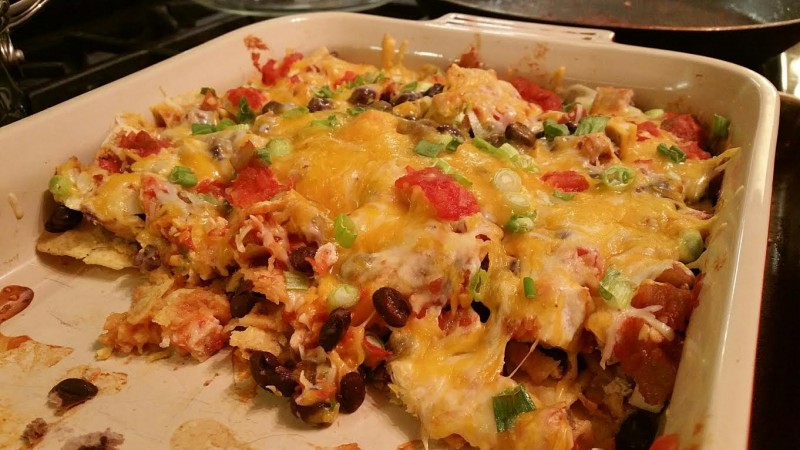
This finished dish never lasts more than two days in our house.  It’s that tasty.  It’s hard to even put it in the fridge, you just want more.  It’s a perfect meal: protein of the beans and chicken, carb of the tortilla chips, fat of the cheese (and optional sour cream), and veggies: salsa, green onion, and beans (which have fiber too).  It’s just perfect, believe me.  You can health it up by doing multigrain or high fiber tortilla chips.

—–I put some ground cumin on my raw chicken, pan-fried it with some olive oil (via the Misto), let it rest 5 mins, then I chopped it into bite-sized pieces.  I am not often a fan of shredding, it takes forever.

—–I used organic low sodium black beans.  If you only have regular black beans, drain and rinse them multiple times – it removes 40% of the salt!

Makes 6 servings

Prep Time 10 Mins.

Oven Time 15 Mins.


INGREDIENTS:

  • 6 oz. baked or regular tortilla chips (c’mon put some more in the pan, live a little. I did probably 10 oz.)
  • 2 cups (8 oz.) cooked shredded chicken
  • 1 can (15 oz) black beans, rinsed and DRAINED**
  • 1 cup jarred salsa or Picante sauce (or add more!)**
  • 1 cup shredded reduced-fat or regular Mexican cheese blend**
  • 4 scallions, trimmed and thinly sliced (I used green onions)**
  • Optional: sour cream as a topping right before serving
  • Optional variation: replace chicken and beans with 1/2 LB. coarsely chopped cooked shrimp and 1 can (8 oz.) drained crushed pineapple**

**Known IC irritants, tread carefully!

DIRECTIONS:

  1. Preheat oven to 350 degrees.
  2. If you do not already have your chicken cooked and ready, cook it now.  Let it rest a few minutes before chopping or shredding.
  3. Line bottom of a 13x9x2″ baking dish with tortilla chips.
  4. Scatter cooked chicken and beans over the chips.
  5. Spoon salsa over the beans and top with cheese and scallions (or green onions).
  6. Bake at 350 for 15 mins. until heated through and cheese is melted.
  7. Serve immediately!  (Who could wait anyway?)


Grilled Margherita Sandwiches


Grilled Margherita Sandwiches Cooking Light


I saw this recipe in my newest magazine subscription – Cooking Light.  “This quick five-ingredient entree transforms a favorite pizza combo into a melty grilled sandwich.  To thinly slice fresh mozzarella with ease, freeze the cheese for about 30 minutes before cutting.”.

We all know Margherita pizza is just a culinary delight, so this sandwich is wonderful.  Next time I will, a) use the panini press, b) I think the recipe forgot to say to seed your tomatoes, a very important step to avoid a soggy sandwich.

INGREDIENTS:

  • 1/4 cup lower-sodium marinara (I just used my Newman’s Own spaghetti sauce)
  • 8 (1 ounce) slices of whole-grain bread
  • 4 ounces fresh mozzarella cheese, thinly sliced
  • 1 large tomato, seeded, cut into 8 thin slices
  • 1/2 teaspoon freshly ground black pepper
  • 1/4 teaspoon kosher salt
  • 12 large fresh basil leaves
  • Cooking spray
  • 1 tablespoon olive oil, divided

DIRECTIONS:

  1. Spread 1 tablespoon marinara over 1 side of each of 4 bread slices.
  2. Top evenly with cheese and tomatoes.
  3. Sprinkle tomatoes evenly with pepper and salt.
  4. Top tomatoes with basil and remaining bread slices.
  5. Lightly coat sandwiches with cooking spray.
  6. Heat a large skillet over medium-low heat.  Add 1 1/2 teaspoons oil to pan, swirl to coat.
  7. Add sandwiches to pan, cook 2 1/2 minutes or until browned.
  8. Brush tops evenly with remaining 1 1/2 tsp. olive oil.
  9. Turn sandwiches over, cook 2 minutes or until browned.
  10. Serve immediately.
  11. (Alternatively, after step 5 you could use your panini press.)  


Hoisin Chicken Wings * (Not IC Safe)

Hoisin Chicken Wings 6-2015

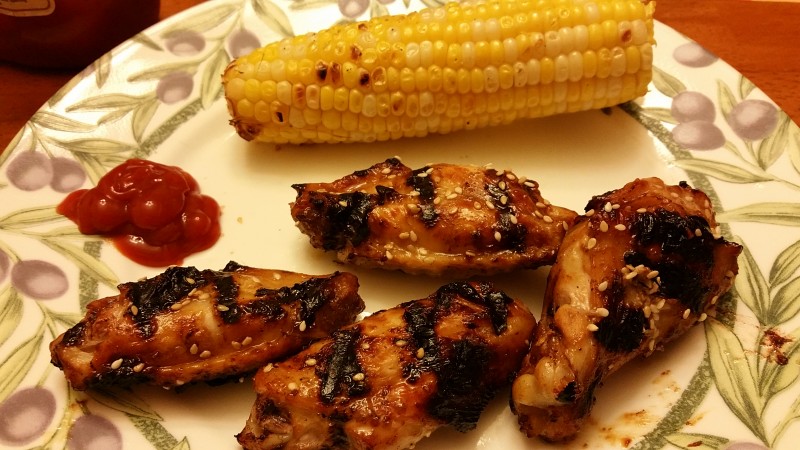
This is a super delicious recipe.  I have been meaning to post it

INGREDIENTS:

  • Marinade (see step #1)
  • 2 garlic cloves, minced
  • 1/2 cup Hoisin sauce (look in the Asian aisle)**
  • 2 tablespoons white rice vinegar**
  • 1 teaspoon sesame oil (don’t replace it with anything else!)
  • 1 teaspoon Chinese five-spice powder**
  • 1 teaspoon cayenne pepper**
  • 1/4 teaspoon salt
  • 2 pounds chicken wings, drumsticks and wingettes separated
  • 1 teaspoon white sesame seeds (optional)
  • My idea: Chopped green onions can be added to marinade for flavor – or decor once the dish is plated **

**Known IC irritants, tread carefully!


DIRECTIONS:

  1. In a large bowl, whisk together the garlic, hoisin sauce, rice wine vinegar, sesame oil, five-spice powder, cayenne, salt, and chopped green onions, if using.
  2. Add the wings to the mixture and use your hands to toss and coat the wings with the marinade.
  3. Let stand at room temperature for 10 to 15 minutes to marinate.
  4. Preheat the oven to 400 degrees F.
  5. Line a large baking pan with aluminum foil.  I double lined it for drip security.  
  6. Remove the wings from the marinade, shaking off the excess and saving marinade for basting.  Arrange the wings in a single layer on the baking pan.
  7. Roast for 20 minutes.
  8. Remove from oven and baste the wings with the leftover marinade, and sprinkle the sesame seeds, if using, over the wings.
  9. Return the wings to the oven and roast for another 10-15 minutes, or until the outsides are golden brown and crispy (also do a temperature check, always!)
  10. Transfer to a platter and serve.  Sprinkle with chopped green onions for decoration, if desired.

Easy Rotisserie Chicken (Well, Easy-ish) *

20150727_182500_resized20150727_172416_resized 20150727_182044_resized 20150727_182328_resized


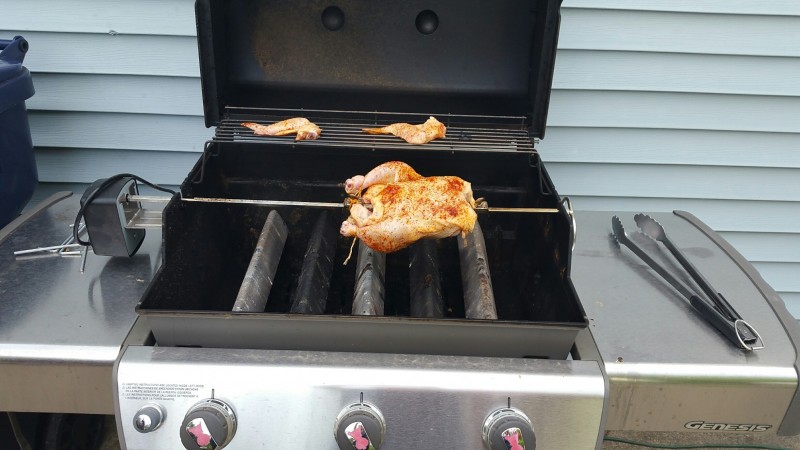
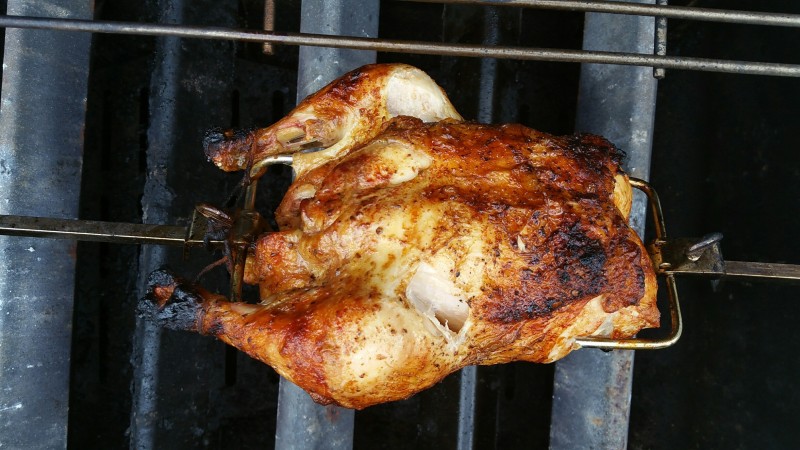
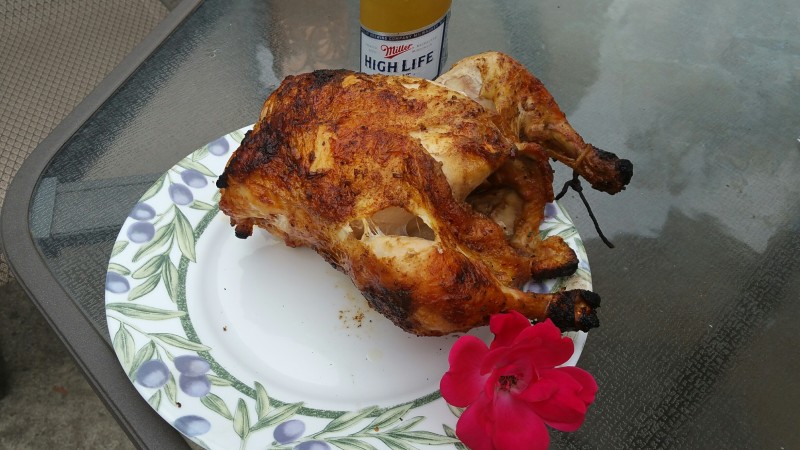
So I’ll preface this with we are not grill masters, but we find our way and make some yummy BBQ.  Nothing special or crazy exotic, just yummy BBQ.  So here’s our recent rotisserie chicken.  I bought a antibiotic-free chicken and went for it.

About grills and rotisseries:  We own the Weber Genesis E-310 propane grill.  It was expensive but it’s worth every single penny.  We had too many cheapie grills that fell apart too early. I’m looking at you, Charbroil $300 special!  The Charbroil was junked in about two years with good care.

When you do certain grill tasks and especially use a rotisserie, you want quality silicone gloves to be able to grab the hot rotisserie and the hot meat.  We purchased the AYL Silicone heat resistant BBQ gloves on Amazon, about $19.99.  Links below.

INGREDIENTS:

  • A large whole chicken, you decide the size.
  • Smoked paprika**
  • Coarse salt
  • Freshly ground pepper**
  • Oregano

**Known IC irritants, tread carefully!

To make this IC safe, omit the paprika and pepper.  The oregano should give enough flavor.  

TOOLS:

DIRECTIONS:

  1. Remove the packaging from your whole chicken.  Remove giblets or any bonus parts you won’t need.  Don’t rinse your chicken; it just spreads bacteria all over your sink and counter.
  2. Pat your chicken dry with paper towels.
  3. Cut off chicken wings.  (If you leave the thin wings on, they will get burnt to a crisp, so do not).  You can grill them separately or save them for another use.  They crisp up very nicely on the top rack of your grill!
  4. Using kitchen twine, tie the drumsticks to the chicken or the rotisserie tightly, otherwise they will flop around while grilling.
  5. I sprayed my chicken with Original PAM spray because I was especially lazy, but you massage some softened, unsalted butter over the skin.
  6. Sprinkle and rub your spices on the whole chicken (and the wings, if using): smoked paprika gave it an awesome smokey taste, oregano, freshly ground pepper, coarse salt – or whatever spices you like.
  7. Unscrew your rotisserie and thread your whole chicken on it, making sure to insert it into the metal stabilizers.
  8. Prepare your grill per rotisserie directions.  We remove our grill grates and do indirect grilling.  We leave the left and right burners on our 3-burner grill, and turn off the middle burner.  This allows the meat to slowly cook.
  9. After about an hour, temperature your meat, away from the bone.  Cook until 165 degrees F, the safety temp.
  10. Once it has reached the safe temp., turn off your grill and leave lid open so the meat can cool and rest – a very important step.
  11. Wearing your silicone gloves, remove rotisserie with meat to a clean tray.


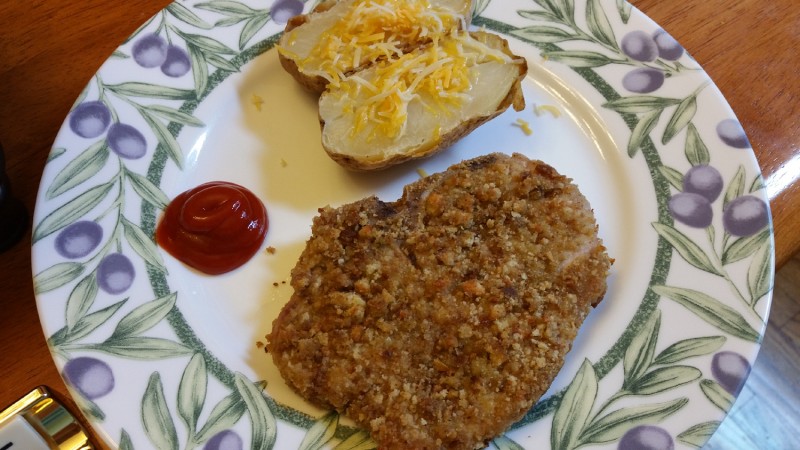
Oven-Fried, Breaded Pork Chops

breadedpork1 breadedpork2 breadedpork3


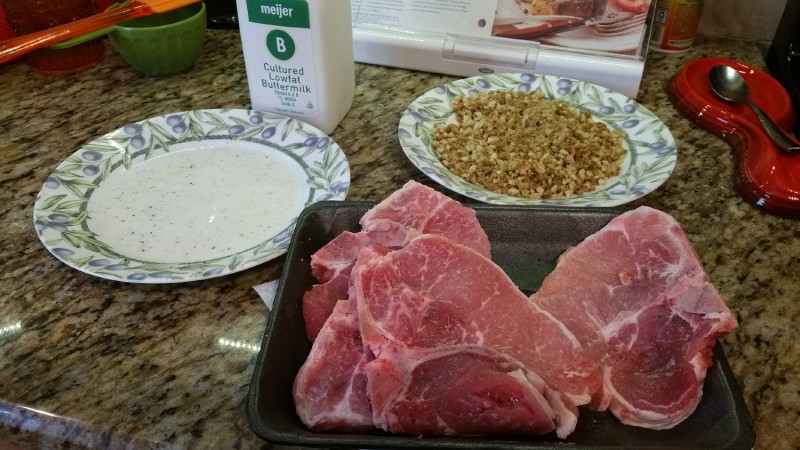
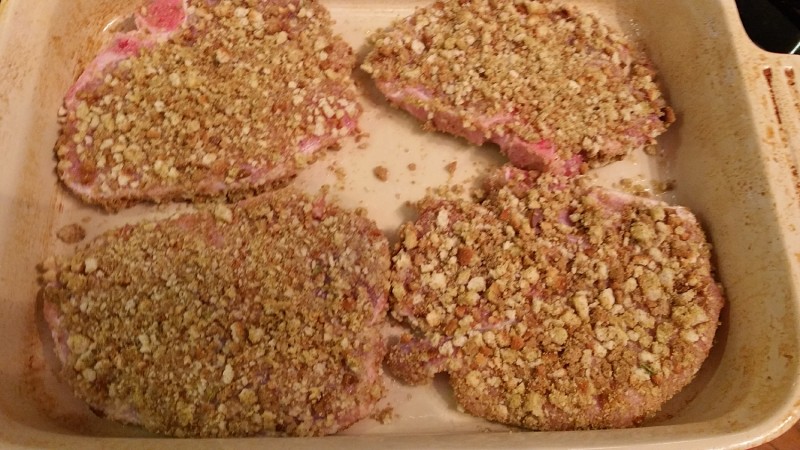
It’s well known I do not like many forms of pork that do not involve a) bacon or b) ribs, so I have some difficultly eating a pork chop or pork tenderloin unless it’s absolutely exceptional, moist, and flavorful.  Otherwise, I rather eat the sides on my plate and call it a day.  With that pickiness in mind, I gave this Better Homes & Gardens recipe a try.  Thankfully, it turned out fantastic.  I used my favorite stuffing – Meijer chicken stuffing in a large, tall container.  Since we have an egg allergy in the house, I omitted the egg and milk and used buttermilk instead.  It was great!  Don’t skimp on the butter here.


INGREDIENTS:

  • 4 pork loin chops, cut 3/4″ thick
  • 2 tablespoons butter, melted (unsalted is safest as your stuffing mix will have sodium)
  • 1 egg, beaten
  • 2 tablespoons milk
  • 1/4 tsp. black pepper
  • 1 cup herb-seasoned stuffing mix, finely crushed


DIRECTIONS:

  1. Preheat oven to 425.
  2. Trim fat from meat.
  3. Pour butter into a 13x9x2″ baking pan, tilting pan to coat the bottom.
  4. In a shallow dish, combine egg, milk, and pepper (or combine buttermilk and pepper).
  5. Place stuffing mix in another shallow dish.
  6. Dip chops into egg/milk/pepper mixture or buttermilk/pepper mixture.
  7. Coat both sides with stuffing mix.
  8. Place chops in prepared pan.
  9. Bake uncovered for 10 minutes.  Turn chops and bake additional 10-15 minutes until 160 degrees and juices run clear.

***After trying this recipe once, I figured out another option.  That is to preheat your oven with butter and pan inside.  Then *carefully* add your prepared chops to your hot pan with the hot butter already melted and up to temperature, to get more of a searing effect.

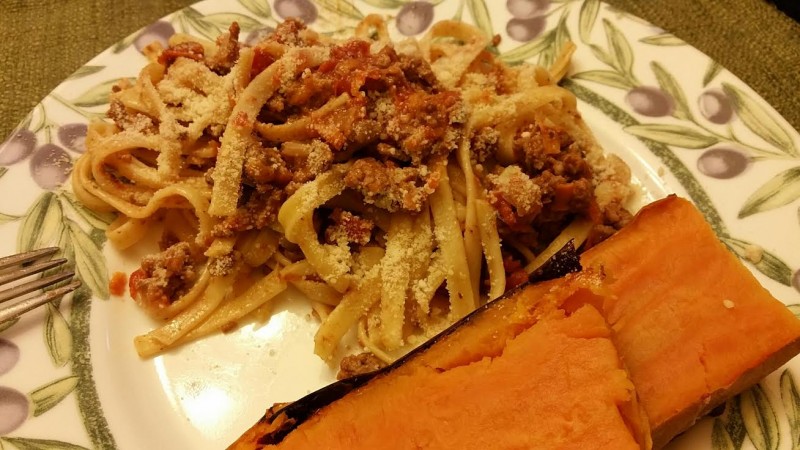
Pasta & Easy Italian Meat Sauce with Fettuccine * (Not IC Safe)

easy-meat-sauce-fettuccine

We loved this recipe from Martha Stewart’s “Great Food Fast” cookbook!  It’s a perfect recipe when you want a homemade meat sauce to go with your pasta and want to avoid a jarred sauce.  It reminded us of the flavors of the Greek dish called Pastichio, but it was infinitely easier to make!  The secret ingredient is shredded carrot and most people would never know!  This was a quick recipe and could be made even on a week night.

This recipe includes milk, which channels Northern Italian recipes like that of the famed Ragu alla Bolognese.

The only change I made was that I used about 1/3 of an onion instead of a whole onion, so I decreased the butter to 2 tablespoons and used the 1 tablespoon olive oil as instructed.  I probably could have decreased the butter to 1 tablespoon looking back, because it left a little oil/butter residue.  Very yummy dish!

*We used a little over 3/4 LB. of lean ground beef (90%).  Next time I’d use a full pound.  

INGREDIENTS:

  • 4 tablespoons butter, which you can reduce (unsalted is best to use)
  • 1 tablespoon olive oil
  • 1 carrot, grated (about 1/2 cup)
  • 1 onion, chopped**
  • 2 garlic cloves, chopped
  • 3/4 lb. to 1 lb. ground beef*
  • 1 can (28 ounces) whole tomatoes**
  • 1/2 cup milk
  • 1 dried bay leaf
  • 1/2 tsp. dried thyme
  • 1/4 tsp. ground nutmeg
  • Coarse salt and freshly ground pepper**
  • 1 LB. fettuccine
  • Grated Parmesan cheese, for serving

**Known IC irritants, tread carefully!

DIRECTIONS:

  1. Heat the butter and oil in a large saucepan over medium heat.
  2. Stir in the grated carrot, onion, and garlic.  Cook a few minutes.
  3. Add the ground beef and cook until it turns from pink to brown, about 5 minutes.
  4. Add the tomatoes and their liquid, crushing them with the back of a large spoon.
  5. Stir in the milk, bay leaf, thyme, nutmeg, 1/2 tsp. salt, and 1/8 tsp pepper.
  6. Simmer for 20 minutes.  Then discard bay leaf.
  7. Meanwhile, in a large pot of boiling salted water, cook the fettuccine until al dente according to the package directions.
  8. Reserve about 1/2 cup of the cooking water, and drain the fettuccine.
  9. Return the pasta to the warm pot.
  10. Add the meat sauce to the pasta, and toss.
  11. Add the reserved pasta water as needed if the sauce seems dry.  (I ended up adding maybe 1/4 cup to make it moister).
  12. To serve, sprinkle with Parmesan cheese.