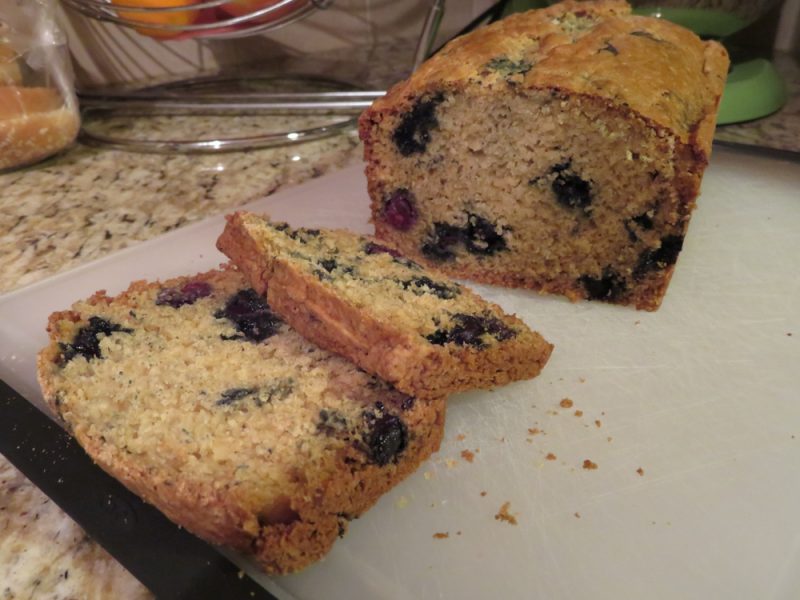
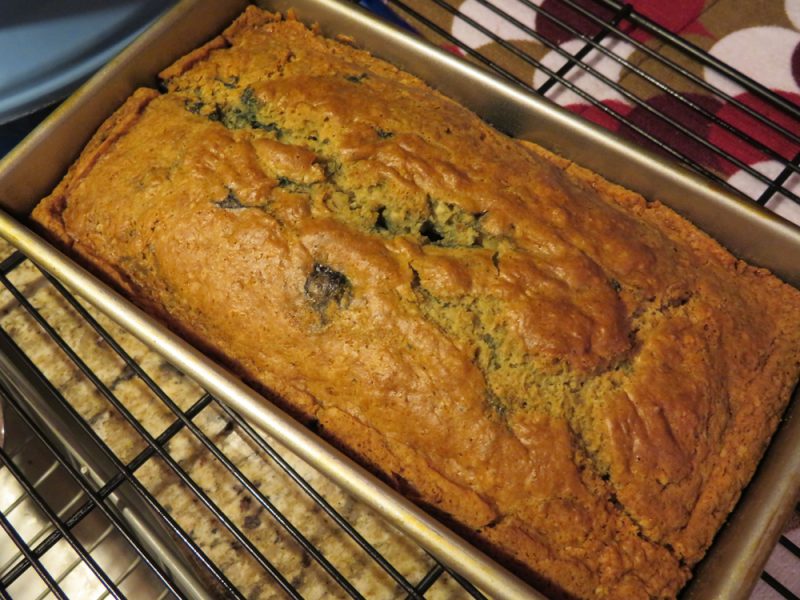
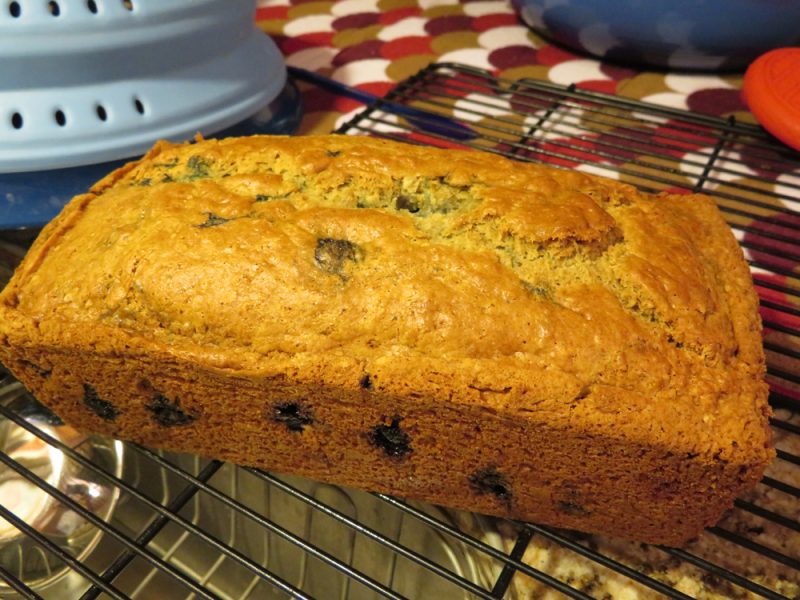
Here’s a fantastic blueberry bread that whips together quickly! It features just a few simple ingredients. Since you mix just until moistened, you can avoid using the stand mixer or electric mixer. Highly recommended!
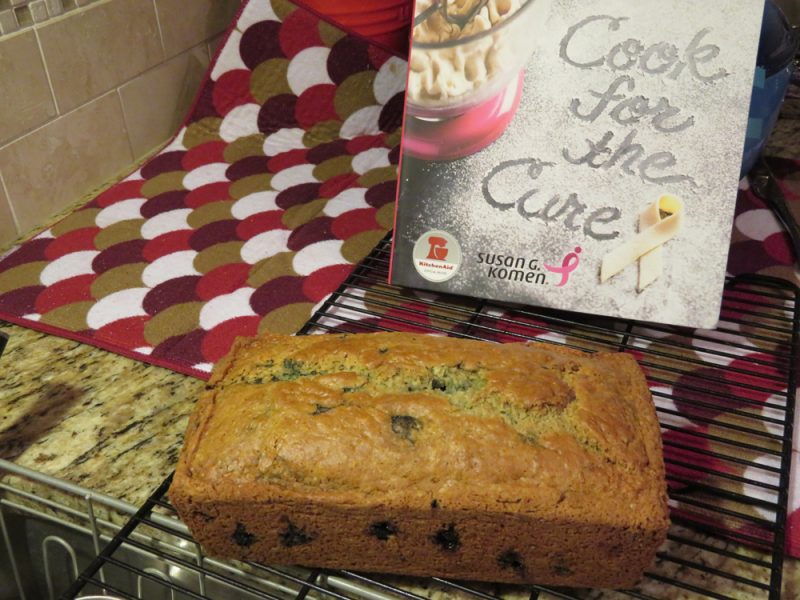
I got this book free via a promotion from ABT Electronics in Glenview, IL. It’s a book called KitchenAid “Cook For The Cure” – Susan G. Komen. Thanks, ABT!
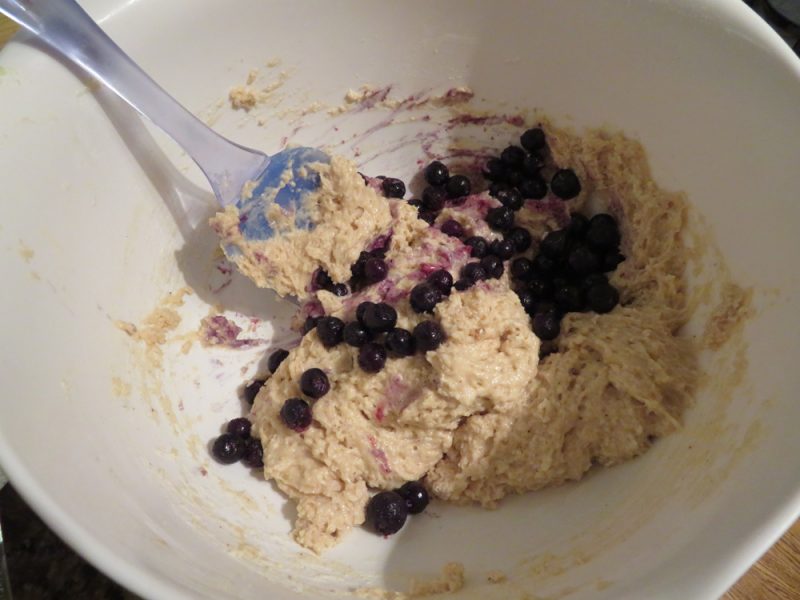
Note: Frozen blueberries worked fine, I ran out of fresh.
INGREDIENTS:
3/4 cup buttermilk
1 egg
3 tablespoons vegetable oil or melted butter –(I used butter)
2 cups all-purpose flour
3/4 cup packed brown sugar
2 teaspoons baking powder
1 teaspoon baking soda
1 teaspoon salt
1/2 teaspoon ground nutmeg
1 cup fresh or frozen blueberries
DIRECTIONS:
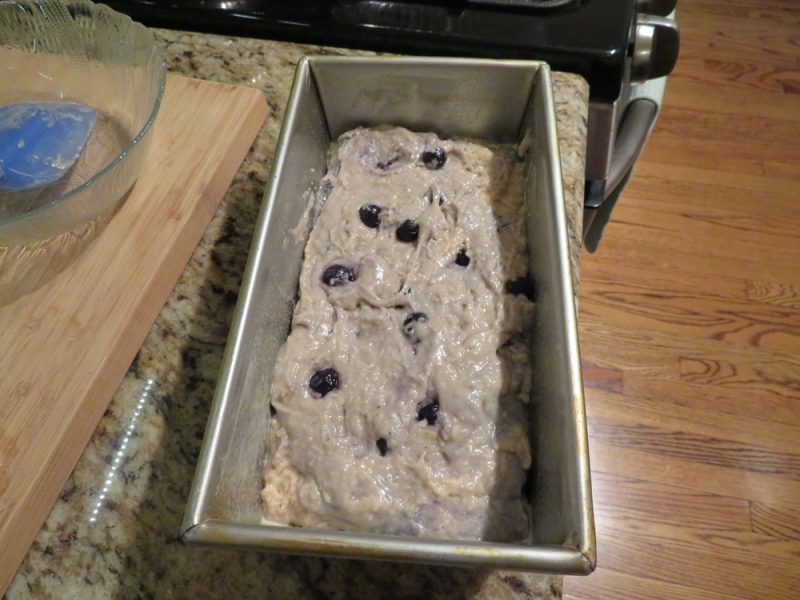
Preheat oven to 350F. Grease 8×4″ loaf pan.
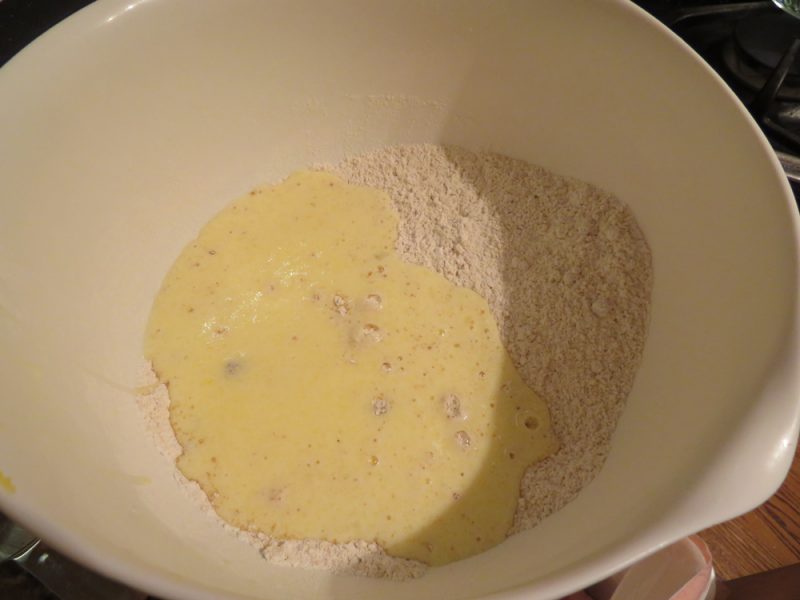
Combine buttermilk, egg, and oil in small bowl.
Combine flour, brown sugar, baking powder, baking soda, salt, and nutmeg in large bowl.
Stir in buttermilk mixture just until moistened (batter will be lumpy). Do not overmix.
Fold in blueberries.
Spread batter in prepared pan.
Bake 50-60 minutes or until toothpick inserted in center comes out clean.
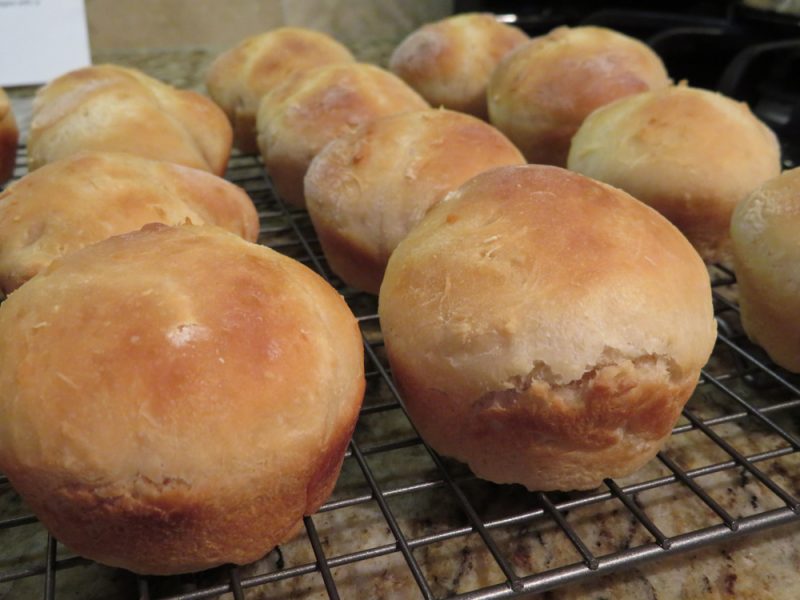
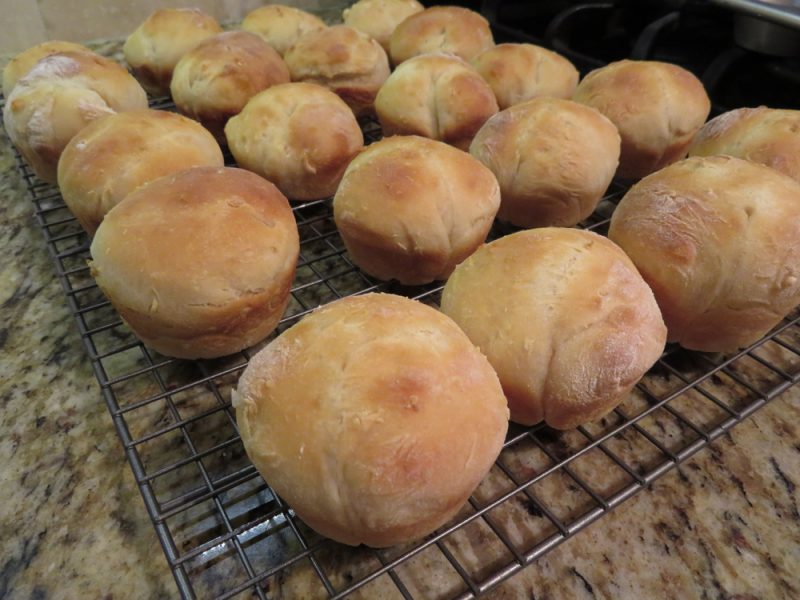
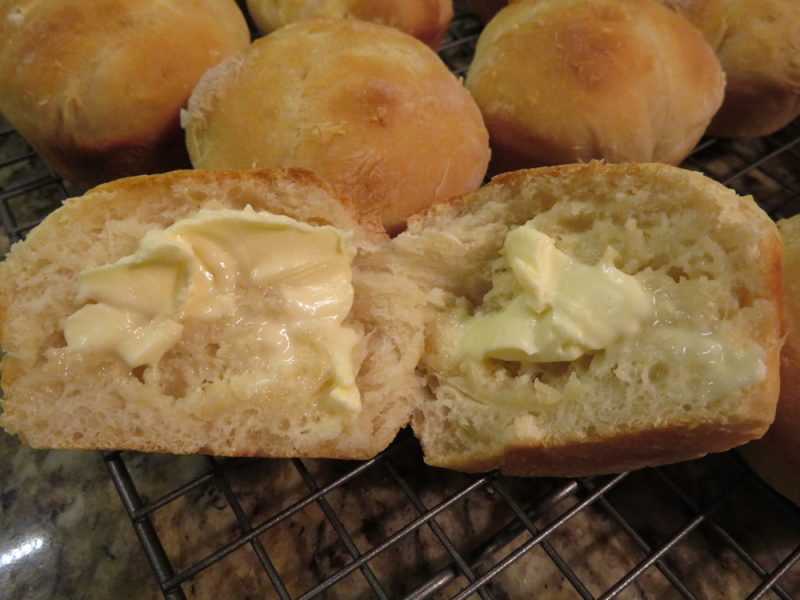
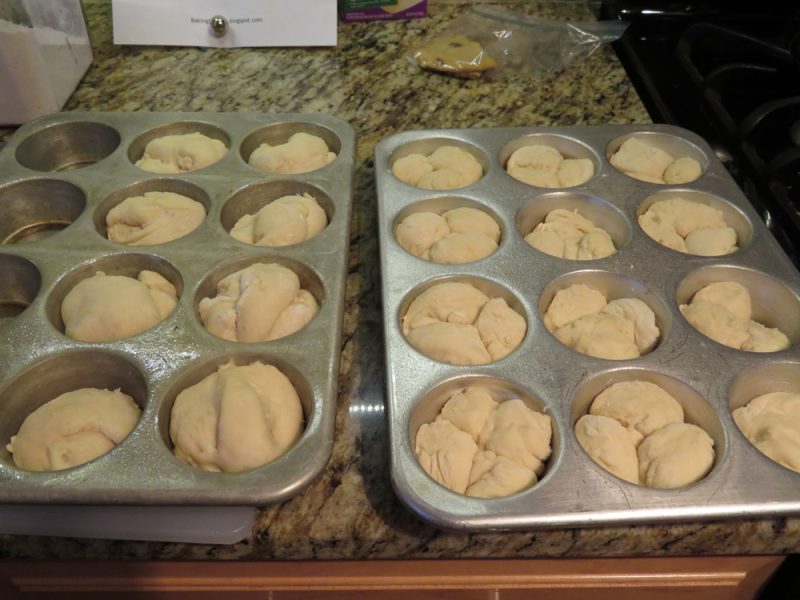
I finally found a bread machine recipe for fresh rolls that is eggless and easy! Many bread roll recipes for the bread machine and regular baking involve eggs. Thankfully, this one was very tasty and did not. This is simple and uses inexpensive, common ingredients. This makes about 20-24 rolls depending on size.
INGREDIENTS:
1/4 cup canola oil
1/3 cup sugar
1 3/4 tsp. salt
1 tablespoon active dry yeast
3/4 cup warm water
3/4 cup milk (I used 2%)
4 cups flour (I weighed it – this equals about 500 g.)
Also needed:
Bread machine
Muffin pan (regular size) x 2 pans
Spatula
Pastry brush, etc
PAM spray
DIRECTIONS:
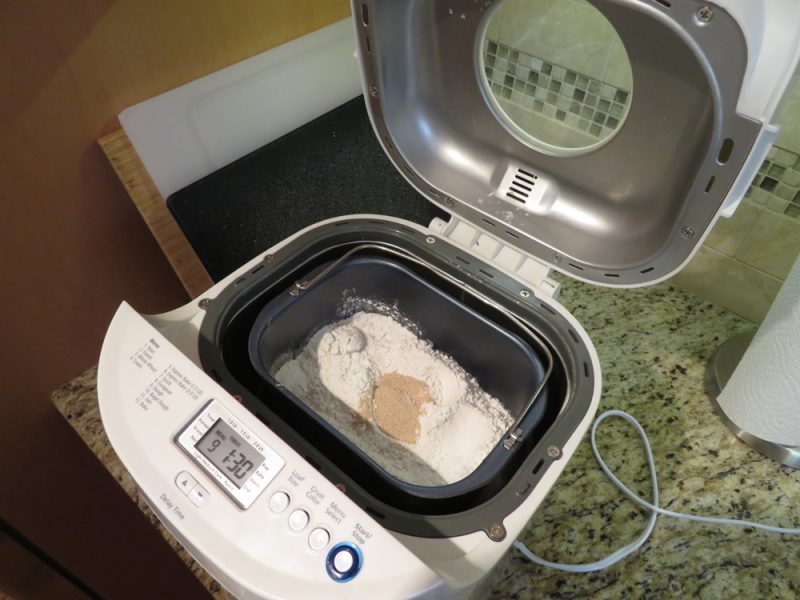
Place liquid ingredients in bottom of loaf pan – including canola oil, warm water, and milk.
Add other ingredients: sugar, salt, and flour on top of the liquid ingredients.
Add yeast at the very top – not touching the liquid ingredients on bottom.
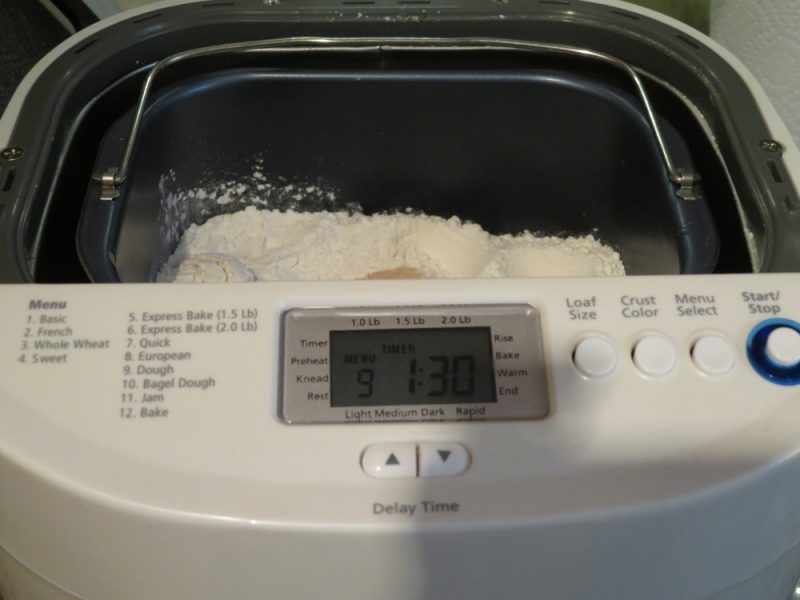
Select the dough cycle. (My dough cycle lasted 1.5 hours).
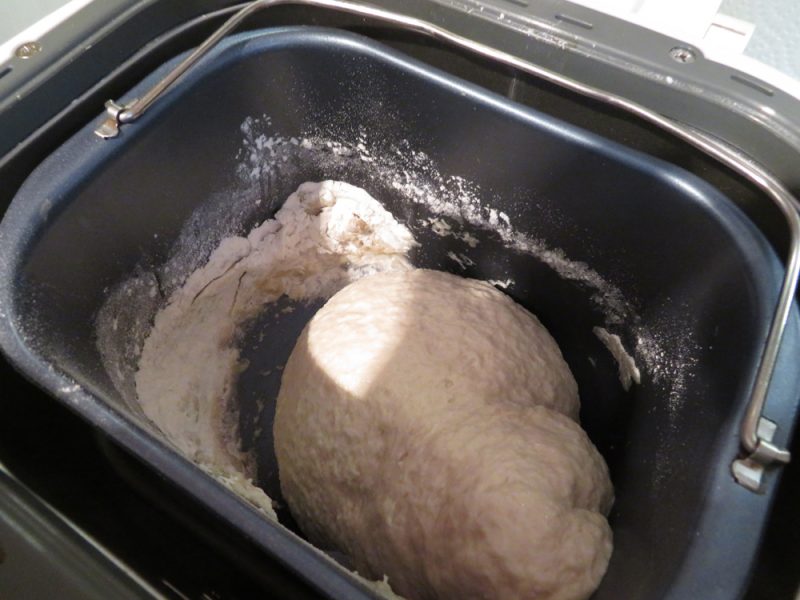
Monitor dough cycle in about 5-10 minutes. Scrape the sides of the pan with a soft spatula, if necessary, to scrape the flour back into the dough. (See photo #6 to see how dry flour sticks to the side of the pan). Add a tiny bit of warm water, if needed, to get that flour incorporated into the dough.
Once the dough cycle has ended, take out and shape into rolls or balls. Place balls into muffin cups sprayed with PAM first.
Leave rolls in muffin pans on counter to relax the gluten – about 20 minutes.
Bake rolls at 400 degrees for 12 minutes, or until golden. (Mine took about 15ish minutes).
Using a pasty brush, brush butter on top of finished rolls.
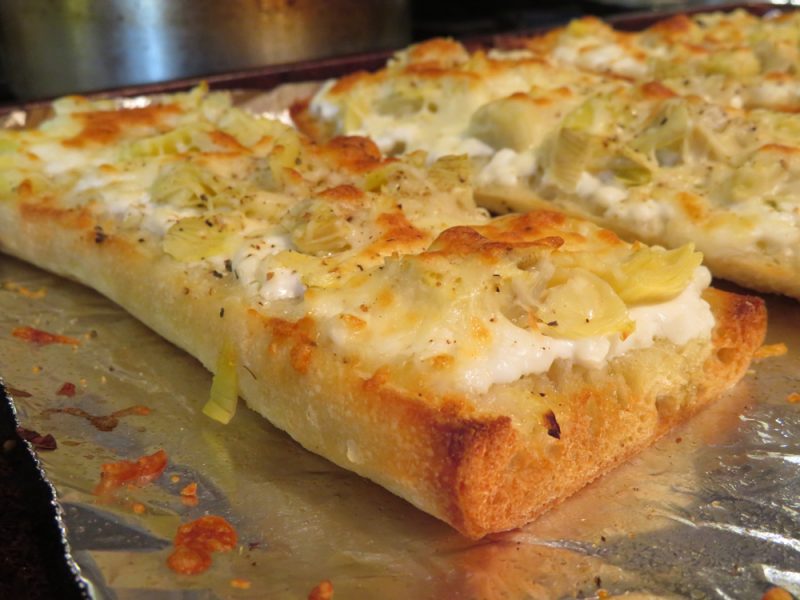
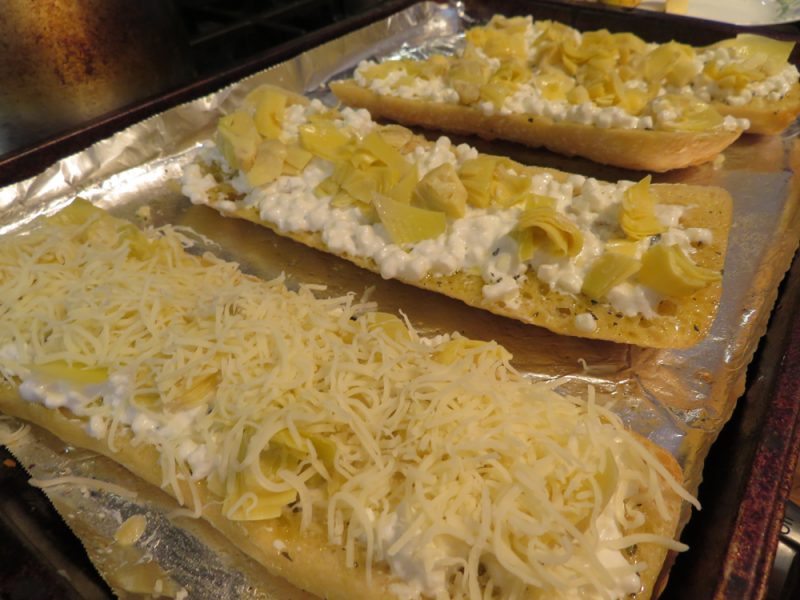
This is a stellar recipe for a simple snack that I like to call “Cheesy artichoke bread”, also known as artichoke French bread pizza. It tastes just wonderful and it’s full of flavor. I omitted the red pepper. My son, who is very picky with foods, ate it without noticing the artichoke and just thought it was cheesy bread. He was thrilled. Next time I’ll lightly food process the artichoke so it’s not so obvious.
I doubled the ingredients and used a larger loaf – actually, a ciabatta loaf. I am glad I did, it was all gone in about two days.
INGREDIENTS:
1/4 cup extra virgin olive oil
1 minced garlic clove
1/2 tsp. red pepper flakes
1/2 tsp. dried oregano
1/2 tsp. kosher salt
small baguette —(I used a dense ciabatta loaf)
1/2 cup ricotta
1/2 cup chopped marinated artichoke hearts
1/2 cup shredded mozzarella cheese
Fresh parsley, for topping
DIRECTIONS:
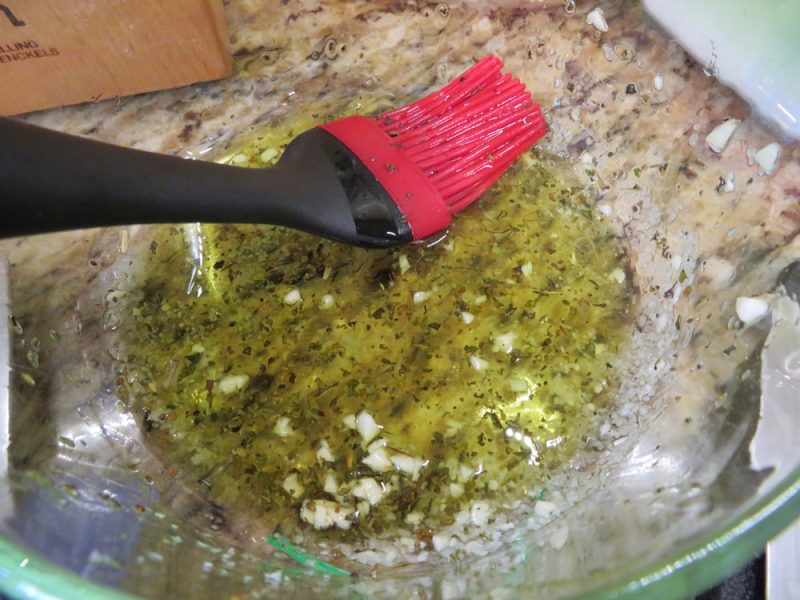
Combine 1/4 cup extra virgin olive oil, 1 minced garlic clove, and 1/2 tsp. each red pepper flakes, dried oregano, and kosher salt; brush on a split small baguette.
Top with 1/2 cup each ricotta, chopped marinated artichoke hearts, and shredded mozzarella.
Broil (on low) until the cheese is browned and bubbling. (Set the time 5 minutes so you don’t come back to a burnt, smoking mess).
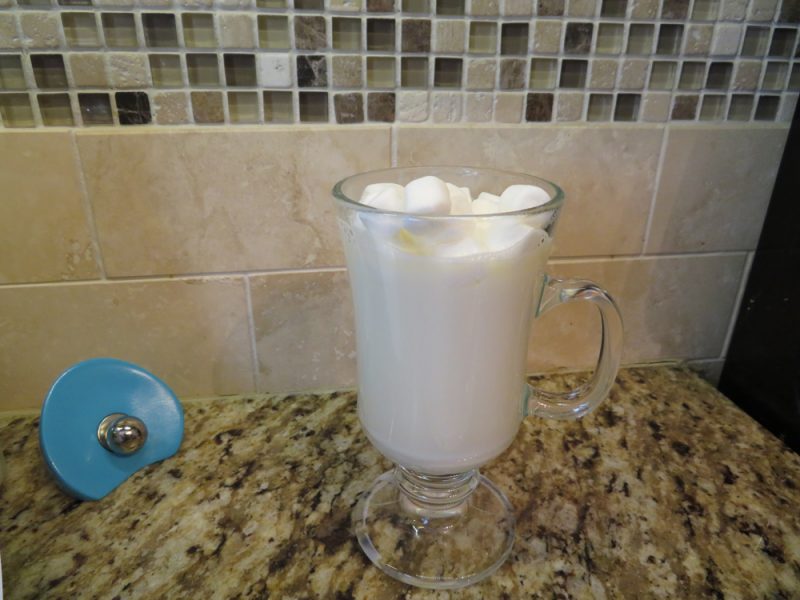
I can no longer have amazing hot cocoa, coffee, and all those wonderful things. With a very irritated I.C. bladder, I have to find another route to the joy of hot chocolate. So I looked online and found this recipe from www.gimmesomeoven.com, and gave it a try. I had the 2% milk and homemade vanilla on hand, so all I needed was the white chocolate. I got a big bag of Ghirardelli white chocolate chips and gave it a whirl! It’s creamy, whips up in about five minutes, and tastes Starbucks-like to me.
–Makes about four ample servings. It’s a filling drink that is wonderful.
INGREDIENTS:
4 cups of milk of your choice (or you can substitute heavy cream or half and half, or do a mixture).
1 tsp. vanilla extract
8 oz. white chocolate, chopped into small pieces (or white chocolate chips)**
whipped cream or marshmallows for topping
NOTE: White chocolate and vanilla can irritate some IC sufferers, tread carefully!
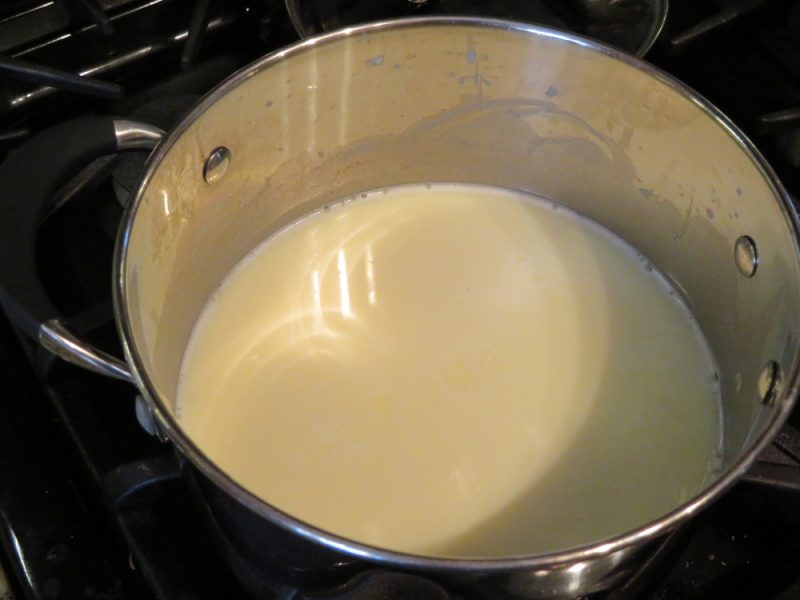
Stir together milk, vanilla, and chopped white chocolate in a medium saucepan.
Cook over medium-low heat, stirring occasionally, until the white hot chocolate comes to a simmer. (Do not let it come to a bowl). *I just got the mixture very hot, I didn’t simmer it.
Remove from heat and serve immediately. Top with whip cream or marshmallows, if desired.
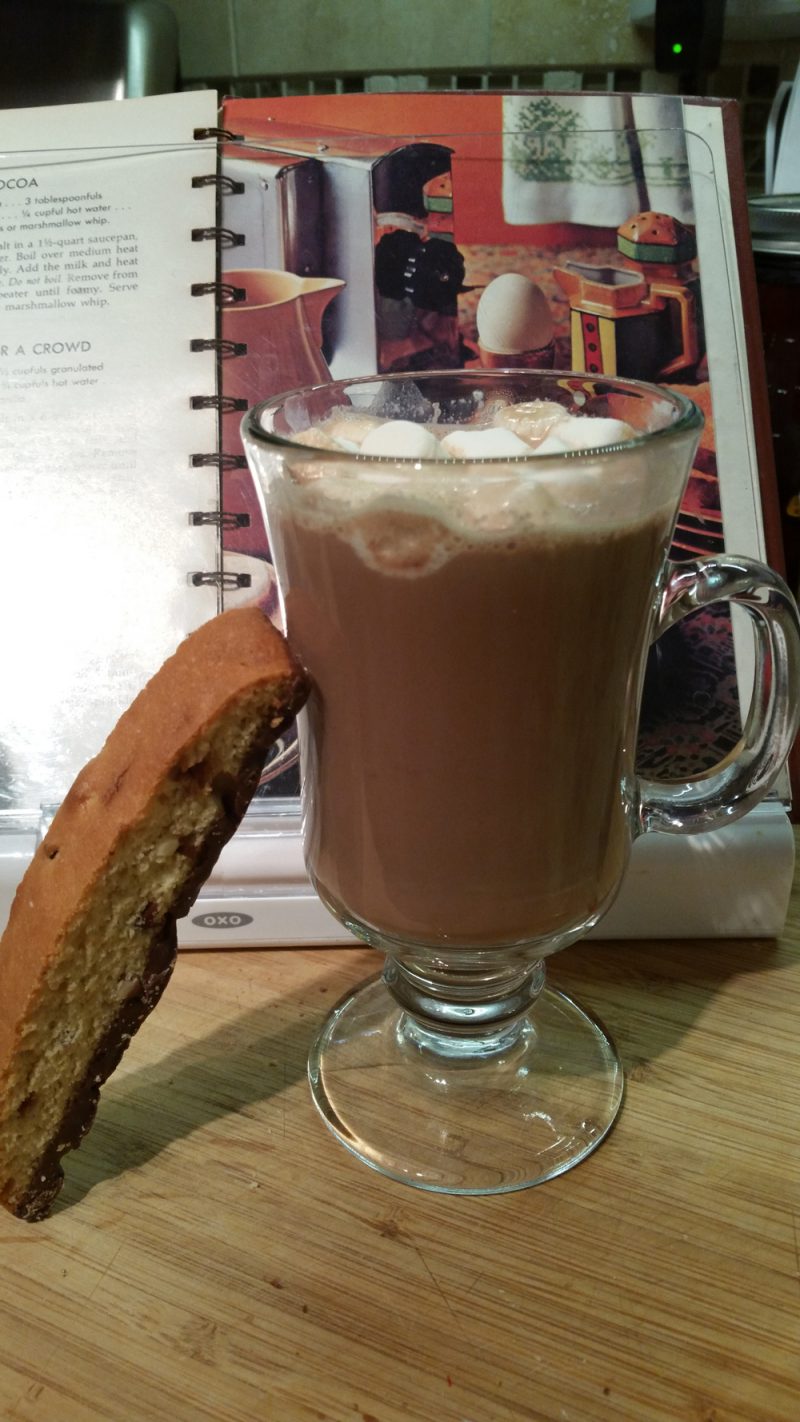
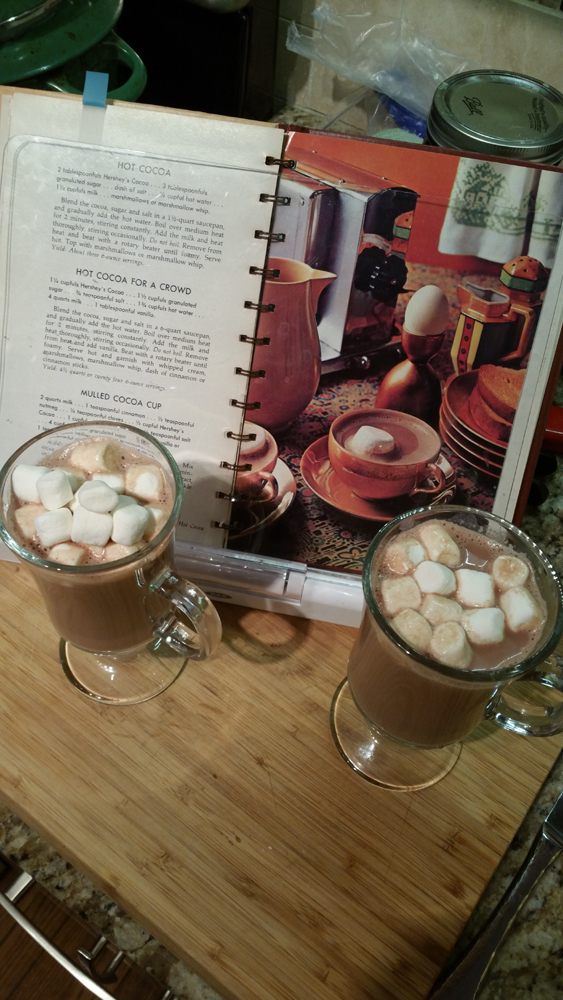
We make this recipe when we want a cup of hot cocoa that a) doesn’t have preservatives, b) fake sweeteners, and c) doesn’t taste weird. It takes a few minutes but the flavor is really worth it.
One note about this recipe, though, it states it makes three 6 oz. servings, but in reality, one recipe yields about two servings at best. We always double this recipe for three people. The recipe below serves approximately 2 people. No one wants to have a small cup of hot cocoa…especially after smelling this recipe!
INGREDIENTS: (for approximately 2 people)
2 tablespoons Hershey’s cocoa powder**
3 tablespoons granulated sugar
dash of salt
1/4 cup hot water (doesn’t need to be boiling)
1 1/2 cup milk (any percentage is fine, I used 2%)
marshmallows, if desired.
**Known IC irritants, tread carefully!
DIRECTIONS:
Blend the cocoa powder, sugar, and salt in a medium saucepan.
Gradually add the hot water.
Boil over medium heat for 2 minutes, stirring constantly.
Add the milk and heat thoroughly, stirring occasionally. (Do not boil).
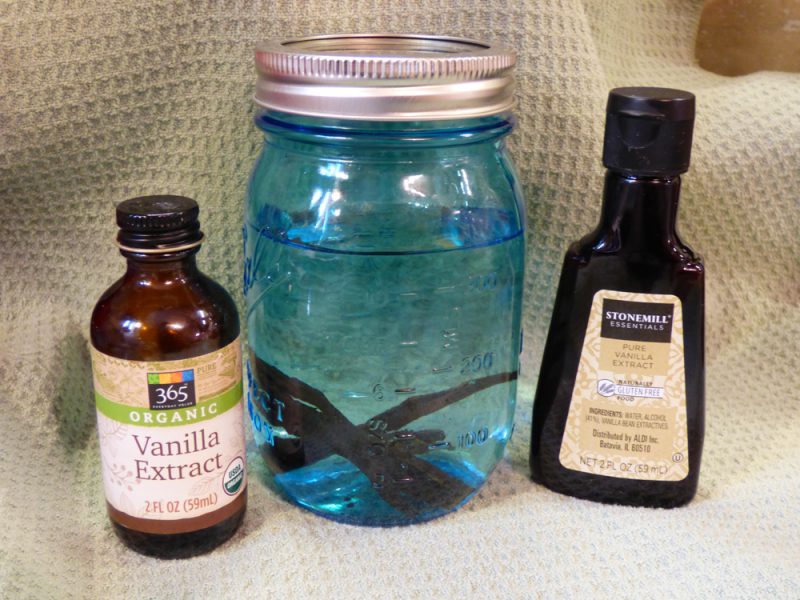
Homemade vanilla extract is something I never thought I’d make, but I am so glad I gave it a try. I will definitely be making this again too. With a little bottle of pure vanilla extract costing $5-10+, and with the possibility of the manufacturer putting unfortunate and fake ingredients in your vanilla, it’s a wise choice to make it yourself. Also, it was simply fun to monitor it over the few weeks to watch (and smell) it morph from a vanilla bean inside a jar of vodka into vanilla extract. The smell is heavenly!
Use this extract as a 1:1 replacement for store-bought extract. This makes a great deal of vanilla extract!
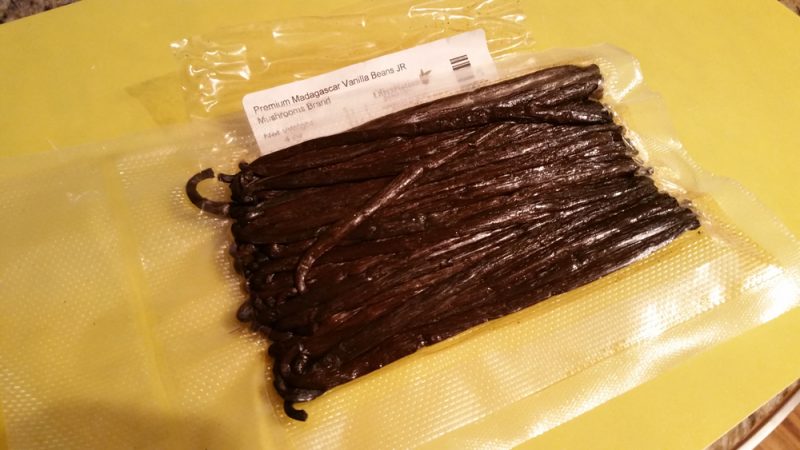
Using a sharp knife, split each vanilla bean in half down the middle.
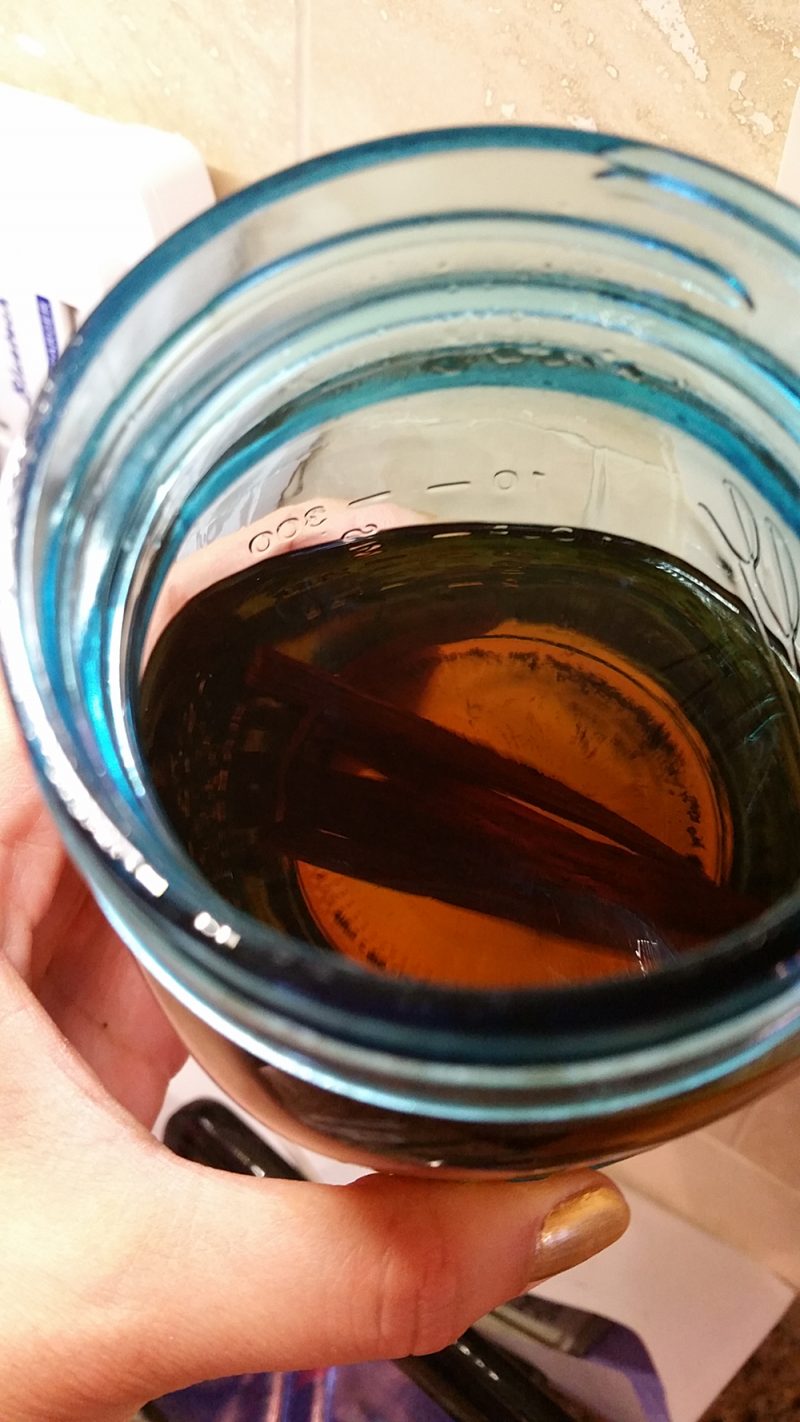
Add the sliced beans to the vodka bottle.
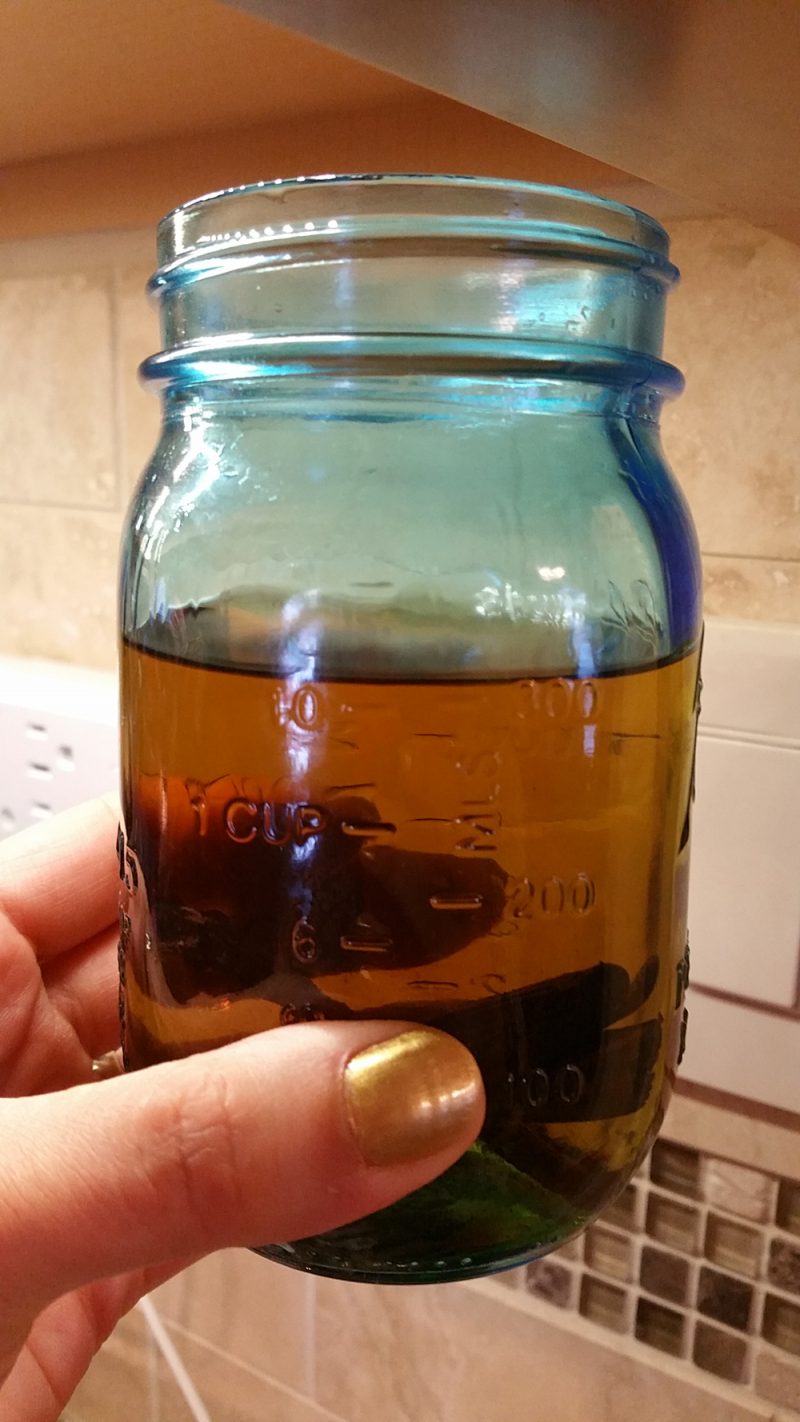
Secure the lid and store the jar in your pantry for a couple of weeks, until the liquid starts to turn brown, then it’s ready to use. (For me, this was about 6 weeks, give or take).
I found a bigger bottle of vodka and measured out the 375mL amount into a Mason jar and proceeded from there.
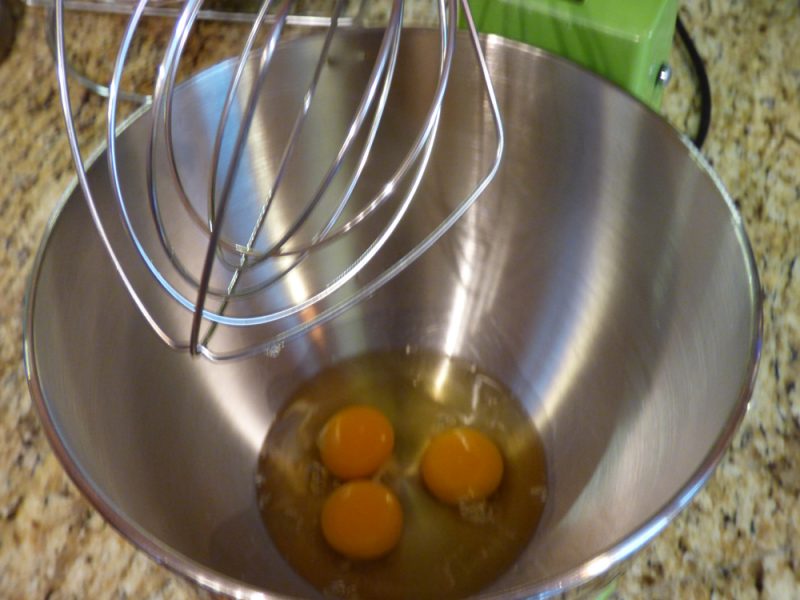
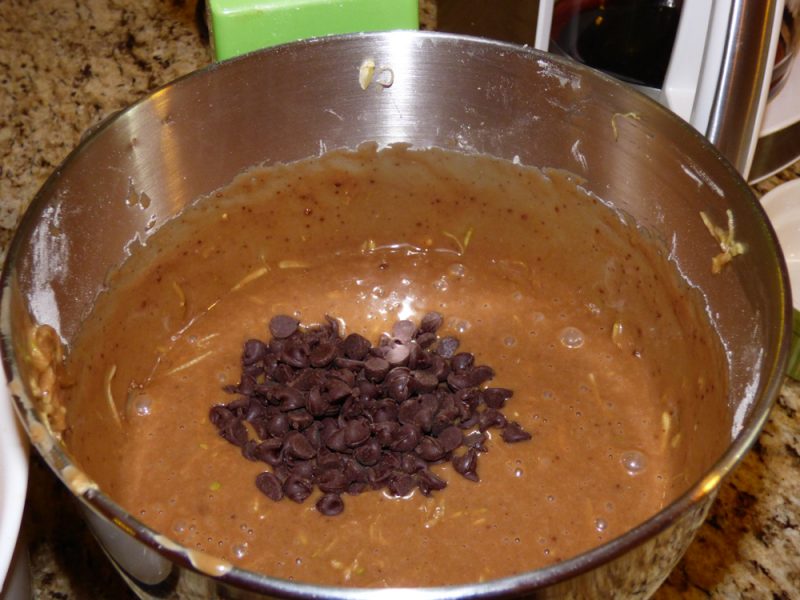
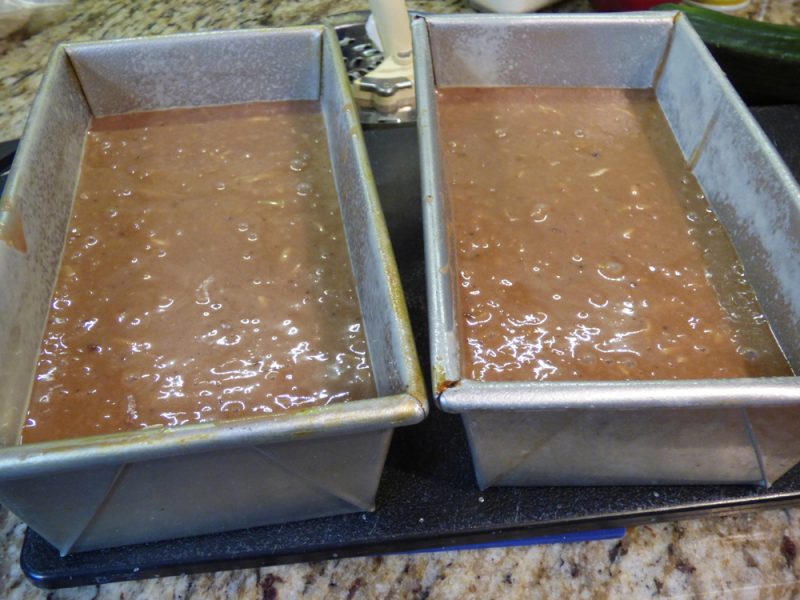
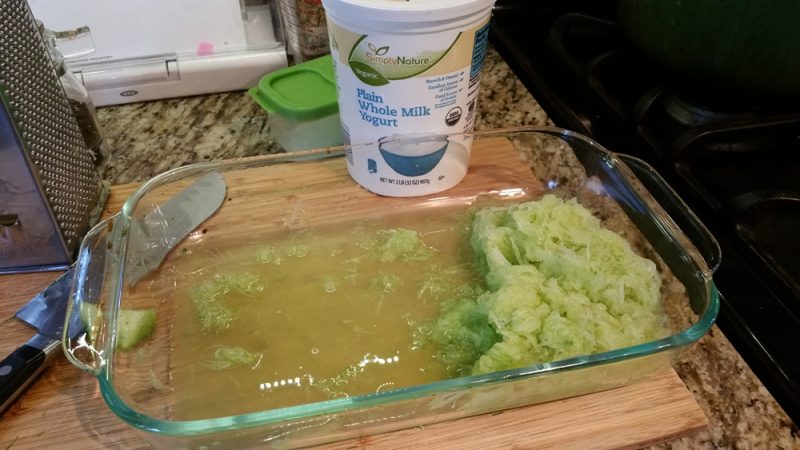
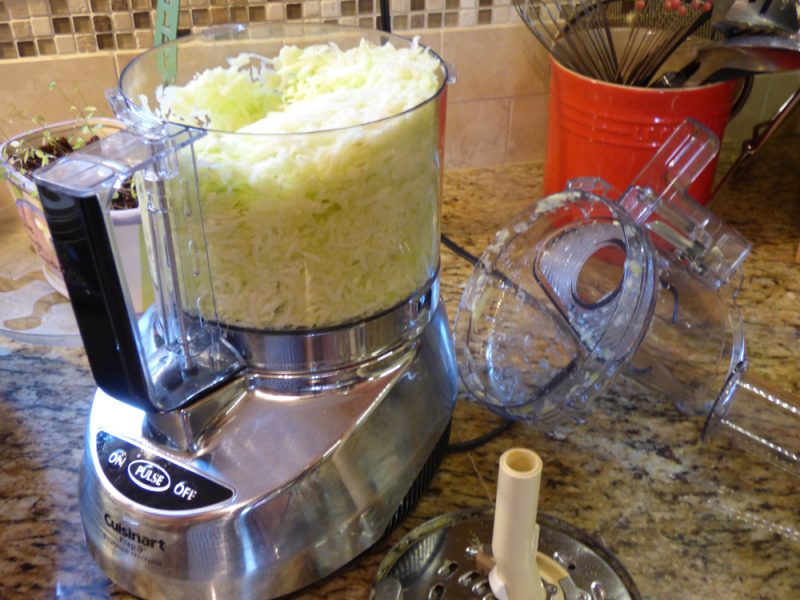
(I should not have peeled the zucchini beforehand — it was a mistake as that’s where the nutrients are.) Don’t make my mistake! I won’t goof up again.
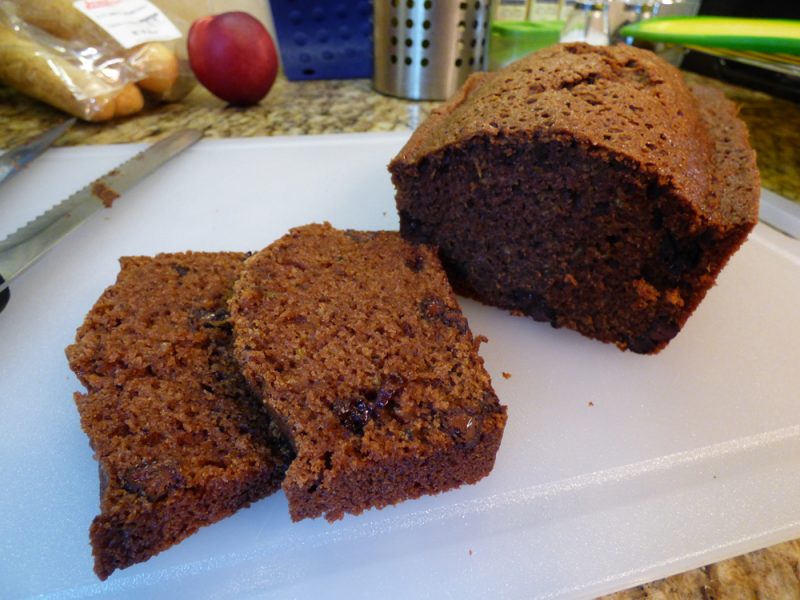
You will love this zucchini ‘double chocolate’ bread – that’s all I have to say! It’s perfect.
Obviously, it’s not a true bread – it doesn’t have yeast; it’s more of a dessert! But it gets zucchini into your children, so you can’t complain too much.
Make sure it’s fully cooked before removing from oven. It shouldn’t look gooey at all on top. I had to bake the two loaves for 1 hour 25 minutes.
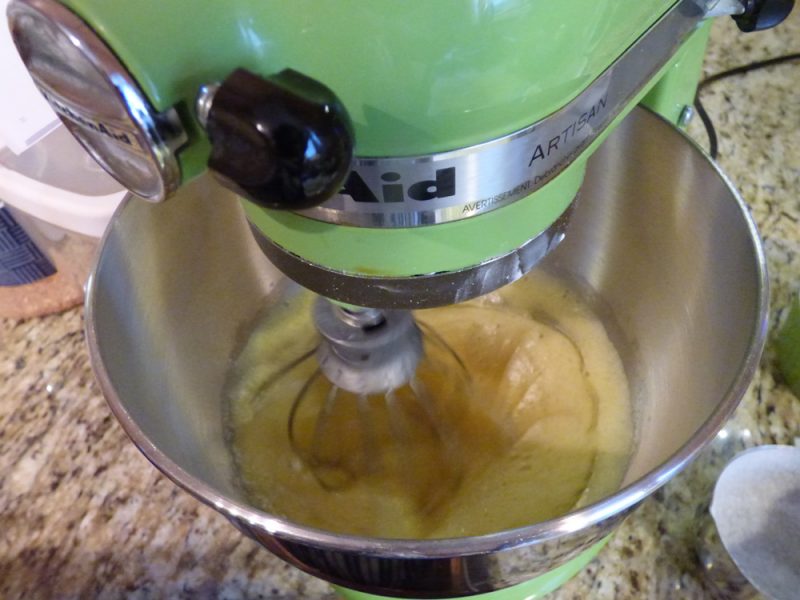
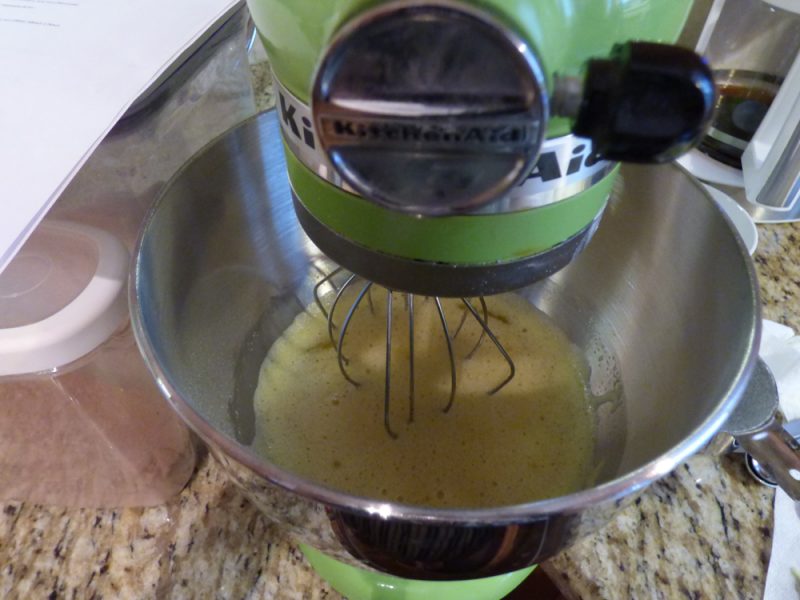
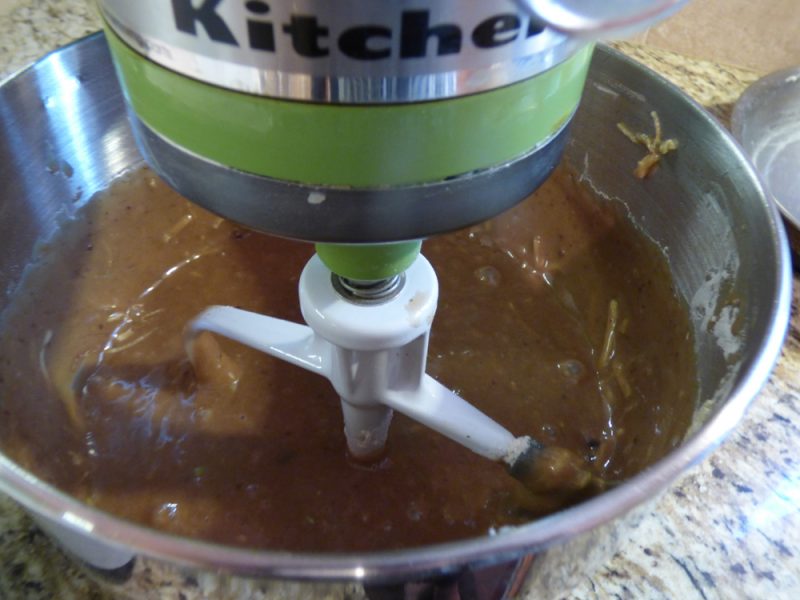
This recipe really is easier with the right tools: the food processor, the stand or hand mixer, and the right pans (See link below for the best pan). The link goes to an Amazon pan that is very similar to the Williams-Sonoma pan but less than half the price.
Warning #1: I consider this a weekend recipe because it does dirty up your food processor, mixer, and more. It’s very worth it, but I wouldn’t tackle this on a weekday.
Warning #2: Be glad this makes 2 loaves. Don’t halve the recipe. Once you taste it, you’ll be glad you listened to me!
INGREDIENTS:
1 cup vegetable oil
(Or omit walnuts, and add 1 cup of semisweet chocolate chips)**
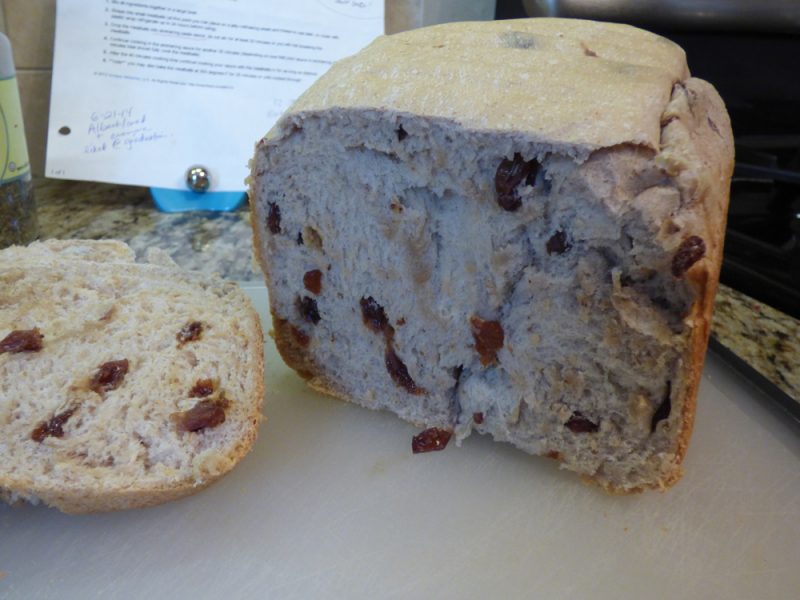
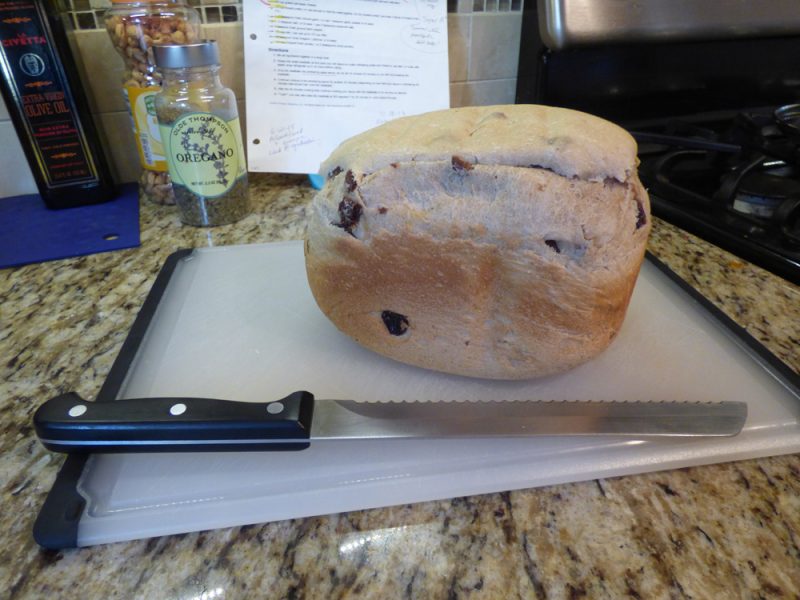
This is a keeper recipe – it makes great tasting cinnamon raisin bread that can go desserty, it can be your carb for breakfast, or just a treat. It’s a great all-around special bread machine concoction. Enjoy…
I bumped up the raisins to 1 cup – c’mon, it is raisin bread! Haha….
**I used the 1.5 LB. size and “light crust” color setting on my machine.
INGREDIENTS:
1 cup water
2 tbsp. butter or margarine, softened
3 cups BREAD flour
3 tbsp. sugar
1 1/2 tsp. salt
1 tsp. ground cinnamon**
2 1/2 tsp. bread machine yeast
3/4 cup to 1 cup dark raisins**
**Known IC irritants, tread carefully!
DIRECTIONS:
Measure carefully, placing all ingredients except raisins in bread machine pan in the order recommended by the manufacturer. Weighing your bread flour, or any flour will always turn out best. I go off the general assumption that 1 cup of flour equals 125 grams, but check your package or check online.
Add raisins at the “Raisin/Nut” audible signal, or 5-10 minutes before the last kneading cycle ends.
Select Sweet or Basic/White cycle.
Use medium or light crust color.
Select 1.5 LB. loaf size.
Once completed, remove baked bread from pan and cool on wire rack before slicing.
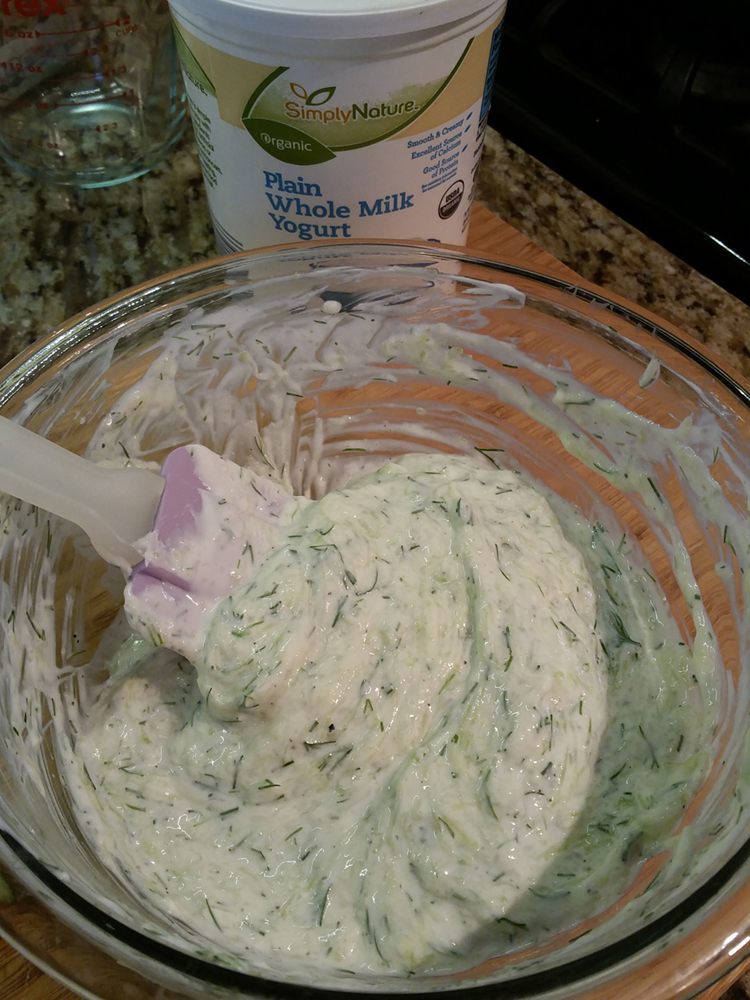
A perfect sauce to accent your gyros, chicken in a pita, and more. Or you can use it as a dip for veggies. Just make sure you use whole fat yogurt. Next time I’ll be sure to use Greek – or it gets a little watery as time goes on. But it was excellent! I frozen the remainder.
INGREDIENTS:
1 cup Greek whole milk yogurt
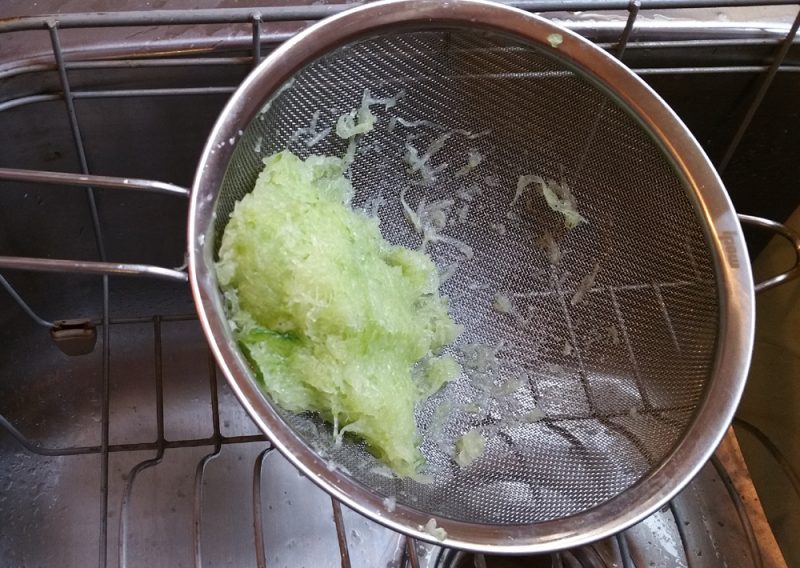
1 English cucumber, seeded, finely grated and verydrained
2 cloves garlic, finely minced
1 tsp. lemon zest, plus 1 tbsp. fresh lemon juice
2 tbsp. chopped fresh dill
kosher salt and freshly ground pepper
DIRECTIONS:
(Hand mixing is preferred as a blender can lead to too wet of a concoction).
In a medium bowl, whisk together the yogurt, cucumber, garlic, lemon zest, lemon juice and dill. Season with salt and pepper. Chill.
Tip: For extra flavor, add some olive oil and some coarsely chopped fresh mint.
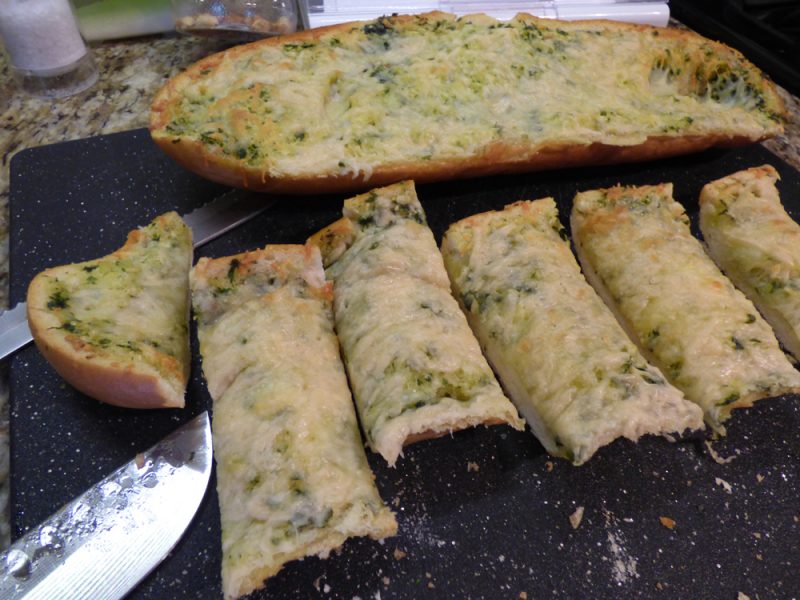
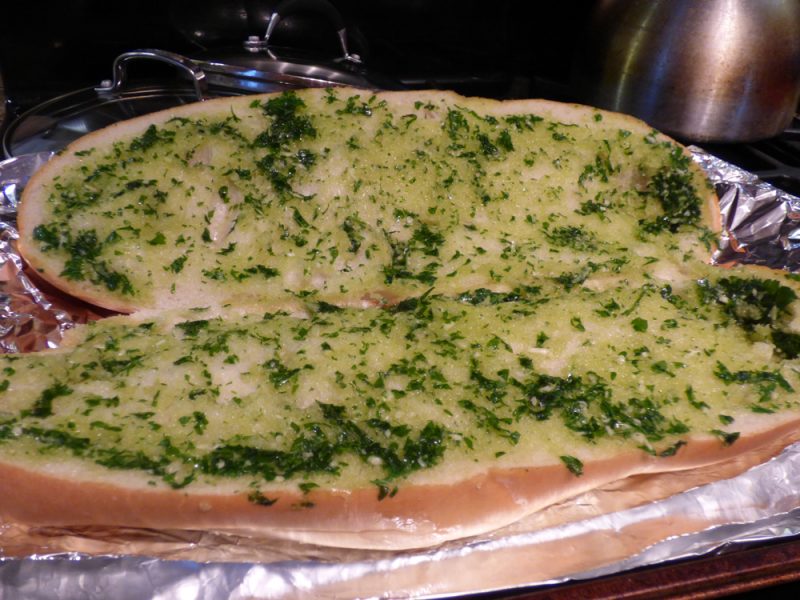
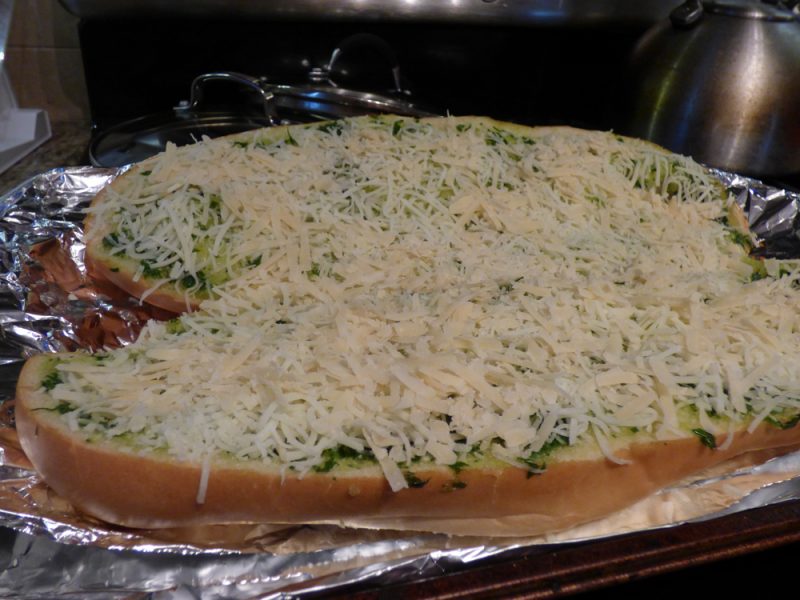
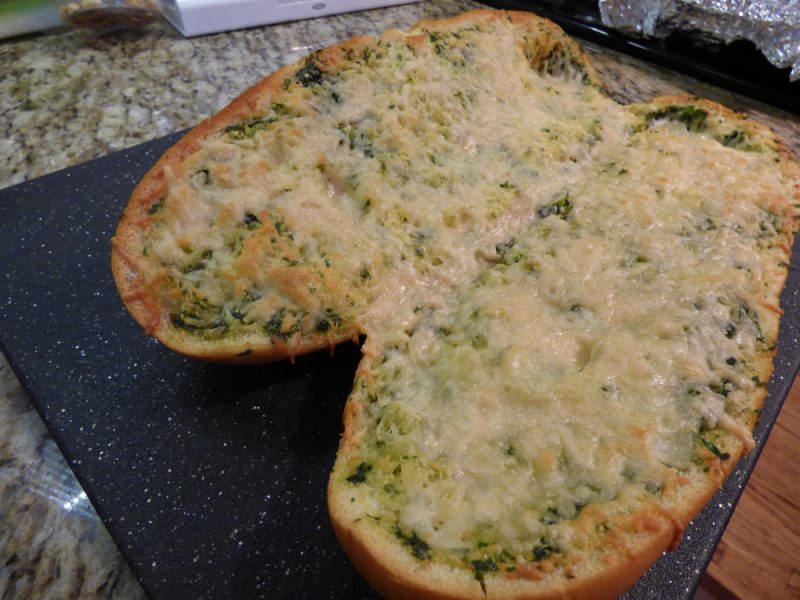
This cheesy garlic bread is very flavorful and yummy. It’s a different taste because it has olive oil versus butter. Some day, I may remake it trying just butter and no olive oil just to see the difference. We will see! Follow the directions and you’ll get an awesome cheesy bread!
(I reduced the garlic to one clove because I’m sensitive to allium. It was fine! Also, if using 6 cloves, be careful, sizes of cloves vary wildly).
Serves approximately 6 people.
INGREDIENTS:
1 loaf ciabatta bread or any kind of Italian bread
6 cloves garlic (or less)
1/4 cup of extra virgin olive oil
2 Tbsp. of fresh parsley
1-2 cups shredded mozzarella cheese
Freshly grated Parmiggiano Reggiano
DIRECTIONS:
Preheat oven to 400 degrees.
Line a baking sheet with aluminum foil and set aside.
In a small food processor or in a blender, add the garlic oil, and parsley. Puree until smooth.
Smear this mixture on both sides of the bread. Place the top of the bread on top of the bottom and wrap it in aluminum foil, bake for 10 minutes.
*Carefully* unwrap the bread, being aware of steam, and place it cut side up.
Sprinkle over the mozzarella and grate about 1 cup of Parmiggiano all over both sides of the bread.
Return to the oven for 10-15 minutes or until the top is golden brown and bubbly.


 (I should not have peeled the zucchini beforehand — it was a mistake as that’s where the nutrients are.) Don’t make my mistake! I won’t goof up again.