Peach Blueberry Banana Smoothie *

This is a ‘recipe’ for a very tasty smoothie that I discovered myself.  Smoothies don’t need a recipe, you just need complimentary flavors and enough liquid.  No pic of the actual result this time, it was so good it was gone in moments. Just imagine a purple smoothie.  No measurements needed, eyeball this one!  Play with the amounts of ingredients.  It will be fine!

INGREDIENTS:

  • 1 peach, room temp. or refrigerated, cored and sliced
  • Approximately 1/3 cup to 1/2 cup frozen blueberries
  • Approximately 1/2 cup frozen sliced bananas**
  • Approximately 1 cup 2% (or your choice of fat) milk

Make sure these fruits are safe for  you!  They are IC safe for some.

DIRECTIONS:

  1. Pour your milk into the blender.
  2. Add your peach slices, frozen blueberries, and frozen slices of bananas.
  3. Cover with lid and process until super smooth – about 45 seconds to a minute.  (We love our NutriBullet much more than traditional blenders.  It makes the ingredients pulverized into super fine bits.  Even fruit seeds are no longer annoying to eat)
  4. If the smoothie gets too thick or the blender struggles, turn off blender, and add more milk, cover, and re-process.
  5. Enjoy!!

** When your banana is too ripe or on it’s way out, take off the peel, and slice it up.  You have two choices:

1) You can be lazy like I am sometimes and throw your banana slices into a Ziplock bag and put it in the freezer.  This works better for bananas than berries.  Bananas will freeze and clump together but they’re still seperate-able.  With berries, I recommend #2.

2) With berries or if you have time to freeze bananas the right way: slice your bananas and lay them on a parchment paper or aluminum foil-lined plate, making sure they don’t touch.  Freeze them for a few hours (1-2 hours).  Then take them off the plate and put them in a freezer bag, and label.  Initially freezing them separately keeps them from becoming a massive berry lump!  I’ve been there and learned the difficult way. LOL
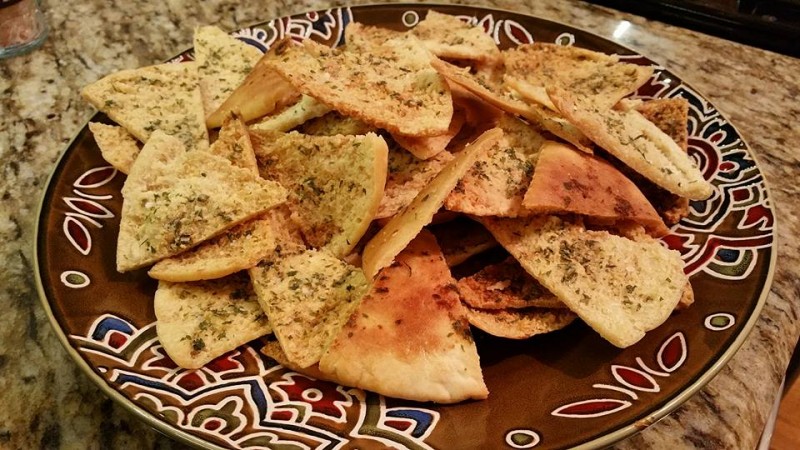
ATK Buttermilk-Ranch Pita Chips *

pita-chips-1

pita-chips-3

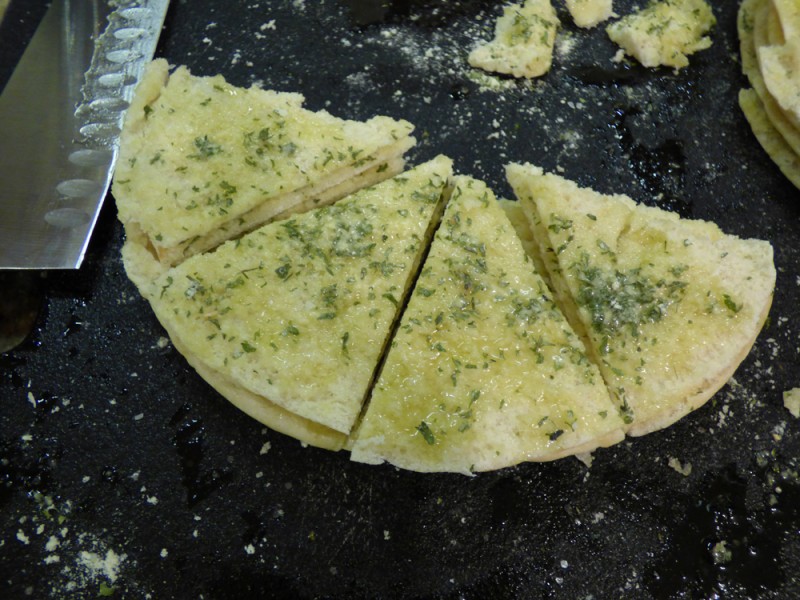
ABOVE: Use pita pockets for easiest cutting.  I have made this recipe twice and using the pita pockets was infinitely easier to cut and resulted in uniform thickness chips versus cutting a non-pita pocket myself.

pita-chips-4

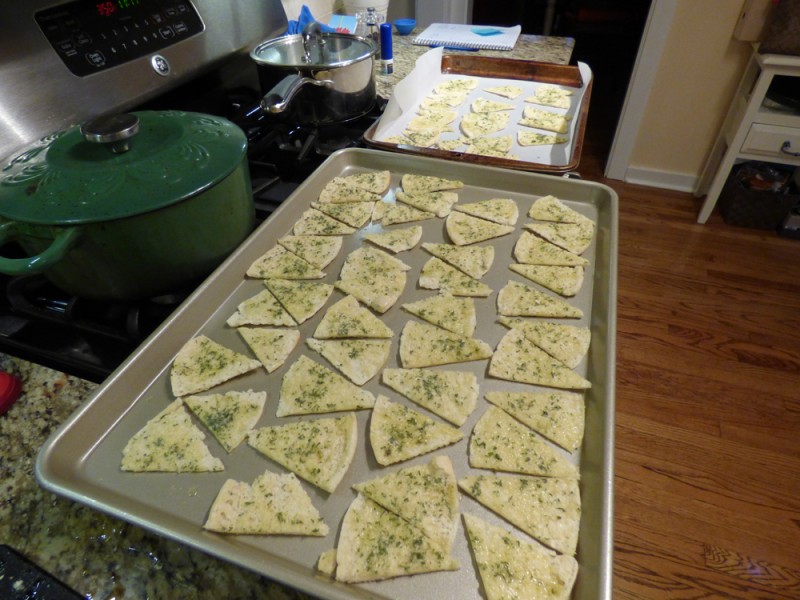
(ABOVE: Alternate wedges in order to fit maximum number of chips on the pan).

Buttermilk-powder-I-like

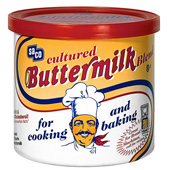
(ABOVE: The brand I buy for buttermilk powder).


I just subscribed to the three website deal on Americastestkitchen.com, that includes access to Cook’s Country website and Cook’s Illustrated.  So, you may be seeing a lot of these recipes from now on, since they are such a trusted source I will be making many of them.  I saw this recipe on the Cook’s Country website and had to try it immediately!  Everyone that has tasted it has ranted and raved about it.

Buttermilk powder is in the baking aisle at your larger, well-equipped stores.  It was maybe $5-6 and I had just bought it a month before this recipe came along for those instances where you need 1 cup of buttermilk and don’t want to buy a $4 container and have the rest go to waste.

****I had just run out of dried dill, it had lost all flavor and I threw it out.  So I went with dried parsley and it was fantastic!

Note: Use good quality extra-virgin olive oil here as this recipe uses a bit of it and it’s a major component!

Note #2: You can use regular or whole-wheat pita bread here.

Serves 8

INGREDIENTS:

  • Four 8″ pita breads (if you want to make life easy, but the pocket style!)
  • 1 T. buttermilk powder (see photo above)
  • 2 tsp. dried dill****
  • 1 tsp. kosher salt
  • 1/4 tsp. garlic powder (not salt)
  • 1/4 tsp. onion powder (not salt)**
  • 1/2 cup extra-virgin olive oil

**Onion can irritate some people, be careful.


DIRECTIONS:

  1. Adjust oven racks to upper-middle and lower-middle positions and heat oven to 350 degrees F.
  2. Using kitchen shears, cut around perimeter of each pita and separate into 2 thin rounds.
  3. Combine buttermilk powder, dill (or parsley), salt, garlic powder, and onion powder in bowl.
  4. Working with 1 round at a time, brush cut side generously with olive oil and sprinkle with spice mixture.
  5. Stack round on top of one another, cut side up, as you go.
  6. Using chef’s knives, cut pita stack into 8 wedges.
  7. Spread wedges, cut side up and in single layer, on 2 rimmed baking sheets. (See my photo for alternating pita chips on baking sheet to get maximum number of chips on each sheet).
  8. Bake until wedges are golden brown and crisp, about 15 minutes, rotating and switching sheets halfway through baking.
  9. Let cool slightly before serving. (They are best served slightly warm, but are great at any temperature!)


Easy French Toast Casserole *

French-toast-casserole

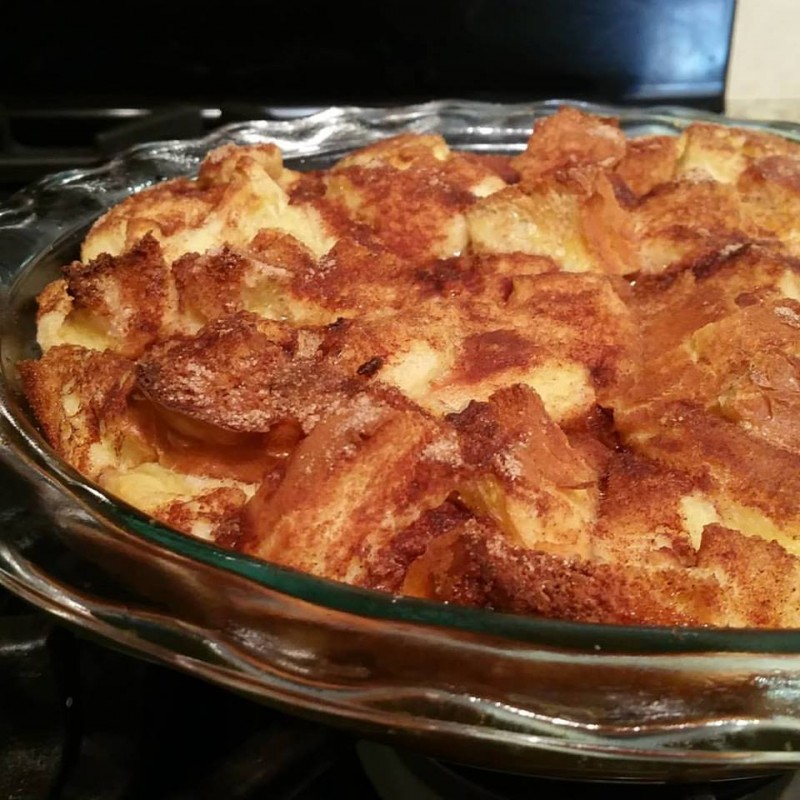
This is an excellent French toast casserole for breakfast or brunch.  It’s crispy on the top but just enough softness inside – NOT too gooey inside as that’s a pet peeve of mine for any French toast product.  I found this recipe in a French toast ebook.  Yes, French toast ebooks exist; c’mon get with the times! LOL  It is fantastic.  I’d say it will give you four servings if you’re famished and six servings if you appear to eat normally, or are eating it with something else.  Enjoy!

INGREDIENTS:

  • 5 cups bread cubes
  • 4 eggs
  • 1 1/2 cups milk (I used 2%)
  • 1/4 cup white sugar, divided
  • 1/4 tsp. salt
  • 1 tsp. vanilla extract**
  • 1 T. margarine or butter, softened
  • 1 tsp. ground cinnamon**

NOTE: Cinnamon is a known irritant, omit it if it bothers you.  Vanilla bothers me, so I omit it.  


DIRECTIONS:

  1. Preheat oven to 350 F.
  2. Lightly butter a 8×8″ baking pan.  (I used a 9″ round!)
  3. Line bottom of pan with bread cubes.
  4. In a large bowl, beat together eggs, milk, 2 T. sugar, salt, and vanilla.
  5. Pour egg mixture over bread.
  6. Dot with margarine/butter.  Let stand 10 minutes.
  7. Combine remaining 2 T. sugar with 1 tsp. cinnamon and sprinkle over the top.
  8. Bake in preheated oven about 45-50 minutes, until top is golden.


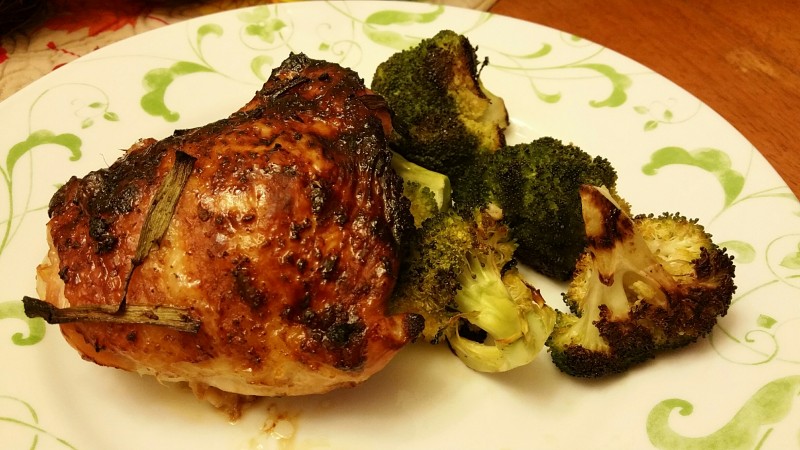
Mahogany Chicken with Pan Roasted Broccoli Side Dish * (Not IC Safe)

mahogany-chicken-1mahogany-chicken-3  mahogany-chicken-2

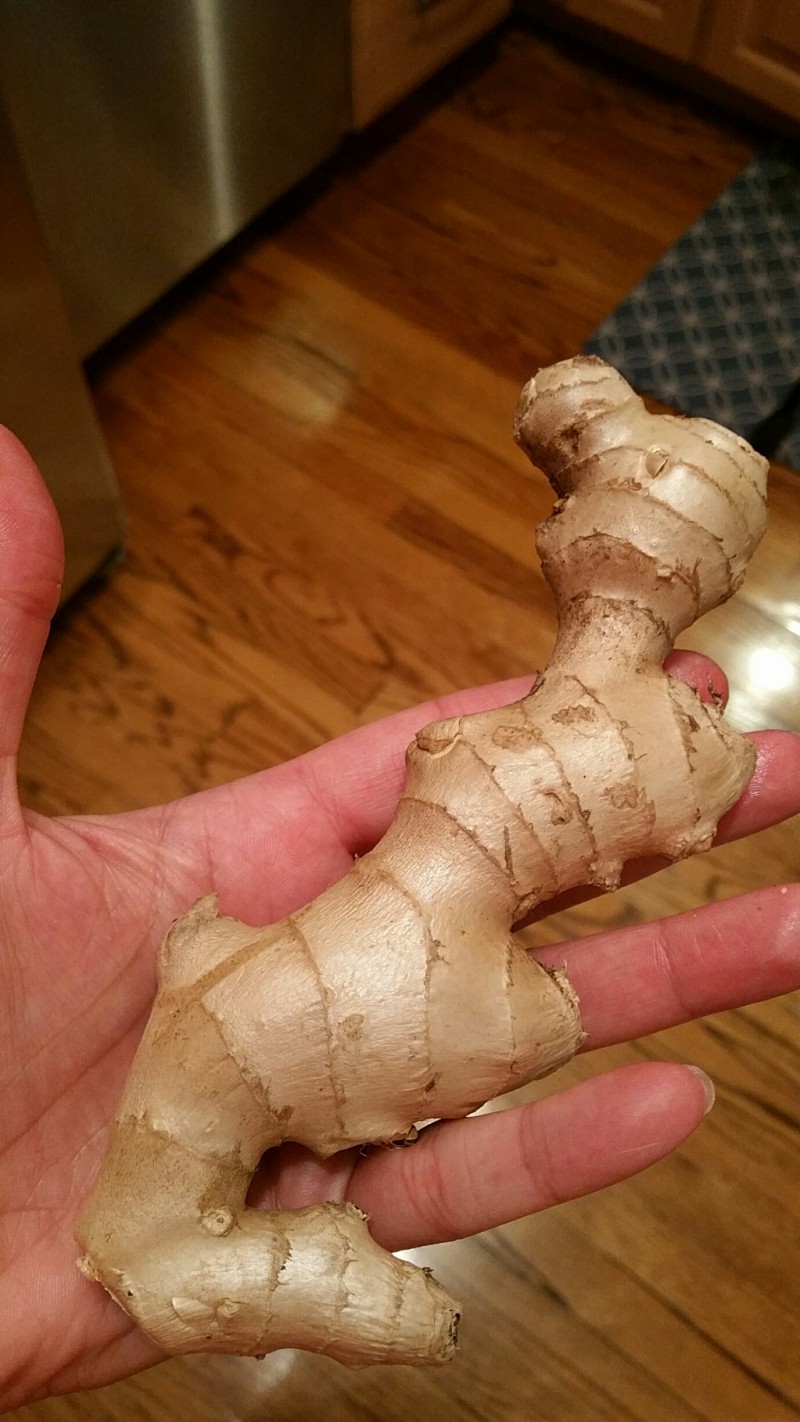
Above: Non-peeled fresh ginger.  Fresh ginger’s a unique art form by itself.  I prefer the smell of ginger freshly sliced than any fake room freshener out there (especially since I can’t even be around those artificial room fresheners).


Hot New Glaze! It’s called Mahogany.  It’s usually a mix of soy and honey that gives a dish’s glaze its rich color and caramelized flavor.  It works on pork tenderloin as well, the recipe states.

Next time the only change I’ll make is using bone-in chicken breasts and doubling the entire sauce mixture to cover to bigger breasts.  We are more white-meat people for stand-alone chicken dishes.  But we will definitely make this again and again!

INGREDIENTS:

  • 2 T. lower-sodium soy sauce**
  • 2 T. honey
  • 2 cloves garlic, pressed
  • 2 tsp. grated and peeled fresh ginger (see photo above)
  • 1 1/2 lbs. chicken thighs, fat trimmed – (or chicken breasts if you prefer)
  • 1 bunch green onions, cut into 2-inch lengths**

**Known IC irritants, tread carefully!

Optional Side Dish Ingredients:

  • 1 lb. fresh broccoli florets
  • 2 T. vegetable oil
  • 1/8 tsp. salt

DIRECTIONS:

  1. Line 2 rimmed baking sheets with heavy duty foil.
  2. In large bowl, whisk 2 T. lower-sodium soy sauce, 2 T. honey, 2 cloves pressed garlic, and 2 tsp. grated peeled fresh ginger.
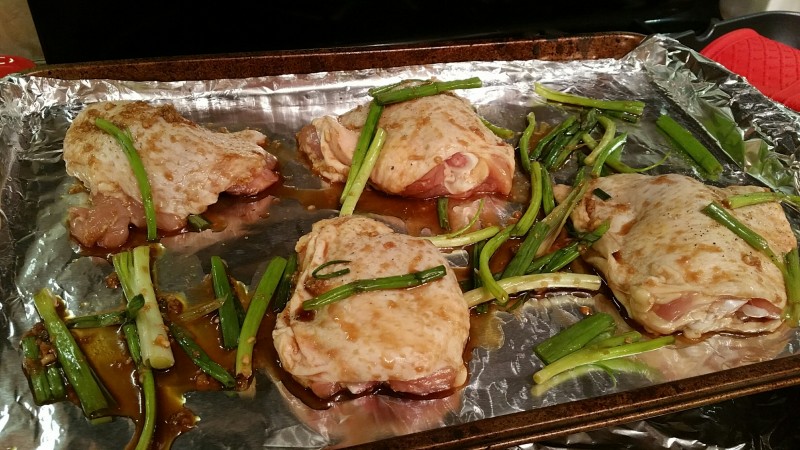
  3. Add 1.5 lbs. chicken thighs (fat trimmed) and 1 bunch green onions (cut into 2″ lengths).  Toss to coat.
  4. Arrange chicken, skin side up, and greens onions on 1 prepared baking sheet.
  5. If making side dish: On other baking sheet, toss 1 lb. broccoli florets with 2 T. vegetable oil and 1/8th tsp salt.  Arrange in single layer.
  6. Roast chicken and broccoli in 450 degree F oven 30 mins or until chicken is cooked through (165 degrees F) and broccoli is tender.

Food.com Crock Pot Lasagna

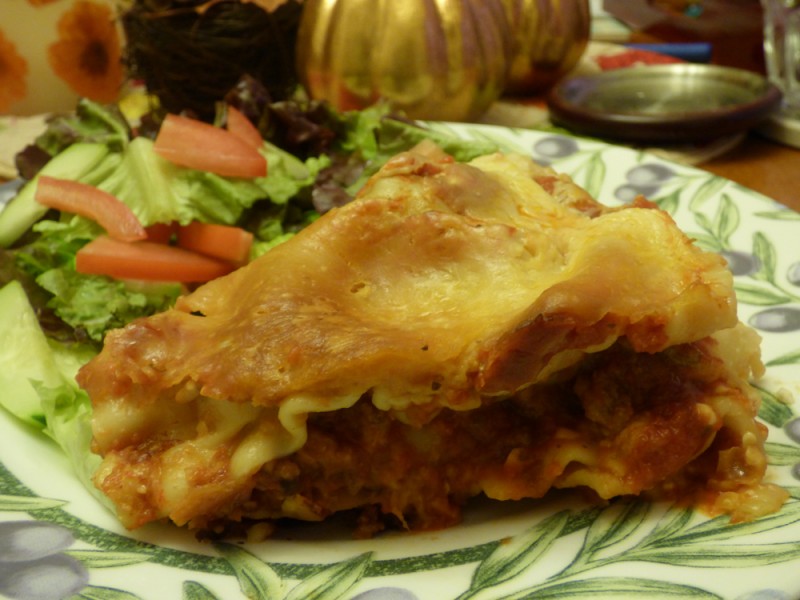
Foodcom Crockpot Lasagna 9-2015

I have only a few requirements for a good lasagna: savory, not too dry and definitely not too oily (gross!), and it has to reheat well on leftover day.  This one is our new “go to” recipe and I threw out my other recipes!  Usually I use 85% ground beef for a mix of fat and flavor.  Sometimes I even mix 85% with 90% for hamburgers.  Usually I would not use such a low fat ground beef as it can really get dried out, but there are so many other ingredients that keep the meat moist and flavorful in this crockpot – and the worst thing in the world is oily lasagna in my opinion!  And with it being in a crockpot, oily is a definite possibility – BUT, this recipe turned out beautifully!  Add a salad and call it a day!  Enjoy! 🙂

INGREDIENTS:

  • 1 LB. lean ground beef (I used 90% to avoid an oily crockpot, usually I use higher fat ground beef for other tasks like hamburgers etc).
  • 1 onion chopped**
  • 2 garlic cloves, smashed**
  • 1 (28 oz) can tomato sauce
  • 1 (6oz) can tomato paste (I used the one with basil and added spices)
  • 1 1/2 tsp. salt
  • 1 tsp. dried oregano
  • 12 oz. cottage cheese (I used Breakstone’s 2%, again to avoid an overly-fatty, oily mess)
  • 1/2 cup grated Parmesan or 1/2 cup Asiago cheese (I used the grated cheese in the bag)
  • 12 oz. lasagna noodles, uncooked
  • 16 oz. shredded mozzarella cheese (I used slightly less)

**Because of allergies, I used onion and garlic powder as replacements, not onion salt and garlic salt, that would be overkill in the salt dept.!  The powders worked fine; I just used a few dashes of each.  You can also do this if you want to save money or feel lazy! 🙂
DIRECTIONS:

  1. Brown ground beef, onion, and garlic (or powders), in frying pan.
  2. Add tomato sauce, tomato paste, salt, and oregano.
  3. Cook long enough to warm ingredients.
  4. Spoon a layer of meat sauce onto bottom of the slow cooker.
  5. Add a double layer of uncooked lasagna noodles (break them to fit) and top with cheeses.
  6. Repeat with sauce, noodles, and cheese until all are used up.
  7. Cover and cook on low for 4-5 hours.  (Mine took about 4 hours.)