Grilling Tip

IMG_20130313small

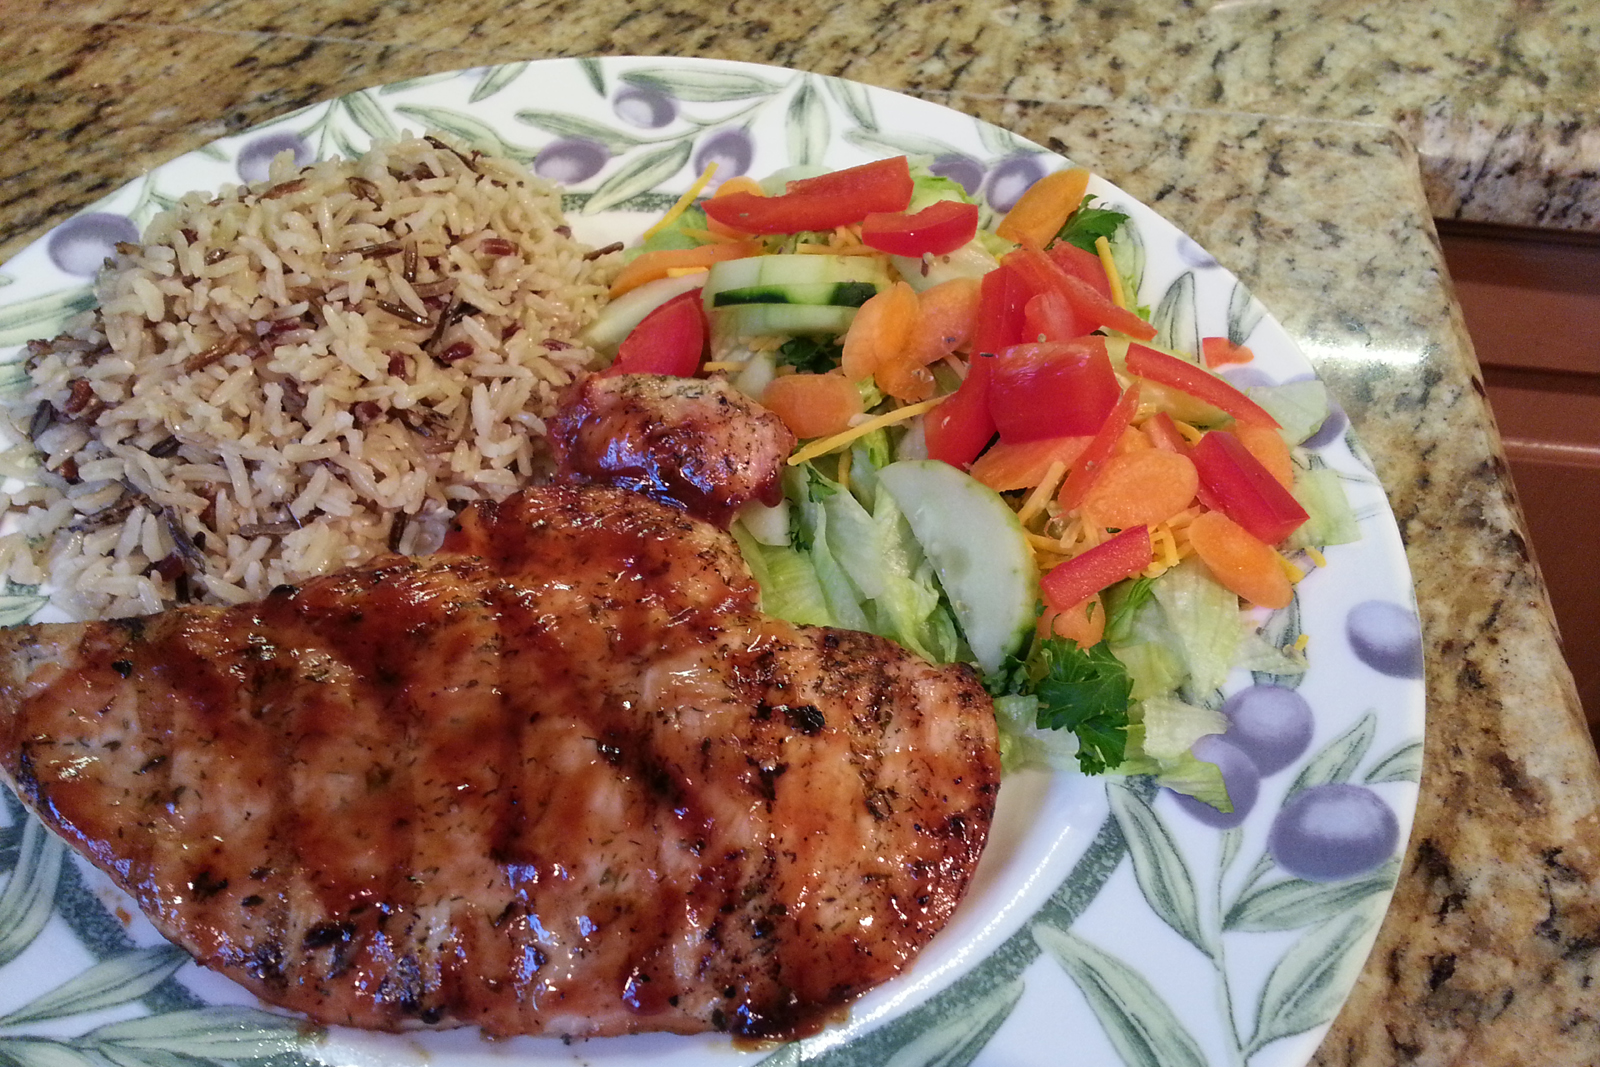
Do you know why this photo looks so scrumptious?  I was lucky enough to get perfect lighting, sure, and the colors of the food just are pretty, and the rice pilaf matches the granite, BUT….do you notice that the B.S. (boneless skinless) chicken breast is grilled to perfection?  There are a lot of tools and appliances out there where it doesn’t matter what brand you have, but after owning an expensive WEBER grill, our food always turns out perfectly the first time.  When we first got it, we commented on how the chicken could be cooked to safety standards but also be JUICY?  Was that possible?  Our old Charbroil looked good and looked expensive, but that didn’t matter because the final product was often burnt, dried out, and not so perfectly grilled.  The old Charbroil looked expensive but it was hiding behind its stainless steel and black facade.  In about three years, it was garbage and everything on it had fallen apart and the grates completely disintegrated.  I was lucky for someone to pick it up off Craigslist for mere pennies of what we paid.  Don’t be fooled by Charbroil. 

My husband was very good at grilling but it didn’t matter because of the inferior tool he was using – the Charbroil!  I urge you to reconsider buying charbroil and put that $120-400 towards a grill that has been known to keep on working for decades – a WEBER, no matter if it’s Weber’s inexpensive end or their high end.  And parts are easier to find with Weber, not so much with Charbroil! 

Sometimes, the issue that keeps  you from that wonderfully prepared food is price.  Here’s our Weber Genesis E-310 propane grill, Made in the U.S.A.  Obviously ours wasn’t cheap, but this is one of those purchases where money doesn’t matter to us because the end result is perfection and we will get many, many years out of it.  I highly recommend this grill, or any Weber grill.  Weber has many price points!  We own it’s inexpensive brother (usually in the $50’s-$60’s) and it’s performed beautifully as well – a Weber 1520 Gas Go-Anywhere Grill.


Asian Beef With Broccoli

20130503_174933small

To say I love this recipe is an understatement.  Sometimes slow cooker recipes look great on paper and the execution is lacking.  This one really is awesome!  I used fresh broccoli and I reluctantly used the oyster sauce.  I thought it would ruin the recipe and smell fishy, but it was a great enhancement (and did not smell fishy!).  I used beef stock from bouillon.  The sauce that is created is SOOO good and the rice soaks it up.  I recommend LOW HEAT as my cooker cooks fast for a “slow” cooker.  It’s from my new cookbook “Crock Pot: Favorite Slow Cooker Recipes (c) 2010”.  Before I drool, I’ll tell you the recipe:

Makes 4-6 servings.  Takes approximately 3 1/4 hours on high.  (It took me probably that same time on low).

INGREDIENTS:

  • 1 1/2 pounds boneless chuck steak, about 1 1/2 inches thick, sliced into thin strips. 
  • 1 can (10.5 ounces) condensed beef consomme, undiluted.
  • 1/2 cup oyster sauce
  • 2 tablespoons cornstarch
  • 1 bag (16 oz) fresh broccoli florets
  • Hot cooked rice
  • Sesame seeds (optional)

DIRECTIONS:

  1. Place beef in slow cooker and pour consomme and oyster sauce over beef.  Cover and cook on high 3 hours.  (I did low heat and it turned out fine).
  2. Combine cornstarch and 2 tablespoons cooking liquid in small bowl.  Stir well to combine.  Stir into slow cooker.
  3. Cover, cook on high 15 minutes longer or until thickened (I still did low heat).
  4. Prepare broccoli as directed on bag, or steam your fresh broccoli.  Put broccoli in slow cooker and gently toss beef and broccoli together.
  5. Serve over rice, garnish with sesame seeds if desired. 

America’s Test Kitchen Grilled All-in-One Burgers *

P1090876small

I love America’s Test Kitchen and I love dependable cookbooks.  Their “The Best Simple Recipes” book is one of my favorites, this recipe comes from it.  We used this recipe for 6 burgers as we don’t like extremely large burgers.  It is just a glorious taste and it has B.A.C.O.N built in! 🙂

INGREDIENTS:

  • 8 slices bacon, chopped fine
  • 1 1/2 pounds 90% lean ground beef
  • 1 cup shredded sharp cheddar cheese
  • 4 teaspoons yellow mustard**
  • 2 teaspoons Worcestershire sauce**
  • 1/2 tsp. salt
  • 1/2 tsp. pepper**

**Known IC irritants, tread carefully! Omit these three irritants and you’ll still have a great burger! 🙂


DIRECTIONS:

  1. Cook bacon in large skillet over medium heat, stirring occasionally, until brown and crisp, 10-12 minutes.  Transfer to paper towel-lined plate.
  2. Break beef into small pieces in bowl, then add bacon, cheese, mustard, Worcestershire, salt and pepper.
  3. Lightly knead mixture by hand until combined.  Divide into 4 equal portions, then form each into loose ball and gently flatten into 1-inch-thick patty.
  4. Cover and refrigerate until grill is ready.
  5. Grill burgers over hot fire, without pressing on them, until well seared on both sides and cooked through, 4-6 minutes per side. 
  6. Transfer burgers to platter.  Cover with foil and let rest 5 minutes before serving. 


Won Top Soup

P1090873small


20130702_163601_resizedsmall


20130702_164744_resizedsmall


My comments:  I found this recipe on About.com and I liked how authentic everyone said it was.  The wrappers can be found in your grocer’s fresh fruit/veg area, usually.  This recipe is very much worth it; we ate all the leftovers.  We replaced sherry with chardonnay because that is what we had.  Also, I took reviewer’s advice and used GROUND pork, it was easy to work with! The cool bowls with spoons are from World Market.  🙂  ENJOY!! -Tiffany


The name won ton means swallowing a cloud, and the wonton floating in this popular soup are thought to resemble clouds. This recipe for Won ton Soup serves 4.

Prep Time: 15 minutes

Cook Time: 15 minutes

Total Time: 30 minutes

Ingredients:

  • 18 – 24 won ton wrappers
  • Filling:
  • 1/2 pound boneless lean pork, chopped finely
  • 1 tablespoon soy sauce
  • 1 tablespoon oyster sauce
  • a few drops sesame oil
  • 1 teaspoon sherry
  • 1/2 teaspoon sugar
  • 1 green onion, finely minced
  • 1 teaspoon cornstarch
  • 2 dashes of white pepper
  • Other:
  • Water for boiling won tons
  • 4 1/2 – 5 cups chicken stock
  • green onion, thinly sliced, as desired
  • a few drops sesame oil (optional)

Preparation:

Combine all the filling ingredients in a bowl, mixing well. Lay one won ton skin in front of you. Cover the remaining won ton skins with a damp towel to keep them from drying out.
    Filling the won tons: Moisten all the edges of the won ton wrapper with water. Place a heaping teaspoon of won ton filling in the center.
  Fold the won ton wrapper in half lengthwise, making sure the ends meet. Press down firmly on the ends to seal. Use thumbs to push down on the edges of the filling to center it. Keeping thumbs in place, fold over the won ton wrapper one more time. Push the corners up and hold in place between your thumb and index finger. Wet the corners with your fingers. Bring the two ends together so that they overlap. Press to seal. The finished product should resemble a nurse’s cap. Repeat with remaining won tons.

Alternate method: Place the teaspoon of filling in the middle of the wrapper and twist to seal. The final result should resemble a money bag or drawstring purse.
 
Boiling the won tons: Bring a large pot of water to a boil. Add the won tons, making sure there is enough room for them to move about freely. Let the won tons boil for 5 – 8 minutes, until they rise to the top and the filling is cooked through. Remove from the pot with a slotted spoon.

To make the soup: bring the chicken stock to a boil. Add the won tons and bring the soup back to a boil. Add the green onion, remove the pot from the heat and add the sesame oil, stirring. Ladle into soup bowls, allowing 6 won tons per person.
    
Reader Review:
Rating: 4.5 out of 5 stars
Comments: This is an easy and excellent recipe. My Cantonese relatives say it reminds them of home cooking.

Zesty Slow Cooker Chicken Barbeque * (Not IC Safe)

20130720_180740_resized

This recipe is a keeper!  I used Sweet Baby Ray’s bbq sauce, but next time I will try inexpensive Aldi BBQ sauce because you are going through an entire bottle.  You put your chicken breast halves in there frozen; can we say this is easy?!  It turned out just wonderful.  The remaining sauce, which should get to a proper temperature, is a tasty sauce for just about anything.  Try it, please!  

Ingredients:

  • 6 frozen skinless, boneless chicken breast halves
  • 1 (12) oz. bottle BBQ sauce
  • 1/2 cup Italian salad dressing
  • 1/4 cup brown sugar
  • 2 tablespoons Worcestershire sauce

Directions:

  1. Place chicken in slow cooker.  In a bowl, mix the BBQ sauce, Italian salad dressing, brown sugar, and Worcestershire sauce.  Pour over the chicken.Cover, and cook 3 to 4 hours on High or 6 to 8 hours on Low.


The Best Ever Baked Potato & Ham (Or Bacon) Soup

soup


I have tried a few baked potato soup recipes and had a favorite.  This one blows it out of the water and made me throw out my old potato soup recipe!  For this one I used bacon instead of ham, because that’s what I had.  I omitted onion but did everything else like the recipe says.  It was absolutely wonderful and did not curdle!  To avoid curdling, always add your milk OFF THE HEAT and while stirring with the other hand.  So pre-measure your milk so it’s ready to go in a pourable Pyrex or something similar with a spout.  I’m pretty sure I reduced the butter amount because that is a lot of butter.  A+!  You’ll regret ever paying $5/bowl at your favorite restaurant for that baked potato soup again!

 Ingredients:

  • 3 1/2 cups peeled and diced potatoes
  • 1/3 cup diced celery
  • 1/3 cup finely chopped onion
  • 3/4 cup diced cooked ham
  • 3 1/4 cups water
  • 2 tablespoons chicken bouillon granules
  • 1/2 teaspoon salt, or to taste
  • 1 teaspoon ground white or black pepper, or to taste
  • 5 tablespoons butter
  • 5 tablespoons all-purpose flour
  • 2 cups milk

Directions:

  1. Combine the potatoes, celery, onion, ham and water in a stockpot. Bring to a boil, then cook over medium heat until potatoes are tender, about 10 to 15 minutes. Stir in the chicken bouillon, salt and pepper.
  2. In a separate saucepan, melt butter over medium-low heat. Whisk in flour with a fork, and cook, stirring constantly until thick, about 1 minute. Slowly stir in milk as not to allow lumps to form until all of the milk has been added. Continue stirring over medium-low heat until thick, 4 to 5 minutes.
  3. Stir the milk mixture into the stockpot, and cook soup until heated through. Serve immediately.


Authentic Pizza Margherita * (Not IC Safe)

margpizza


After many pizza tries, we found this recipe and love it!  It’s for a thin Margherita pizza.  We’ve tried it grilled and in the oven (on a pizza stone), but we prefer it in the oven!  It even tasted great on a metal baking sheet.  We invested in a pizza stone (Inexpensive at T.J.Maxx $15.00?) and a 14″ stainless steel pizza peel.

I use a thermometer to get my water to around 110°, otherwise it won’t activate the yeast.  I buy my yeast in a little tub at Target.  I’m sure there’s places that sell larger amounts but I want to make sure mine is fresh.  I mix the yeast mixture in my Kitchenaid mixer.  Then once the yeast proofs (gets foamy and proves it’s working), I put the dough hook on so I avoid all the labor-intensive work.  You always want to make sure the yeast proofs because otherwise, imagine your dissapointment when you add all your flour in and it ends up going in the garbage!  Last important note: if after proofing, the dough is too sticky you can always add more flour.  If it’s too dense, I add a tiny bit of warm water.  This will depend upon the humidity in the air, if you have the air conditioning on, etc. 

Only fresh mozzarella and fresh basil are recommend for optimal flavor.  You will be glad you sought them out because the flavor is worth it!   The olive oil is a must!  Once you bite into it, you will be amazed at all the flavors.

Make sure to preheat the oven WITH the pizza stone in it; you want the pizza to hit that hot stone and start cooking instantly.  I cover my pizza peel in cornmeal so the pizza slides right off of it onto your stone, hopefully quickly.  It can take some practice to get this right.  Sometimes the pizza will flip onto itself; remember you’re learning!

—-This recipe makes 4 medium sized pizzas.  I used one fresh mozzarella ball for all 4 pizzas.  Estimate how much mozzarella and basil you want for each — you don’t have to put exactly 4 basil leaves on each pizza, of course!

I suggest doing this recipe on the weekend, especially the first time you make it.  It will make a lot of dirty dishes, etc, especially when you’ve never made it before.  I reserve it for the weekend, even though I know how to make a minimal mess now. 

 Ingredients:

  • 3 1/2 cups all-purpose flour
  • 1 teaspoon salt
  • 1 cup water
  • 1 (.25 ounce) package active dry yeast
  • 1 pinch white sugar
  • 1/4 cup flour for dusting
  • 2 cups pizza sauce (a known IC irritant)
  • 20 slices fresh mozzarella cheese
  • 20 leaves fresh basil
  • olive oil
  • sea salt to taste

Directions

  1. Stir flour and 1 teaspoon salt in a bowl. Set aside.
  2. Mix water, yeast, and sugar in a large bowl. Let stand until yeast begins to form a creamy foam, about 5 minutes.
  3. Stir half the flour mixture into yeast mixture until no dry spots remain. Stir in remaining flour, 1/2 cup at a time, mixing well after each addition. When dough pulls together, turn it out onto a lightly floured surface and knead until smooth and elastic, about 8 minutes.
  4. Lightly oil a large bowl, then place dough in the bowl and turn to coat with oil. Cover with a light cloth and let rise in a warm place (80 to 95 degrees F (27 to 35 degrees C)) until doubled in volume, about 1 hour. Punch dough down, divide into 4 equal pieces, and form each into a ball.
  5. Preheat oven with a pizza stone to 500 degrees F (260 degrees C).
  6. Stretch out and pat 1 dough ball to form a circle 10 to 12 inches in diameter. Place dough on a lightly floured pizza peel. Top with 1/2 cup of tomato sauce and spread to cover within an inch of the edge of the dough. Arrange 5 slices of mozzarella cheese on top of the tomato sauce, then place 5 basil leaves on top. Drizzle pizza with 1 tablespoon olive oil and sprinkle with sea salt to taste. Repeat for 3 remaining dough balls.
  7. Slide each pizza onto the pizza stone in the preheated oven. Bake until cheese is bubbly and the underside of the crust is golden brown, 5 to 7 minutes.


One-Pot Tomato Basil Pasta * (Not IC Safe)

20130714_123908-small

This is one of those recipes you see floating around Facebook.  The great thing about this recipe is it wasn’t a failure like my zucchini cheesy log recipe I saw on Facebook.  This recipe is truly made in one pot!  The aroma was very nice.  I used my Dutch oven to cook it in, someday I’ll post a photo of the pretty lid.  I used linguine like the recipe stated, I used normal diced tomatoes, no onion (used powder).  I used only 1 garlic clove and reduced the red pepper flakes, otherwise my son would not want to try it.  Fresh basil really helps here!  This would be great with chunks of aged Parmesan cheese on top.  I will definitely make this one again!  

ONE POT WONDER TOMATO BASIL PASTA

Serves 4 to 6 as an entree

INGREDIENTS:

12 ounces linguine pasta
1 can (15 ounces) diced tomatoes with liquid ( I used zesty red pepper flavor)*
1 large sweet onion, cut in julienne strips
4 cloves garlic, thinly sliced
1/2 teaspoon red pepper flakes*
2 teaspoons dried oregano leaves
2 large sprigs basil, chopped
4 1/2 cups vegetable broth (regular broth and NOT low sodium)
2 tablespoons extra virgin olive oil
Parmesan cheese for garnish

*Known IC irritants!

DIRECTIONS:

Place pasta, tomatoes, onion, garlic, basil, in a large stock pot. Pour in vegetable broth. Sprinkle on top the pepper flakes and oregano. Drizzle top with oil.

Cover pot and bring to a boil. Reduce to a low simmer and keep covered and cook for about 10 minutes, stirring every 2 minutes or so. Cook until almost all liquid has evaporated – I left about an inch of liquid in the bottom of the pot – but you can reduce as desired .

Season to taste with salt and pepper , stirring pasta several times to distribute the liquid in the bottom of the pot. Serve garnished with parmesan cheese.

Orange Cranberry Muffins * (Not IC Safe)

20130712_200138-small


This is a great muffin recipe because it can be changed into many different flavorful creations – and it only uses one egg (my husband’s allergic).  I had tried the blueberry and chocolate chip variation before, but this time I tried the orange cranberry and used dried cranberries instead.  It turned out beautifully!  I’m including the recipe page with variations.  Just be careful to follow the recipe changes correctly!  What I like is that they are not too sweet.  They freeze beautifully!  This recipe is true to nature, it only makes 12 so if you want more, double it.

INGREDIENTS:

  • 3/4 cup milk
  • 1 tablespoon grated orange peel*
  • 1/4 cup vegetable oil
  • 1 large egg
  • 2 cups all-purpose flour
  • 1/2 cup sugar
  • 2 teaspoons baking powder
  • 1/2 teaspoon salt
  • 1 cup coarsely chopped cranberries (fresh or dried works).*

*Known IC irritants!

DIRECTIONS:

  1. Heat oven to 400° F.  Grease bottoms only of 12 medium muffin cups with shortening, spray with cooking spray or line with paper cups.
  2. In large bowl, beat milk, orange peel, oil, egg with fork or wire whisk until well mixed. 
  3. Stir in flour, sugar, baking powder, and salt all at once just until flour is moistened.  Fold in 1 cup coarsely chopped cranberries.  (Batter will be lumpy).  *If you over mix, the tops will be unattractively peaked.*
  4. Divide batter evenly among muffin cups.
  5. Bake 20-25 minutes or until golden brown.  If baked in greased pan , let stand about 5 minutes in pan, then remove from pan to wire rack.  If baked in paper cups, immediately remove from pan to wire rack.  Serve warm if desired.


P1100018-small


Chef Kate Summer Salad

salad-small

This is a wonderful recipe I acquired from Chef Kate, a local chef who appears at the library for cooking classes.  It’s a wonderful healthy mix of good ingredients for your body!  The only changes I made were to substitute feta for the blue cheese and omit raw onion.  I made the avocado dressing and will post that in a separate post – it was so yummy, I will make that dressing all by itself again!  For an event, I made double the salad and one recipe of the salad dressing.  It was a very good amount of food!  I love the mix of beans, cheese, and crunchy and soft textures.  It’s a tasty and attractive salad that is easy to prepare!

If you want it with the avocado salad dressing complement, click here.

Summer Salad 

Serves 4

1 cup corn, either fresh or frozen
1/2 cup peas, fresh or frozen
2 cups Fresh lettuce, any kind is fine. I used baby lettuce
1/2 cup onion, sliced thinly
1 cup red peppers, juilenned
1/2 cup cucumber, peeled and diced
1/2 cup artichoke hearts, drained and diced
15 oz. can white beans, drained and rinsed
1/2 cup crumbled blue cheese (or feta, etc)

1.) In a small saucepan, cook the peas and corn. If the corn is on the cob, just slice it off with a sharp knife. Once cooked, drain and set them aside.
2.) I lined my plates with lettuce and piled up the vegetables as I cut them. You could place all the vegetables in a large bowl, toss them together and than place them on the beds of lettuce.
3.) Crumble the cheese over the vegetables, divide the beans on top, drizzle with dressing and serve.