Black Forest Pumpernickel Bread Machine Loaf * (Not IC Safe)

pumpernickel-bread-2016-smaller

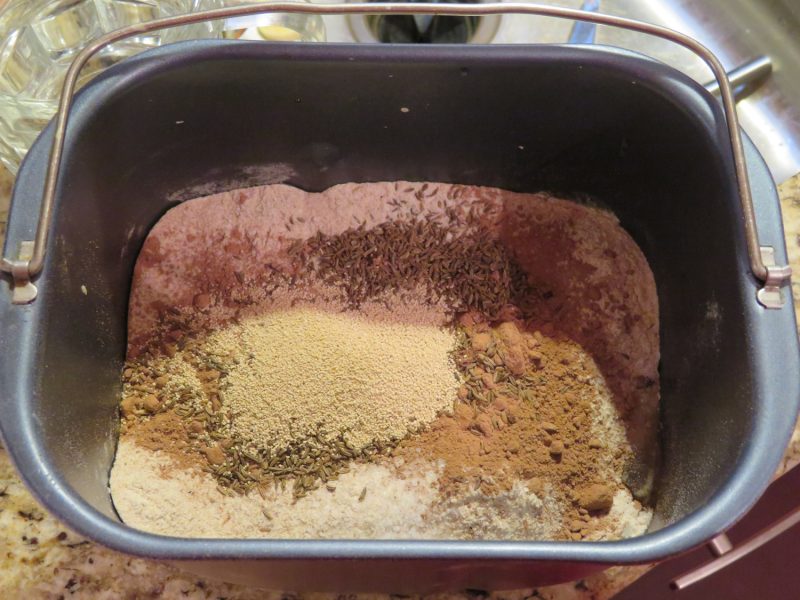
ABOVE: The ingredients in the bread machine pan.  Liquids on bottom, dry ingredients in the middle, and then the yeast on top.  

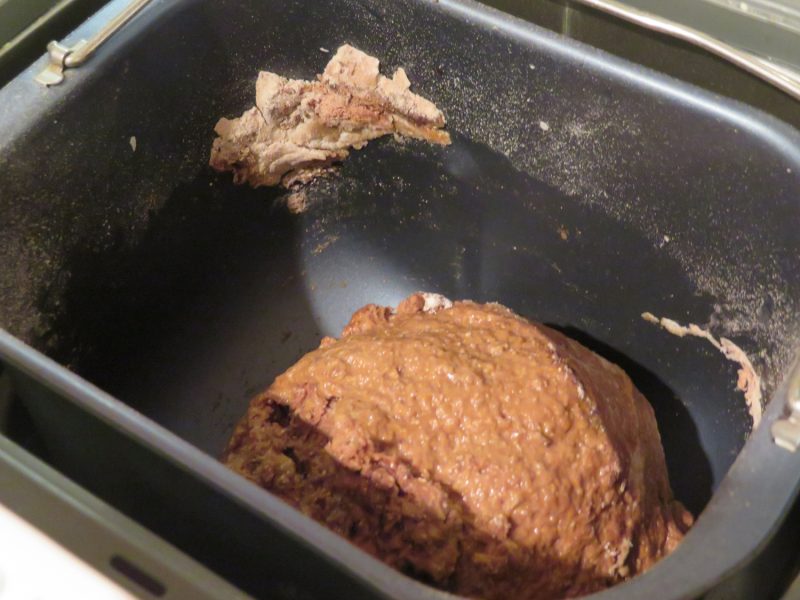
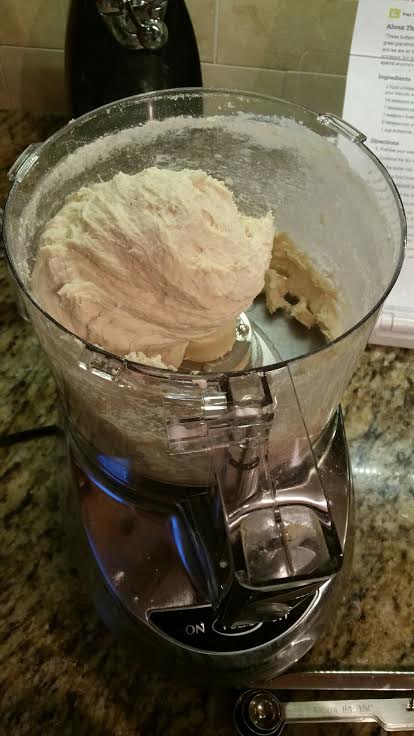
ABOVE: A few minutes into kneading, open the lid and use a spatula to push any flour pockets down into the dough.  (See top left flour pocket clinging to side of bread pan).


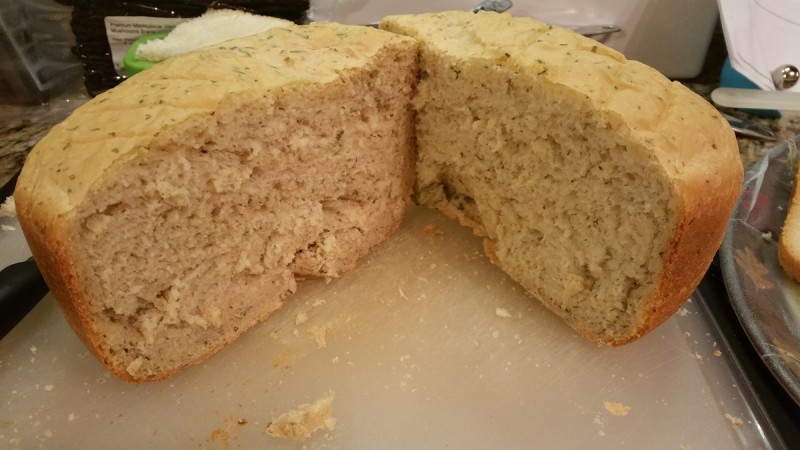
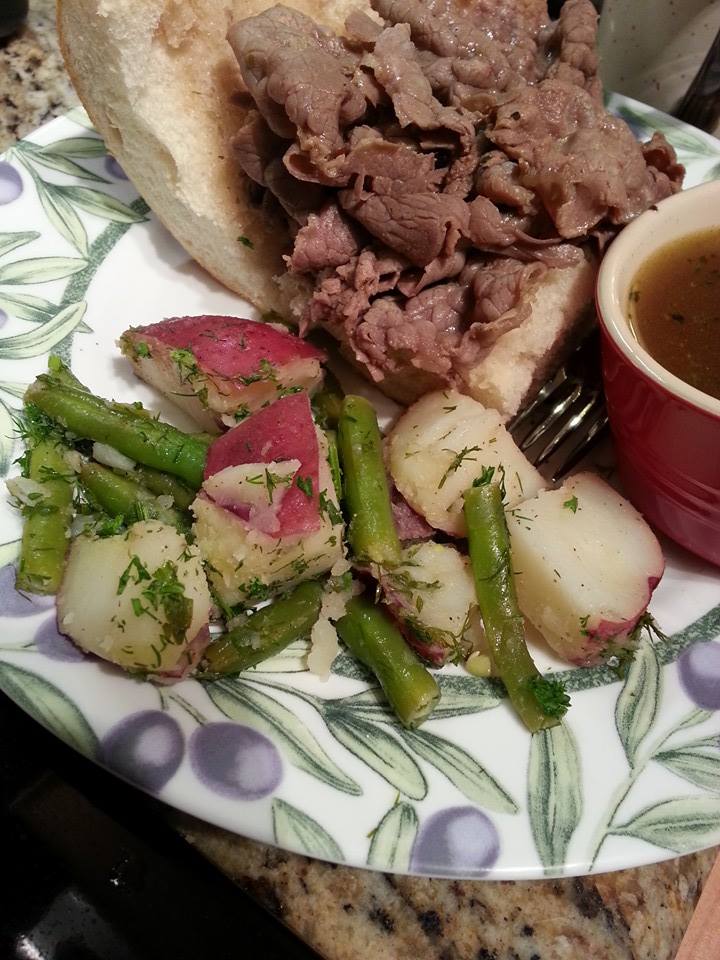
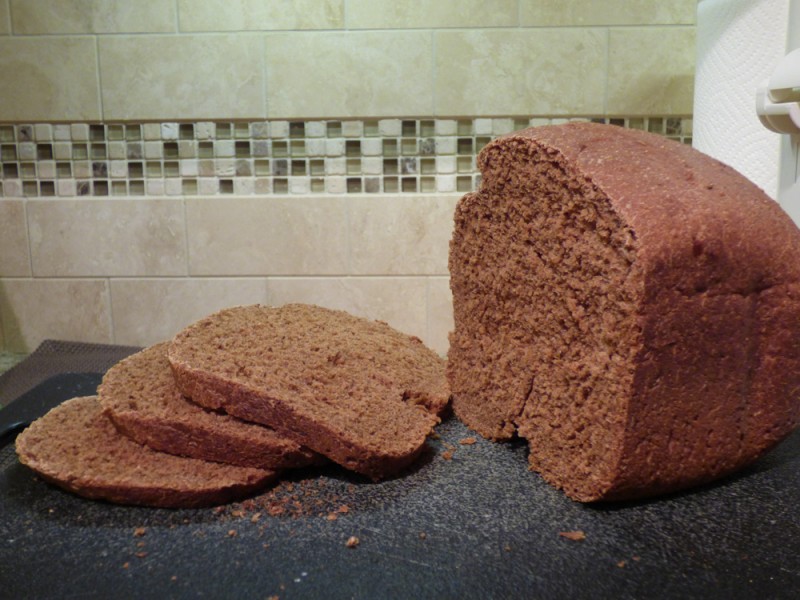
You’re going to love this dark pumpernickel bread with the ease of the bread machine!  It’s just perfect.  I’m not a fan of light rye bread, but I love dark rye!  It does use three types of flour, which may turn off some people, but it’s quite easy.  **Always store your whole wheat flour in the freezer; ask America’s Test Kitchen if you doubt me.  **Spray your measuring cup before pouring molasses into it for easy cleanup!  Enjoy!

INGREDIENTS:

  • 1 1/8 cups warm water
  • 1/3 cup molasses
  • 1 1/2 tablespoon canola oil
  • 1 1/2 cup bread flour
  • 1 cup rye flour
  • 1 cup whole wheat flour
  • 1 1/2 tsp. salt
  • 3 tablespoons cocoa powder**
  • 1 1/2 tablespoons caraway seeds**?
  • 2 tsp. active dry yeast

**Known IC irritants, tread carefully!

DIRECTIONS:

  1. Place all ingredients into your bread maker according to the manual directions.  (Order does matter a lot!)
  2. Select crust type to “light”.
  3. Select basic setting.
  4. Select 1.5 pound loaf size.
  5. Press start.
  6. Check while the machine is kneading.  If mixture is too dry, add a tablespoon of warm water at a time.  If mixture is too wet, add a small amount of flour at a time.  The mixture should go into a ball form and be just soft and slightly sticky to the touch.

Easy Roasted Red Pepper Hummus * (Not IC Safe)

P1070449 P1070450 P1070451 P1070453

This is an ultra easy recipe that comes together in minutes in the food processor.  Try it soon and you’ll be amazed.  I like that it doesn’t use tahini paste (sesame seed paste) as I bought a big jar of that one time, used it once, and the rest went bad.  It replaces that tahini with sesame oil and the latter is something I always have on hand.  I had to omit the lemon juice but it turned out very well without it.  The jarred roasted bell pepper, which is often sold in vinegar, turns the hummus a beautiful orange/reddish color.  Enjoy!

INGREDIENTS:

  • 1 (15 oz) can garbanzo beans, drained, liquid reserve
  • 1 tablespoon lemon juice**
  • 1 tablespoon quality extra virgin olive oil
  • 1 clove garlic, crushed
  • 1/2 tsp. ground cumin**
  • 1/2 tsp. salt
  • 2 drops seasame oil, or to taste (optional)
  • 1 length of roasted red pepper from a jar – allow the vinegar to drip off, cut into 1-2″ chunks. (I used Krinos brand)**
  • Serve with baby carrots, celery sticks, pita chips, or toasted bread to dunk into the hummus.

**Known IC irritants, tread carefully!

DIRECTIONS:

  1. Blend garbanzo beans, lemon juice, olive oil, garlic, cumin, salt, and sesame oil in the food processor.
  2. Stream reserved bean liquid from can into the mixture as it blends until desired consistency is achieved. (I only had to add about half the bean liquid to get the desired thickness).
  3. Serve with dippable veggies and starches mentioned above.

America’s Test Kitchen’s Roasted Carrots

ATK-roasted-carrots-12-2016-1 ATK-roasted-carrots-12-2016-2 ATK-roasted-carrots-12-2016-3 ATK-roasted-carrots-12-2016-4 ATK-roasted-carrots-12-2016-5

This is a beautiful recipe – three ingredients and perfection, thanks to America’s Test Kitchen.  The world is of the day is caramelization.  The perfection is in the preparation and precise directions, which are simple to follow.  Don’t judge, this beautiful dish is next to pizza rolls, and I don’t care what you think. 😉  This blog is for entertainment and sharing the love of cooking/baking, not to impress at every turn.

INGREDIENTS:

  • 1 1/2 lbs. carrots, peeled, halved crosswise, and cut lengthwise if necessary to create even pieces
  • 2 tablespoons unsalted butter, melted
  • Table salt and ground black pepper (freshly ground is always best)

DIRECTIONS:

  1. Adjust oven rack to middle position and heat oven to 425 degrees F.
  2. In large bowl, combine carrots with butter, 1/2 tsp. salt and 1/2 tsp. pepper; toss to coat.
  3. Transfer carrots to foil or parchment-lined rimmed baking sheet and spread in single layer.  (Use the largest baking sheet that you have.)
  4. Cover baking sheet tightly with foil and cook for 15 minutes.
  5. Remove foil and continue to cook, stirring twice, until carrots are well browned and tender, 30-35 minutes.
  6. Transfer to serving platter, season with salt and pepper to taste, and serve.


Yummy Garlic Bread in Bread Machine

garlic-bread-in-machine-11-2015

Garlic bread in the bread machine.  It sounds impossible, but it isn’t at all!  I made this at Thanksgiving and it came together so quickly.  It’s a fast recipe!  The only rule is to make sure you follow your bread machine’s directions of adding the ingredients in the correct order.  Most state liquid ingredients on the bottom of the bread pan, dry ingredients in the middle, and make a little well in the dry ingredients on the top, and put your yeast there.  Don’t let your yeast touch the wet ingredients on the bottom.

INGREDIENTS:

  • 1 cup warm water (110 degrees F)
  • 1 tablespoon butter (use unsalted to control the salt)
  • 1 tablespoon dry milk powder
  • 1 tablespoon white sugar
  • 1 1/2 tsp. salt
  • 1 1/2 tablespoons dried parsley (dried is fine)
  • 2 tsp. garlic powder (use your freshest garlic powder for best results)
  • 3 cups BREAD flour
  • 2 tsp. active dry yeast

DIRECTIONS:

  1. Place ingredients in the pan of the bread machine in the order recommended by the manufacturer.  (Most bread machines state this order, but check your manual first!!
    Liquid ingredients on the bottom of the bread pan
    Dry ingredients in the middle
    And make a little well in the dry ingredients on the top, and put your yeast there.  Don’t let your yeast touch the wet ingredients on the bottom.)
  2. Select basic bread cycle and 2 lb. loaf, press Start.

ATK Rice and Pasta Pilaf *

ATK-Rice-a-roni-pilaf

I have a great substitute to Rice-a-Roni for you.  If you’re concerned, like I am, what goes into your boxed pantry goods, sometimes it’s good to make it yourself.  You will know exactly what the ingredients are and there won’t be any mystery flavorings or chemicals.  The best reward is that this tastes much, much better than the boxed version!  Thanks to America’s Test Kitchen for this recipe!  Enjoy! 🙂


*I used basmati rice because it has the most flavor for a dish like this.

*Be sure to use unsalted butter.  If all you have is salted butter, then don’t add the 1 1/4 tsp. salt. 

*I have raw and cooked onion issues so I subbed onion powder for the grated onion.

*If you want it vegetarian, replace chicken stock with vegetable broth.  


INGREDIENTS:

  • 1 1/2 cups basmati rice or other long-grain white rice
  • 3 T. unsalted butter
  • 2 ounces vermicelli, broken into 1″ pieces
  • 1 onion, grated, or onion powder *
  • 1 garlic clove, minced
  • 2 1/2 cups chicken broth
  • 1 1/4 tsp. salt
  • 3 T. minced fresh parsley

**Onion can be irritating to some IC sufferers, please know how you tolerate it first.  

DIRECTIONS:

  1. Place rice in medium bowl and cover with hot tap water by 2 inches; let stand for 15 minutes.  Don’t skip this step!
  2. Using your hands, gently swish grains to release excess starch.  Carefully pour off water, leaving rice in bowl.
  3. Add cold tap water to rice and pour off water.  Repeat adding and pouring off cold water 4-5 times, until water runs almost clear.
  4. Drain rice in fine-mesh strainer.
  5. Melt butter in saucepan over medium heat.  Add pasta and cook, stirring occasionally, until browned, about 3 minutes.
  6. Add onion and garlic and cook, stirring occasionally, until onion is softened but not brown, about 4 mins.
  7. Add rice and cook, stirring occasionally, until edges of rice begin to turn translucent, about 3 minutes.
  8. Add broth and salt, and bring to a boil.  Reduce heat to low, cover, and cool until all liquid is absorbed, about 10 minutes.
  9. Off heat, remove lid, fold a clean dish towel in half and place over pan, replace lid.  Let stand for 10 mins.  Fluff rice with fork, stir in fresh parsley, and serve.


ATK Simple Refried Beans * (Not IC Safe)

ATK-refried-beans-11-2015ATK-refried-beans

A few years back, after tasting yummy refried beans at a restaruant, I wanted some for myself at home. I bought a can of it thinking, “How bad could it be?”  It was so bad and disgusting it turned me off to refried beans a very long time.  I had them recently at a restaurant and loved them, again.  I found this recipe on ATK’s site.  It took about 10 mins.  Super easy.  I had to omit the onions so I just used the bacon fat to sautee my minced garlic cloves instead.

If you don’t eat pork, you could substitute vegetable oil or olive oil.


INGREDIENTS:

  • 2 slices bacon
  • 1 small onion, chopped fine**
  • 2 garlic cloves, minced or pressed through a garlic press
  • 1 (15 oz) can pinto beans with liquid (do not rinse!)
  • 1/4 cup water
  • Kosher salt

**Known IC irritants, tread carefully!

DIRECTIONS:

  1. Heat bacon in 10-inch nonstick skillet over med-low heat until fat renders and bacon crisps, 7-10 minutes, flipping bacon halfway through.  Remove bacon and reserve for another use.
  2. Increase heat to medium, add onions to fat in skillet, and cook until lightly browned, 5-7 minutes.
  3. Add garlic and cook until fragrant, about 30 seconds.
  4. Add beans and their liquid, plus 1/4 cup water, and bring to simmer.
  5. Cook, mashing beans with potato masher, until mixture is mostly smooth, 5-7 minutes.
  6. Season with salt to taste, and serve.

ATK Buttermilk-Ranch Pita Chips *

pita-chips-1

pita-chips-3

ABOVE: Use pita pockets for easiest cutting.  I have made this recipe twice and using the pita pockets was infinitely easier to cut and resulted in uniform thickness chips versus cutting a non-pita pocket myself.

pita-chips-4

(ABOVE: Alternate wedges in order to fit maximum number of chips on the pan).

Buttermilk-powder-I-like

(ABOVE: The brand I buy for buttermilk powder).


I just subscribed to the three website deal on Americastestkitchen.com, that includes access to Cook’s Country website and Cook’s Illustrated.  So, you may be seeing a lot of these recipes from now on, since they are such a trusted source I will be making many of them.  I saw this recipe on the Cook’s Country website and had to try it immediately!  Everyone that has tasted it has ranted and raved about it.

Buttermilk powder is in the baking aisle at your larger, well-equipped stores.  It was maybe $5-6 and I had just bought it a month before this recipe came along for those instances where you need 1 cup of buttermilk and don’t want to buy a $4 container and have the rest go to waste.

****I had just run out of dried dill, it had lost all flavor and I threw it out.  So I went with dried parsley and it was fantastic!

Note: Use good quality extra-virgin olive oil here as this recipe uses a bit of it and it’s a major component!

Note #2: You can use regular or whole-wheat pita bread here.

Serves 8

INGREDIENTS:

  • Four 8″ pita breads (if you want to make life easy, but the pocket style!)
  • 1 T. buttermilk powder (see photo above)
  • 2 tsp. dried dill****
  • 1 tsp. kosher salt
  • 1/4 tsp. garlic powder (not salt)
  • 1/4 tsp. onion powder (not salt)**
  • 1/2 cup extra-virgin olive oil

**Onion can irritate some people, be careful.


DIRECTIONS:

  1. Adjust oven racks to upper-middle and lower-middle positions and heat oven to 350 degrees F.
  2. Using kitchen shears, cut around perimeter of each pita and separate into 2 thin rounds.
  3. Combine buttermilk powder, dill (or parsley), salt, garlic powder, and onion powder in bowl.
  4. Working with 1 round at a time, brush cut side generously with olive oil and sprinkle with spice mixture.
  5. Stack round on top of one another, cut side up, as you go.
  6. Using chef’s knives, cut pita stack into 8 wedges.
  7. Spread wedges, cut side up and in single layer, on 2 rimmed baking sheets. (See my photo for alternating pita chips on baking sheet to get maximum number of chips on each sheet).
  8. Bake until wedges are golden brown and crisp, about 15 minutes, rotating and switching sheets halfway through baking.
  9. Let cool slightly before serving. (They are best served slightly warm, but are great at any temperature!)


Southern Buttermilk Biscuits *

buttermilk-biscuits-6-15-image1 buttermilk-biscuits-6-15-image2


I found this recipe on Food.com and it sat in my “to-make” recipe folder for about a year and a half.  I thought making buttermilk biscuits would be too difficult, but it turns out it was anything but!  This really is a recipe where the food processor shines!  You could do it by hand but it will be better mixed and so much easier on you to just use a food processor!  Please make this!  It’s a very easy recipe, it just sounds complex in the directions!  It tastes so much better than canned biscuits!!

Use real buttermilk, this isn’t a circumstance where the milk soured with lemon would be good enough.

NOTE: Use unsalted butter.  If you only have salted butter on hand, omit the salt so you don’t have overly salted biscuits.  Cook and bake with unsalted butter for best results.  For serving guests, use salted butter.  

INGREDIENTS:


**Make sure your buttermilk ingredients are safe!


DIRECTIONS:

  1. Preheat your oven to 450°F.
  2. Combine the dry ingredients in a bowl, or in the bowl of a food processor.
  3. Cut the butter into chunks and cut into the flour until it resembles course meal.  If using a food processor, just pulse a few times until this consistency is achieved.
  4. Add the buttermilk and mix JUST until combined.  Do not over-mix.
  5. If it appears on the dry side, add a bit more buttermilk. It should be wet.  Honestly, I like my dough a little on the dry side so I can work with it and not have extremely messy hands.  So I covered my hands in flour while manipulating the dough and added more flour when necessary.  It’s a giant mess if your dough is too wet while cutting it into shapes.  
  6. Turn the dough out onto a floured board.  Gently PAT (do NOT roll with a rolling pin) the dough out until it’s about 1/2″ thick.
  7. Flour the top of your dough lightly to prevent the cutter from sticking.  Then, use a round cutter to cut into rounds.
  8. You can gently knead the scraps together and make a few more, but they will not be anywhere near as good as the first ones.
  9. I put parchment paper down on my pan and it turned out beautifully.  Place the biscuits on a cookie sheet- if you like soft sides, put them touching each other.  If you like”crusty” sides, put them about 1 inch apart- these will not rise as high as the biscuits put close together.
  10. Bake for about 10-12 minutes- the biscuits will be a beautiful light golden brown on top and bottom.  Do not overbake.


Note: The key to real biscuits is not in the ingredients, but in the handling of the dough.  The dough must be handled as little as possible or you will have tough biscuits.  I (the original author) have found that a food processor produces superior biscuits, because the ingredients stay colder and there’s less chance of overmixing.  You also must pat the dough out with your hands, lightly. Rolling with a rolling pin is a guaranteed way to overstimulate the gluten, resulting in a tougher biscuit. You can make these biscuits, cut them, put them on cookie sheets and freeze them for up to a month.  When you want fresh biscuits, simply place them frozen on the cookie sheet and bake at 450°F for about 20 minutes.

Honey-Mustard Chicken Wings * (Not IC Safe)

honey-chicken-wings-4-15


This is a slow cooker recipe, but I adapted it (see option 2) to make it in the oven when I ran out of time one evening.  It really was great!  We don’t like spicy brown mustard (or many mustards) so we just quartered the mustard ingredient and the flavor still came through and worked well.  Enjoy!

INGREDIENTS:

  • 3 lbs. chicken wings
  • 1 tsp. salt
  • 1 tsp. black pepper**
  • 1/2 cup honey
  • 1/2 cup BBQ sauce**
  • 2 T. spicy brown mustard (we reduced it to 1/2 T.)**
  • 1 clove garlic, minced
  • 3-4 thin lemon slices (optional)**

**Known IC irritants, tread carefully!

DIRECTIONS:

  1. Preheat broiler.  Cut off wing tips, discard.  Cut each wing at joint to make 2 pieces.
  2. Season with salt and pepper.
  3. Place on broiler pan.  Broil 4-5 inches from heat about 5 minutes per side.

SLOW COOKER OPTION 1)

  • Transfer wings to slow cooker.
  • Combine honey, BBQ sauce, mustard, and garlic in small bowl.  Mix well.  Pour sauce over chicken wings.  Top with lemon slices, optional.  Cover, cook on LOW 4-5 hours.
  • Before serving, remove and discard lemon slices.
  • Serve wings with sauce.

OR QUICK OPTION 2)

  • Transfer wings to large baking dish that has sides.
  • Combine honey, BBQ sauce, mustard, and garlic in small bowl.  Mix well.  Pour sauce over chicken wings.  Top with lemon slices, optional.  Cover, cook at about 375 degrees for about an hour, or until thermometer reads safe.
  • Before serving, remove and discard lemon slices.
  • Serve wings with sauce.


Dilled Potato and Green Bean Salad * (Not IC Safe)

dill-potato-green-bean-salad-Jan


Here’s a very scrumptious carb and vegetable combo side.  You have the perfectly cooked red potatoes with the fresh green beans mixed together in a savory red wine vinegar/oil sauce similar to a German potato salad flavor.  Since the “six medium potatoes” is a little vague of a measurement, I used four medium potatoes because that looked like enough potatoes for four servings.  Don’t use frozen green beans here, this is a 100% fresh-from-the-produce-section recipe.  This recipe was from Daily Bites Blog -click here.  I omitted the scallions and added more dill and parsley.  Enjoy!


INGREDIENTS:

  • 6 medium red-skinned potatoes, scrubbed and cut into 1-inch chunks
  • 1/2 lb. green beans, trimmed and cut into 2-inch pieces
  • 2 scallions, white and green parts thinly sliced**
  • 1/4 cup parsley, finely chopped
  • 2 tbs. fresh dill, chopped (from about 4-5 sprigs)
  • 2 tbs. extra virgin olive oil
  • 2 tbs. red wine vinegar**
  • Sea salt and black pepper, to taste**

**Known IC irritants, tread carefully!

DIRECTIONS:

  1. Cover potatoes by 2-inches with cold water in a large pot. Bring to a boil over high heat. Cook at a rolling boil for 7 minutes.
  2. Add green beans; continue to boil for 5 minutes or until potatoes are just tender when pierced with a knife but not falling apart. They will continue to soften a bit as they cool, so do not overcook them. Drain vegetables well.
  3. Toss boiled vegetables with scallions and herbs (see hint below). Drizzle with oil and vinegar. Season to taste with salt and pepper. If the salad needs more kick, add additional vinegar and salt. If it’s too tangy or salty, add an extra splash of olive oil.
  4. My added hint: Don’t mix too much while this mixture is piping hot.  Even if you don’t overcook the potatoes, if you mix hot potatoes round and round with the sauce, your potatoes will get mushy.  So let it cool slightly and gently fold veggies & sauce together. 
  5. Serve warm, room temperature, or chilled. Every way is delicious!