Simple Stromboli

stromboli3 stromboli2 stromboli1


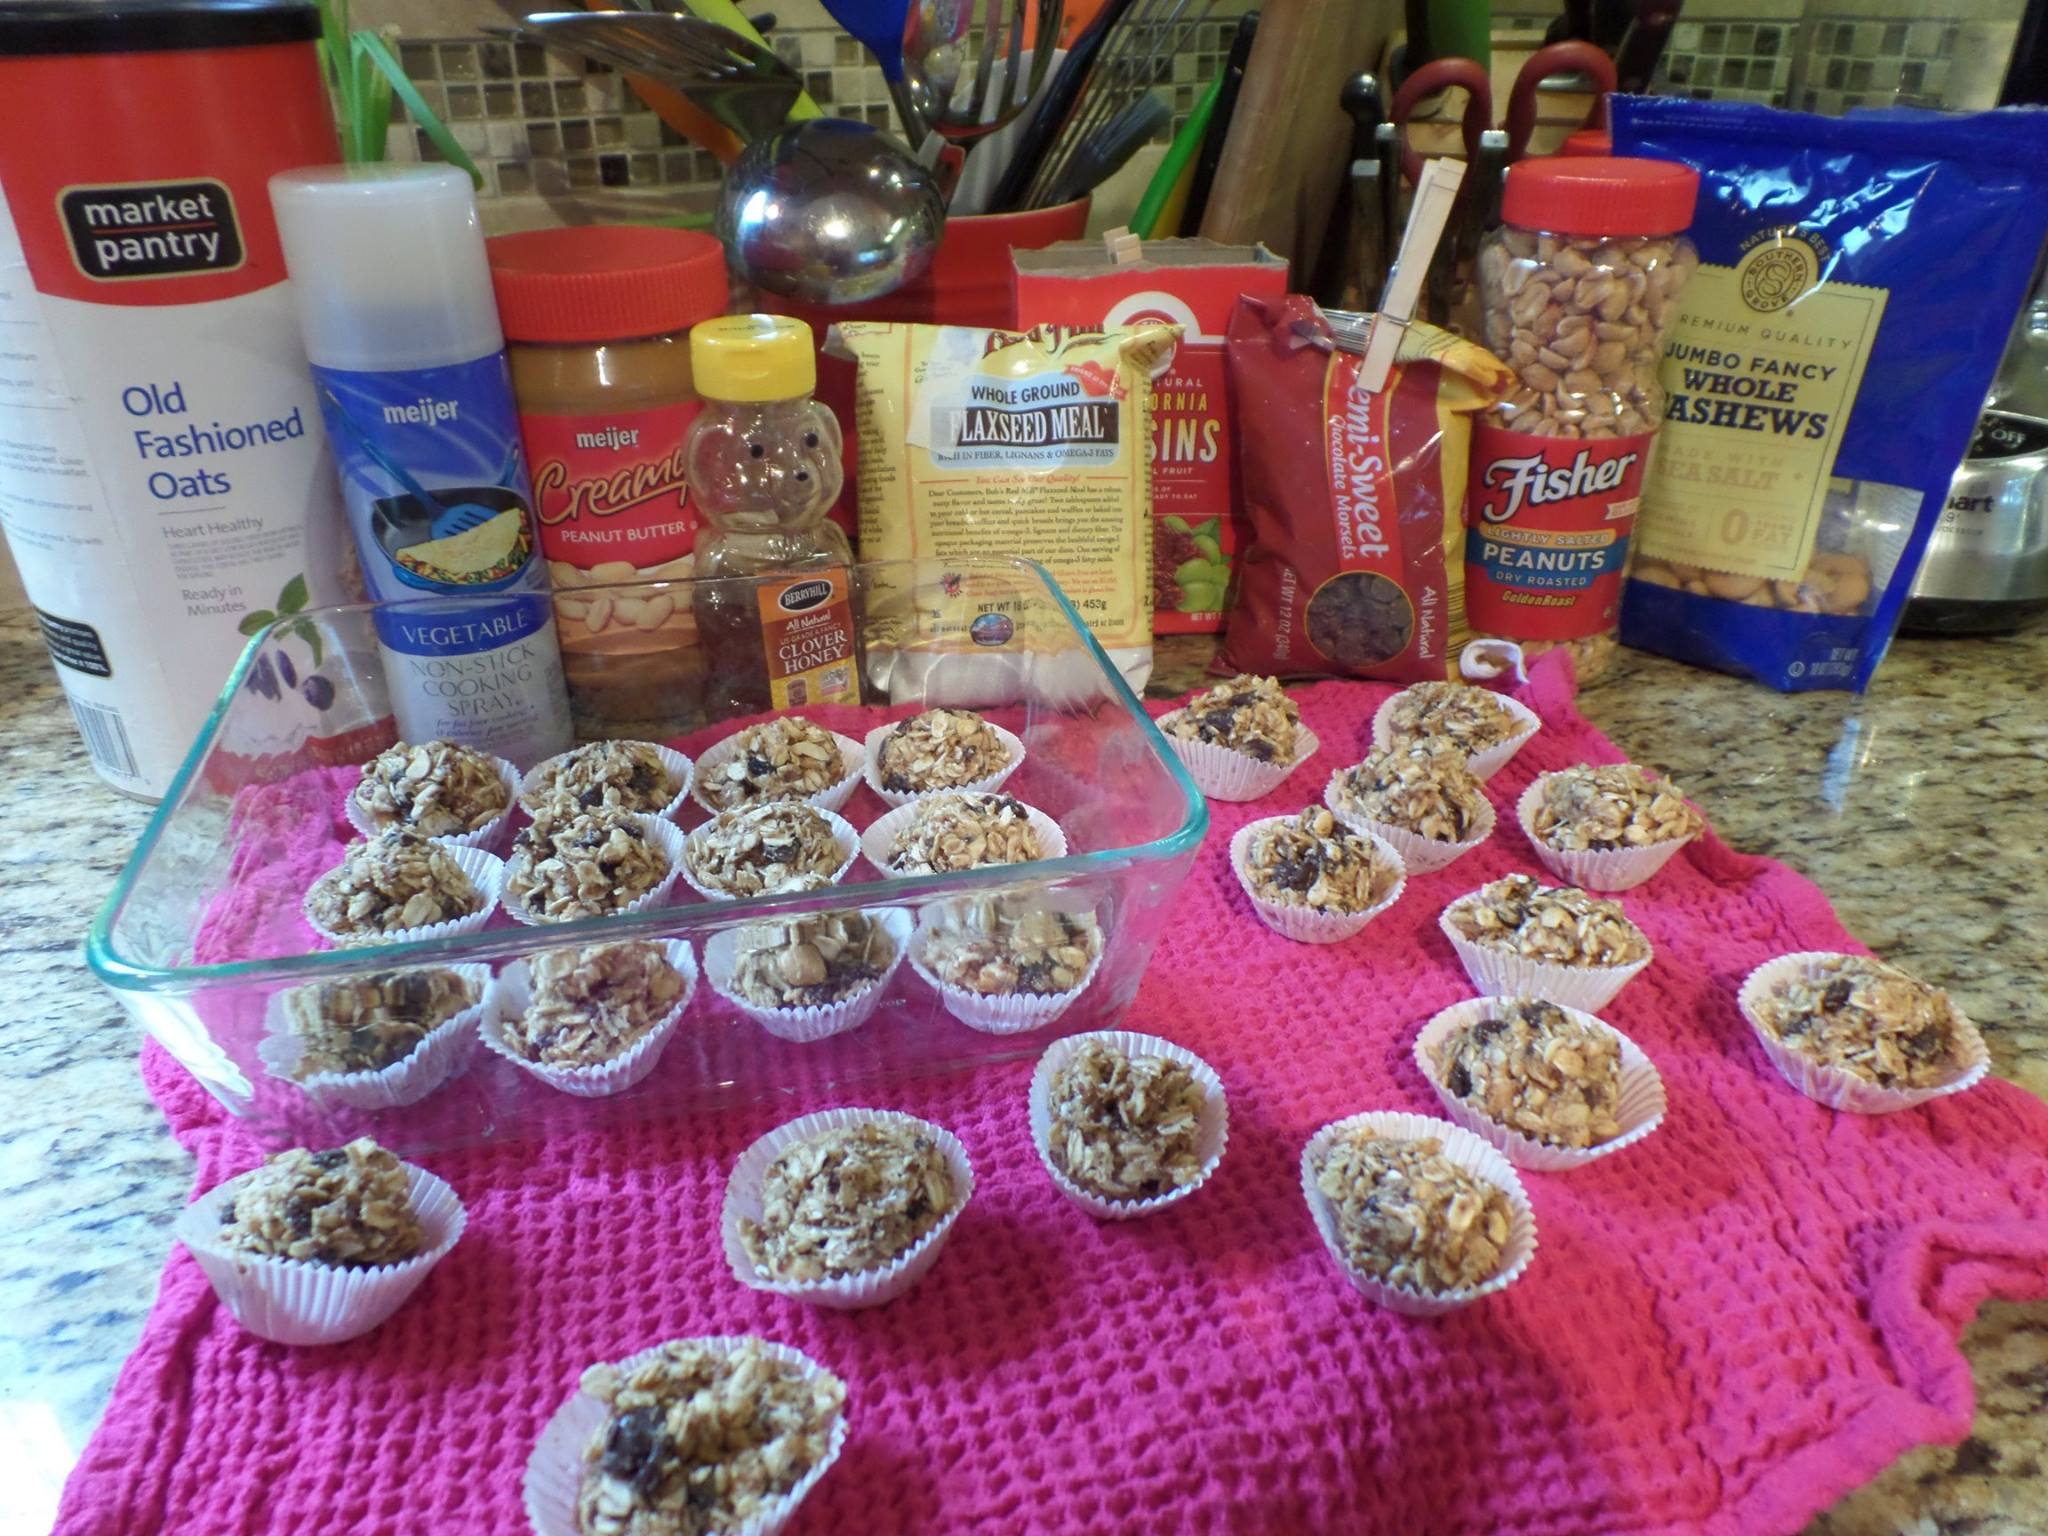
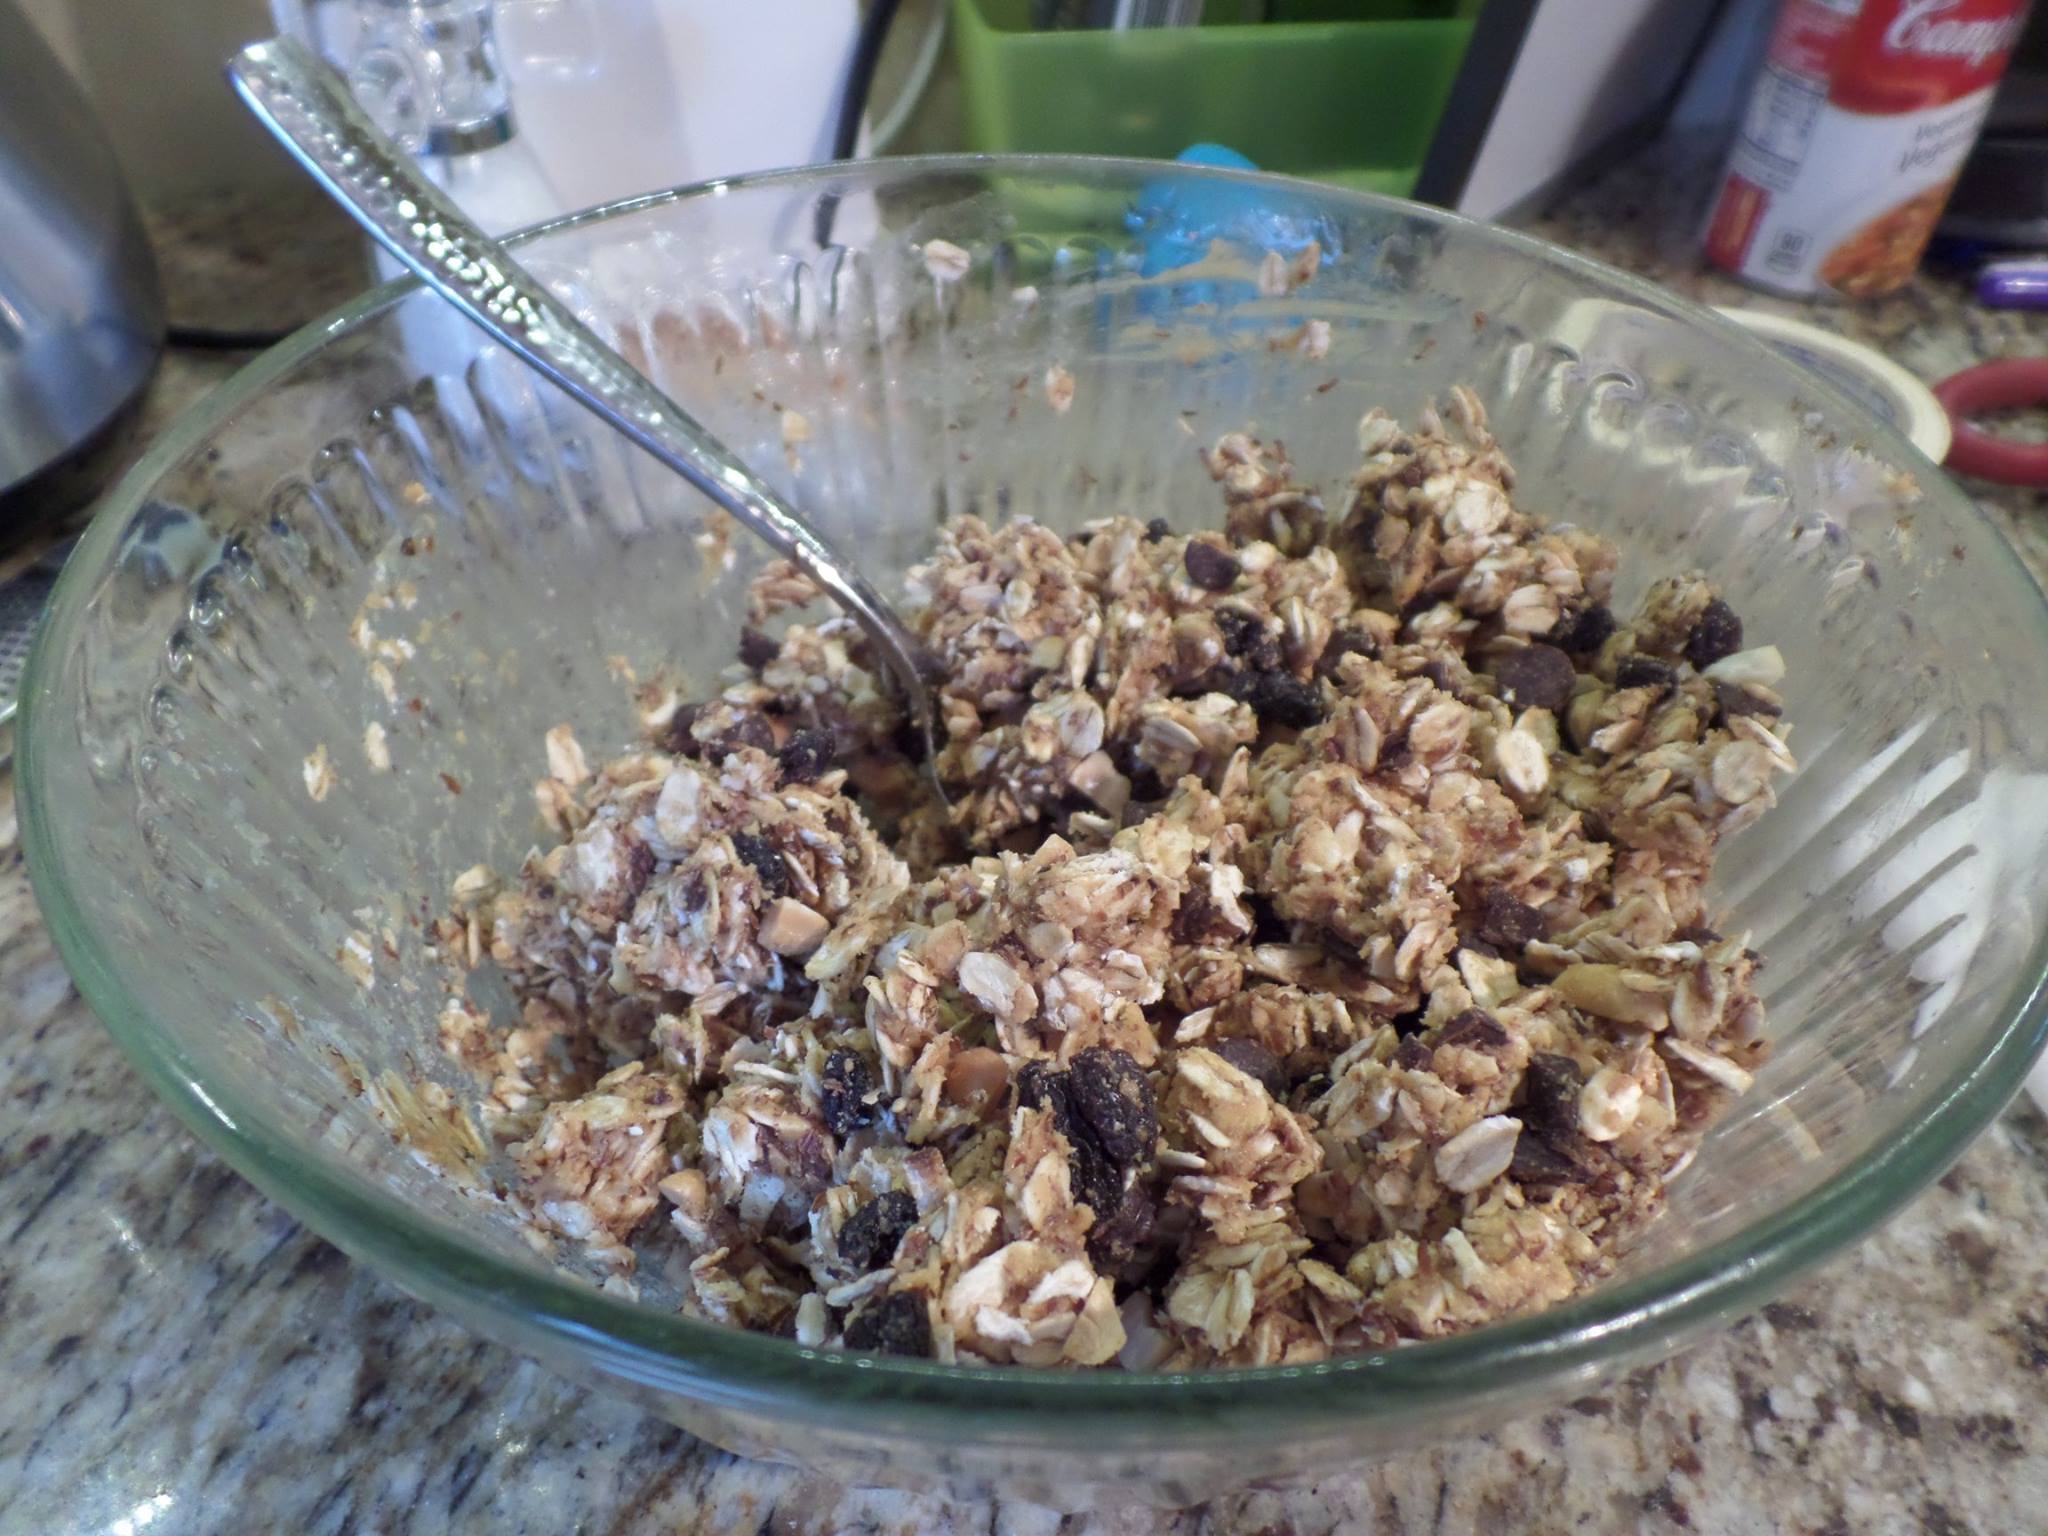
I haven’t updated in a while, I guess winter causing us to be perpetually ill doesn’t help.  I’ve always wanted to make a stromboli!  It just sounds awesome.  I finally got around to it and make a simple stromboli recipe from Better Homes and Gardens.  It was perfect.  We made our own quick pizza dough from scratch, but you can buy a refrigerated dough if you like.  We will definitely make this again and substitute other ingredients like pancetta, salami, and other meats and veggies!

INGREDIENTS:

  • 2 tsp. olive oil
  • 1 T. cornmeal
  • One 13.8oz. package refrigerated pizza dough (or your favorite recipe from scratch)
  • 4 oz. thinly sliced cooked ham (we used deli ham)
  • 1 cup shredded mozzarella cheese (4 oz)
  • 1 cup fresh baby or torn regular spinach
  • 4 oz. thinly sliced cooked turkey (we used deli turkey)
  • 1/4 cup Kalamata olives, pitted and chopped (we omitted)
  • 1/3 cup chopped red, green, or yellow sweet pepper
  • 1 egg, lightly beaten (we omitted and did vegetable oil)

DIRECTIONS:

  1. Preheat oven to 375 F. Lightly brush a baking sheet with olive oil and sprinkle with cornmeal; set aside.
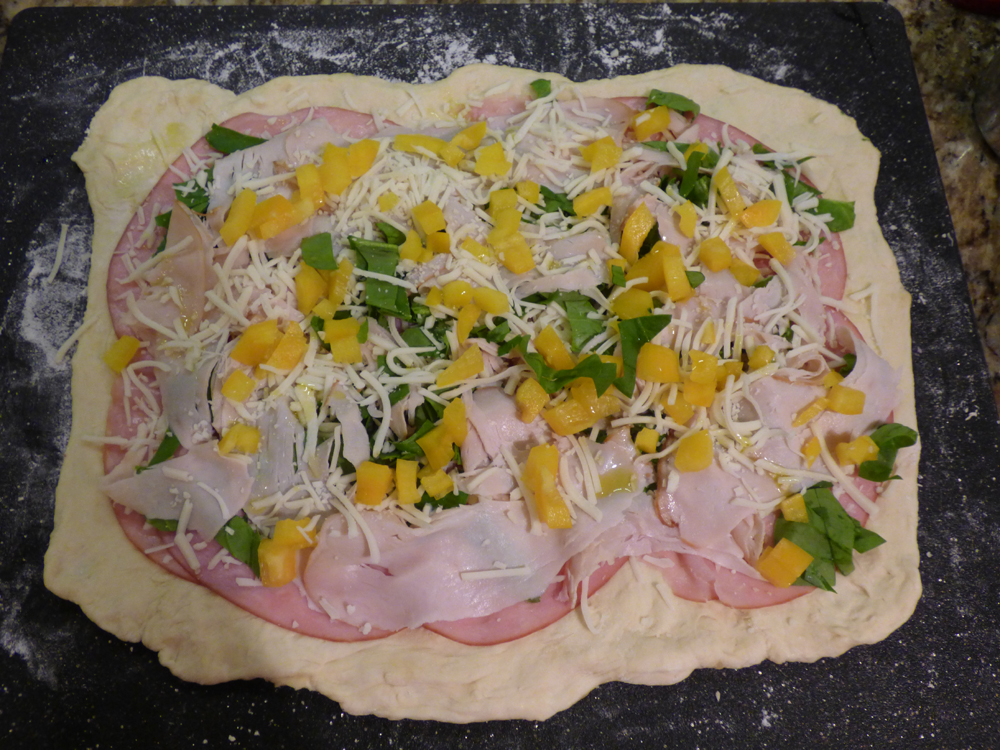
  2. On a lightly floured surface carefully stretch or roll pizza dough into a 13×10″ rectangle.
  3. Arrange ham slices on dough about 1/2″ from edges.
  4. Sprinkle with half the cheese.
  5. Layer spinach and turkey on cheese.
  6. Top with remaining cheeses, olives, and sweet peppers.
  7. Roll up dough, starting from a long side.  Pinch dough to seal the seam and ends.
  8. Place loaf, seam side down, on prepared baking sheet. Brush with egg or vegetable oil.
  9. Using a sharp knife, cut slits in top for steam to escape.
  10. Bake about 30 mins. or until golden brown.
  11. Let stand for 10 minutes. To serve, slice loaf into serving size pieces.

Egg-stremely Easy Ham Egg Cups

Egg cups


Now if you can’t make this successfully after following these simple directions, I just don’t know about your cooking fate.  It may be time to hang up your apron and call it quits.  This is a super simple, near effortless, way to have a quick breakfast (and leftovers), a protein-rich snack or side to your breakfast or brunch.  It’s Paleo approved too, if you’re into that.  Enjoy!

INGREDIENTS:

  • Your favorite thinly sliced ham slices from the deli 
  • Large eggs
  • Salt, sea salt worked well for me. 
  • Freshly ground pepper
  • Paprika (optional)

DIRECTIONS:

  1. Preheat oven to 400 degrees F.
  2. (Directions are for 1 egg cup, multiply by how many you desire……)
  3. Spray a nonstick spray into your muffin tin (do not use muffin paper liners!)
  4. Place one piece of ham into each muffin hole, as illustrated above.  
  5. Crack one egg on top of the piece of ham – if you prefer scrambled eggs inside, lightly beat egg in a glass before dumping into ham cup.  
  6. Season with some salt and freshly ground pepper.  Add a small amount of paprika, if desired.  
  7. Cook 10-14 minutes depending on the doneness you desire.  I wanted it completely cooked solid as I don’t like runny eggs!
  8. Cool slightly and enjoy!

Black Bean & Corn Quesadillas

AR-black-bean-corn-tortillas


I saw this recipe and knowing most of the quesadillas we make are just cheese and cilantro, I wanted to try something new.  It was very good.  I suggest adding cilantro.  Next time I’ll add more salsa, that was my only tip!  Enjoy!  

INGREDIENTS:

  • 2 tsp. olive oil
  • 3 T. finely chopped onion
  • 1 (15.5 oz) can black beans, drained and rinsed
  • 1 (10 oz) can whole-kernel corn, drained (or frozen corn, thawed)
  • 1 T. brown sugar
  • 1/4 cup salsa
  • 1/4 tsp. red pepper flakes
  • 2  T. butter
  • 8 (8 inch) flour tortillas
  • 1 1/2 cups shredded Monterey Jack cheese 
  • Cilantro optional


DIRECTIONS:

  1. Heat oil in a large saucepan over medium heat.  Add onion and cook, stirring, until softened, about 2 mins. 
  2. Stir in beans, corn, sugar, salsa, and pepper; mix well.  Cook until heated through, about 3 mins. 
  3. Melt 2 tsp. butter in a large skillet over medium heat.  Put a tortilla in skillet, sprinkle evenly with some cheese (about 1/3 cup), then top with some bean mixture (about 1/2 cup). 
  4. Put another tortilla on top, pressing down gently with your palm to seal it, cook until golden, about 1 min.
  5. Flip and cook other side. 
  6. Melt more butter as needed, and repeat with remaining tortillas and filling.  Cut into wedges and serve. 

Creamy Banana Shake – Healthy Version *

banana-shake-healthy


If you want a tasty and healthy shake you can make at home, look no further.  This one can be expanded to make it more dessert-like with the addition of chocolate syrup, or you can add more protein with peanut butter, or more fruity with the addition of strawberries – Strawberry milkshake, anyone?  I found this recipe in a very new cookbook by Katie Sullivan Morford, entitled, “Best Lunch Box Ever: Ideas and Recipes for School Lunches Kids Will Love”.  I am not sure this one is so portable, but it’s a good recipe nonetheless!  I put it all in my Ninja blender and my son loved it, so did I!


Makes 2 servings.  

INGREDIENTS:

  • 1 cup milk (I used 2%)
  • 1 1/2 medium frozen ripe bananas, cut into 6 chunks**
  • 2 tsp. honey 
  • 1 tsp. vanilla extract
  • 4 ice cubes 

**Some people can tolerate bananas. I used to be able to, now I can’t.  But maybe you can?

DIRECTIONS:

  1. Pour the milk into a blender, followed by the banana, honey, vanilla, and ice. 
  2. Blend until creamy and smooth with no banana chunks or ice chips remaining, about 1 minute.
  3. Pour into two cups. 

“Energy Balls” – Oatmeal Bites *

1978550_10203660290097501_88301805_o


135268_10203660290217504_828705787_o

I made these as a way to give my growing boy some needed calories but in a tasty way.  I learned a few things by making it so I know what to do better next time.  First, I am glad I made a half batch, it made 25!  Secondly, I tried reducing the honey but it needed all of it to bind together.  Thirdly, I will reduce the chocolate chips next time because it definitely was in the ‘dessert’ category more than I liked.  As written, I’m placing this in the dessert category.  But if the chocolate chips were reduced, I’d place it in the Snacks section.  So halving the chocolate chips to 1/4 cup (for a half batch) would be fine.  I didn’t use the shredded coconut because a) I didn’t have it and b) I don’t have many fans here.  I used ground flax seed, cashews, peanuts, creamy peanut butter, raisins, and everything seen in the photo.  I got this recipe from the Washington Post.  I would definitely try this next time in the food processor for ease!  Enjoy!

INGREDIENTS (FULL BATCH ingredients below, I halved these amounts):

  • 1 cup peanut butter, sunflower butter or almond butter
  • 1 cup raw or regular honey (start with less if regular honey and add more if needed)
  • 3 cups rolled oats
  • 1/2 cup ground chia seed or flax seed
  • 1 cup mini chocolate chips or cacao nibs**
  • 1 cup any combination of nuts, seeds and soft dried fruit, raisins**, cashews/peanuts, such as sunflower seeds, and dried cranberries**
  • Sweetened shredded coconut, for rolling (optional)

**Known IC irritants, tread carefully!


DIRECTIONS:

  1. Combine the nut butter and honey in a large mixing bowl and stir until smooth.
  2. Gradually add the oats and chia seed or flax seed. Add the cacao nibs or chocolate chips and the nut-seed-fruit mixture, and mix gently to combine.
  3. Use your hands to roll the mixture into balls (I used a cookie scoop) approximately the size of ping-pong balls. If desired, roll them in shredded coconut.
  4. Place the balls in paper mini-muffin cups. At this point, you can eat them, but they’ll be less sticky after a night in the refrigerator. They taste best after one day in the fridge.  Layer the balls in an airtight container, using wax paper to separate the layers, and refrigerate for 7 to 10 days or freeze for up to 3 months.